Dell E310dw Dell Printer Users Guide - Page 67
Change the Paper Size (Macintosh), Create Custom Size Macintosh
 |
View all Dell E310dw manuals
Add to My Manuals
Save this manual to your list of manuals |
Page 67 highlights
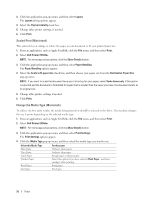
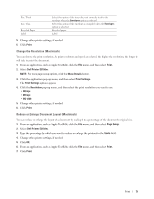
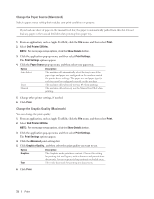
3. Select the Orientation option that matches the way you want the document to print. 4. For automatic 2-sided printing, do the following: a.Click the application pop-up menu, and then select Layout. The Layout setting options appear. b.In the Two-Sided section, select the Short-Edge binding or Long-Edge binding option. c.Change other printer settings, if needed. d.Click Print. 5. For manual 2-sided printing, do the following: a.Click the application pop-up menu, and then select Paper Handling. The Paper Handling options appear. b.In the Pages to Print pop-up menu, select Even Only. c.Change other print settings, if needed. d.Click the Print button. e.After the machine prints the even-numbered pages, remove the printed pages from the output paper tray. f.Make sure the pages are completely flat, and put the paper back in the tray, blank side facing down. g.Repeat steps 1-3, selecting the same printer and settings you used to print the even-numbered pages. h.Click the application pop-up menu, and then select Paper Handling. The Paper Handling options appear. i.In the Pages to Print pop-up menu, select Odd Only. j.Click Print. Change the Paper Size (Macintosh) Paper Size choices include a large selection of standard paper sizes. 1. From an application, such as Apple TextEdit, click the File menu, and then select Print. 2. Select Dell Printer E310dw. NOTE: For more page setup options, click the Show Details button. 3. Click the Paper Size pop-up menu, and then select your paper size. 4. Change other printer settings, if needed. 5. Click Print. Create Custom Size (Macintosh) 1. Click the Paper Size pop-up menu, and then select Manage Custom Sizes.... 2. Click . 3. Type the name for this custom size. 4. Type size and margin values in the Paper Size and Non-Printable Area fields. 5. Click OK. Print 67
-
 1
1 -
2
-
3
-
4
-
5
-
6
-
7
-
8
-
9
-
10
-
11
-
12
-
13
-
14
-
15
-
16
-
17
-
18
-
19
-
20
-
21
-
22
-
23
-
24
-
25
-
26
-
27
-
28
-
29
-
30
-
31
-
32
-
33
-
34
-
35
-
36
-
37
-
38
-
39
-
40
-
41
-
42
-
43
-
44
-
45
-
46
-
47
-
48
-
49
-
50
-
51
-
52
-
53
-
54
-
55
-
56
-
57
-
58
-
59
-
60
-
61
-
 62
62 -
 63
63 -
 64
64 -
 65
65 -
 66
66 -
 67
67 -
 68
68 -
 69
69 -
 70
70 -
 71
71 -
 72
72 -
73
-
74
-
75
-
76
-
77
-
78
-
79
-
80
-
81
-
82
-
83
-
84
-
85
-
86
-
87
-
88
-
89
-
90
-
91
-
92
-
93
-
94
-
95
-
96
-
97
-
98
-
99
-
100
-
101
-
102
-
103
-
104
-
105
-
106
-
107
-
108
-
109
-
110
-
111
-
112
-
113
-
114
-
115
-
116
-
117
-
118
-
119
-
120
-
121
-
122
-
123
-
124
-
125
-
126
-
127
-
128
-
129
-
130
-
131
-
132
-
133
-
134
-
135
-
136
-
137
-
138
-
139
-
140
-
141
-
142
-
143
-
144
-
145
-
146
-
147
-
148
-
149
-
150
-
151
-
152
-
153
-
154
-
155
-
156
-
157
-
158
-
159
-
160
-
161
-
162
-
163
-
164
-
165
-
166
-
167
-
168
-
169
-
170
-
171
-
172
-
173
-
174
-
175
-
176
-
177
-
178
-
179
-
180
-
181
-
182
-
183
-
184
-
185
-
186
-
187
-
188
-
189
-
190
-
191
-
192
-
193
-
194
-
195
-
196
-
197
-
198
-
199
-
200
-
201
-
202
-
203
-
204
-
205
-
206
-
207
-
208
-
209
-
210
-
211
-
212
-
213
-
214
-
215
-
216
 |
 |
