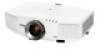
Epson PowerLite Pro G5350 User's Guide - Page 152
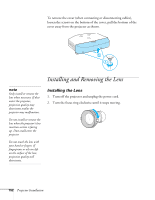
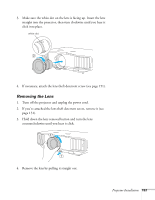
Installing and Removing the Lens, Installing the Lens
 |
View all Epson PowerLite Pro G5350 manuals
Add to My Manuals
Save this manual to your list of manuals |
Page 152 highlights
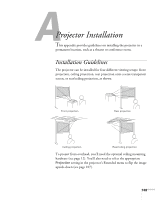
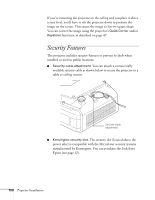
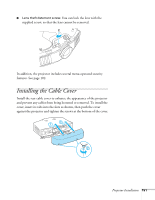
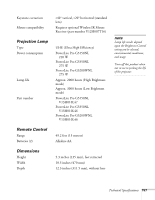
To remove the cover (when connecting or disconnecting cables), loosen the screws on the bottom of the cover, pull the bottom of the cover away from the projector as shown. Installing and Removing the Lens note Only install or remove the lens when necessary. If dust enters the projector, projection quality may deteriorate and/or the projector may malfunction. Do not install or remove the lens when the projector's lens insertion section is facing up. Dust could enter the projector. Do not touch the lens with your hand or fingers. If fingerprints or oils are left on the surface of the lens, projection quality will deteriorate. Installing the Lens 1. Turn off the projector and unplug the power cord. 2. Turn the focus ring clockwise until it stops moving. 152 Projector Installation
-
 1
1 -
2
-
3
-
4
-
5
-
6
-
7
-
8
-
9
-
10
-
11
-
12
-
13
-
14
-
15
-
16
-
17
-
18
-
19
-
20
-
21
-
22
-
23
-
24
-
25
-
26
-
27
-
28
-
29
-
30
-
31
-
32
-
33
-
34
-
35
-
36
-
37
-
38
-
39
-
40
-
41
-
42
-
43
-
44
-
45
-
46
-
47
-
48
-
49
-
50
-
51
-
52
-
53
-
54
-
55
-
56
-
57
-
58
-
59
-
60
-
61
-
62
-
63
-
64
-
65
-
66
-
67
-
68
-
69
-
70
-
71
-
72
-
73
-
74
-
75
-
76
-
77
-
78
-
79
-
80
-
81
-
82
-
83
-
84
-
85
-
86
-
87
-
88
-
89
-
90
-
91
-
92
-
93
-
94
-
95
-
96
-
97
-
98
-
99
-
100
-
101
-
102
-
103
-
104
-
105
-
106
-
107
-
108
-
109
-
110
-
111
-
112
-
113
-
114
-
115
-
116
-
117
-
118
-
119
-
120
-
121
-
122
-
123
-
124
-
125
-
126
-
127
-
128
-
129
-
130
-
131
-
132
-
133
-
134
-
135
-
136
-
137
-
138
-
139
-
140
-
141
-
142
-
143
-
144
-
145
-
146
-
 147
147 -
 148
148 -
 149
149 -
 150
150 -
 151
151 -
 152
152 -
 153
153 -
 154
154 -
 155
155 -
 156
156 -
 157
157 -
158
-
159
-
160
-
161
-
162
-
163
-
164
-
165
-
166
-
167
-
168
-
169
-
170
-
171
-
172
-
173
-
174
-
175
-
176
-
177
 |
 |
