Epson PowerLite Pro G5350 User's Guide - Page 90
Projecting Over a Network, Connecting With Windows Vista
 |
View all Epson PowerLite Pro G5350 manuals
Add to My Manuals
Save this manual to your list of manuals |
Page 90 highlights
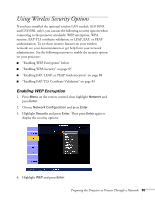
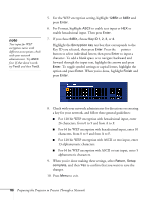
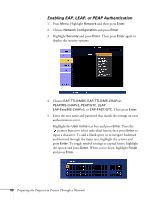
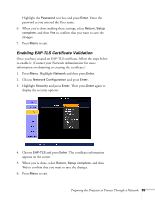
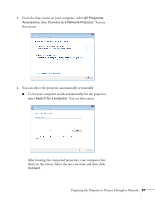
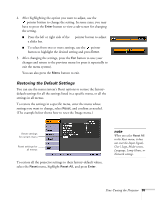
Projecting Over a Network Once you've set up your projector and computer in either Ad Hoc (Quick) mode or Access Point (Advanced) mode (or in the optional wired LAN mode, as described on page 114), see the EasyMP Operation Guide for instructions on the following EasyMP features (G5150NL and G5350NL only): ■ Starting NS Connection ■ Projecting over the network ■ Multi-screen projection ■ Projecting video clips (Movie Sending Mode) ■ Using Presentation Mode ■ Using Virtual Displays Connecting With Windows Vista If you have Windows Vista, you can use the Network Projector function to connect to the projector without installing the EasyMP software. This provides a quick, easy way to connect wirelessly, though with limited capabilities. Not all the features available with EMP NS Connection are possible when connecting using the Vista network projector function. All performances are enhanced when you use EMP NS Connection. Follow these steps: 1. Turn on the projector. 2. Press the EasyMP button on the remote control. The standby screen appears. 90 Preparing the Projector to Present Through a Network
-
 1
1 -
2
-
3
-
4
-
5
-
6
-
7
-
8
-
9
-
10
-
11
-
12
-
13
-
14
-
15
-
16
-
17
-
18
-
19
-
20
-
21
-
22
-
23
-
24
-
25
-
26
-
27
-
28
-
29
-
30
-
31
-
32
-
33
-
34
-
35
-
36
-
37
-
38
-
39
-
40
-
41
-
42
-
43
-
44
-
45
-
46
-
47
-
48
-
49
-
50
-
51
-
52
-
53
-
54
-
55
-
56
-
57
-
58
-
59
-
60
-
61
-
62
-
63
-
64
-
65
-
66
-
67
-
68
-
69
-
70
-
71
-
72
-
73
-
74
-
75
-
76
-
77
-
78
-
79
-
80
-
81
-
82
-
83
-
84
-
 85
85 -
 86
86 -
 87
87 -
 88
88 -
 89
89 -
 90
90 -
 91
91 -
 92
92 -
 93
93 -
 94
94 -
 95
95 -
96
-
97
-
98
-
99
-
100
-
101
-
102
-
103
-
104
-
105
-
106
-
107
-
108
-
109
-
110
-
111
-
112
-
113
-
114
-
115
-
116
-
117
-
118
-
119
-
120
-
121
-
122
-
123
-
124
-
125
-
126
-
127
-
128
-
129
-
130
-
131
-
132
-
133
-
134
-
135
-
136
-
137
-
138
-
139
-
140
-
141
-
142
-
143
-
144
-
145
-
146
-
147
-
148
-
149
-
150
-
151
-
152
-
153
-
154
-
155
-
156
-
157
-
158
-
159
-
160
-
161
-
162
-
163
-
164
-
165
-
166
-
167
-
168
-
169
-
170
-
171
-
172
-
173
-
174
-
175
-
176
-
177
 |
 |