Epson PowerLite Pro G5350 User's Guide - Page 37
Connecting a Network Cable, Turning the Projector On and Off
 |
View all Epson PowerLite Pro G5350 manuals
Add to My Manuals
Save this manual to your list of manuals |
Page 37 highlights
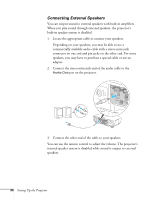
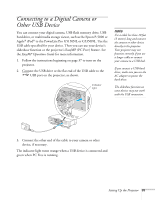
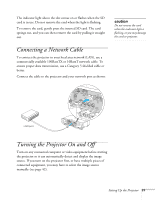
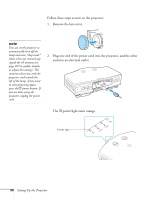
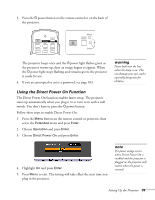
The indicator light above the slot comes on or flashes when the SD card is in use. Do not remove the card when the light is flashing. To remove the card, gently press the inserted SD card. The card springs out, and you can then remove the card by pulling it straight out. caution Do not remove the card when the indicator light is flashing, or you may damage the card or projector. Connecting a Network Cable To connect the projector to your local area network (LAN), use a commercially available 100BaseTX or 10BaseT network cable. To ensure proper data transmission, use a Category 5 shielded cable or better. Connect the cable to the projector and your network port as shown: LAN port Turning the Projector On and Off Turn on any connected computer or video equipment before starting the projector so it can automatically detect and display the image source. If you turn on the projector first, or have multiple pieces of connected equipment, you may have to select the image source manually (see page 42). Setting Up the Projector 37
-
 1
1 -
2
-
3
-
4
-
5
-
6
-
7
-
8
-
9
-
10
-
11
-
12
-
13
-
14
-
15
-
16
-
17
-
18
-
19
-
20
-
21
-
22
-
23
-
24
-
25
-
26
-
27
-
28
-
29
-
30
-
31
-
 32
32 -
 33
33 -
 34
34 -
 35
35 -
 36
36 -
 37
37 -
 38
38 -
 39
39 -
 40
40 -
 41
41 -
 42
42 -
43
-
44
-
45
-
46
-
47
-
48
-
49
-
50
-
51
-
52
-
53
-
54
-
55
-
56
-
57
-
58
-
59
-
60
-
61
-
62
-
63
-
64
-
65
-
66
-
67
-
68
-
69
-
70
-
71
-
72
-
73
-
74
-
75
-
76
-
77
-
78
-
79
-
80
-
81
-
82
-
83
-
84
-
85
-
86
-
87
-
88
-
89
-
90
-
91
-
92
-
93
-
94
-
95
-
96
-
97
-
98
-
99
-
100
-
101
-
102
-
103
-
104
-
105
-
106
-
107
-
108
-
109
-
110
-
111
-
112
-
113
-
114
-
115
-
116
-
117
-
118
-
119
-
120
-
121
-
122
-
123
-
124
-
125
-
126
-
127
-
128
-
129
-
130
-
131
-
132
-
133
-
134
-
135
-
136
-
137
-
138
-
139
-
140
-
141
-
142
-
143
-
144
-
145
-
146
-
147
-
148
-
149
-
150
-
151
-
152
-
153
-
154
-
155
-
156
-
157
-
158
-
159
-
160
-
161
-
162
-
163
-
164
-
165
-
166
-
167
-
168
-
169
-
170
-
171
-
172
-
173
-
174
-
175
-
176
-
177
 |
 |
