Epson PowerLite Pro G5350 User's Guide - Page 153
Removing the Lens, If you've attached the lens theft deterrent screw, remove it see
 |
View all Epson PowerLite Pro G5350 manuals
Add to My Manuals
Save this manual to your list of manuals |
Page 153 highlights
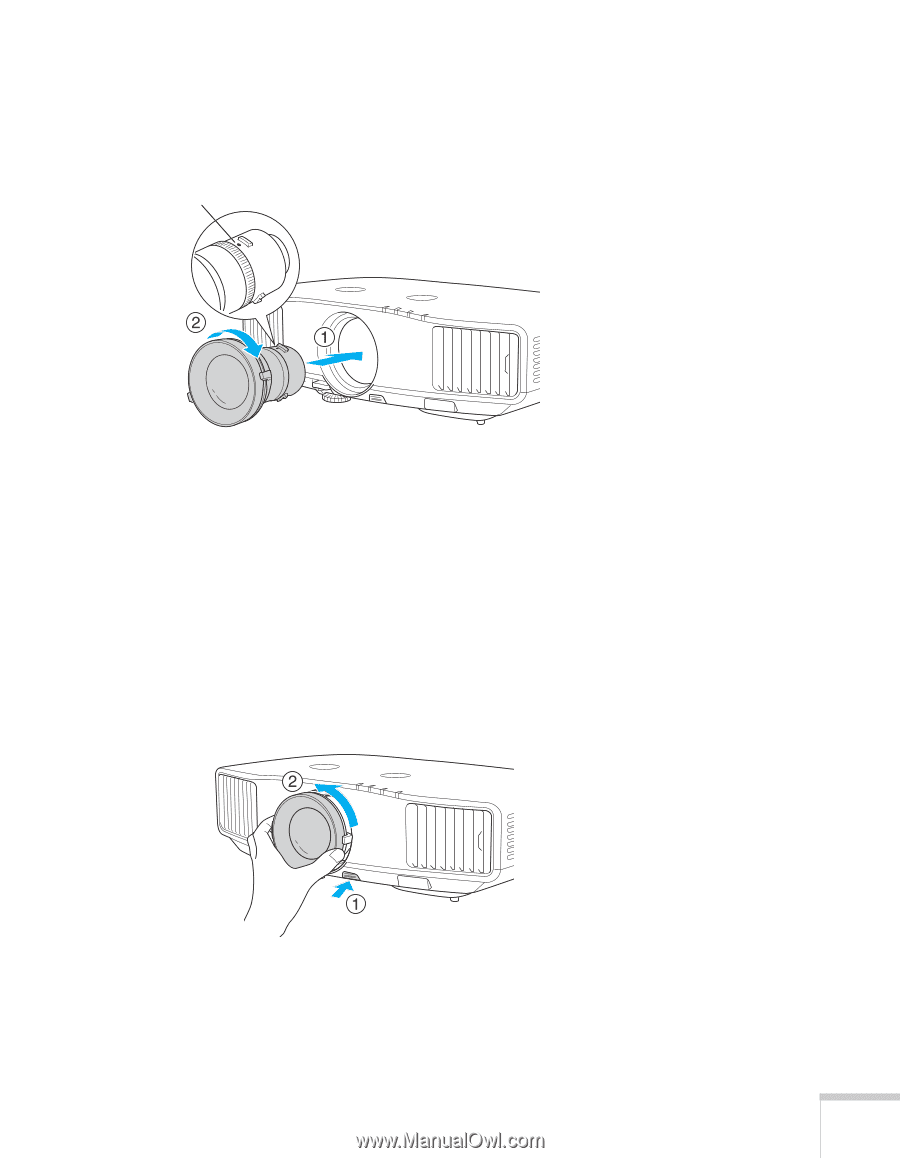
3. Make sure the white dot on the lens is facing up. Insert the lens straight into the projector, then turn clockwise until you hear it click into place. white dot 4. If necessary, attach the lens theft deterrent screw (see page 151). Removing the Lens 1. Turn off the projector and unplug the power cord. 2. If you've attached the lens theft deterrent screw, remove it (see page 151). 3. Hold down the lens removal button and turn the lens counterclockwise until you hear it click. 4. Remove the lens by pulling it straight out. Projector Installation 153
-
 1
1 -
2
-
3
-
4
-
5
-
6
-
7
-
8
-
9
-
10
-
11
-
12
-
13
-
14
-
15
-
16
-
17
-
18
-
19
-
20
-
21
-
22
-
23
-
24
-
25
-
26
-
27
-
28
-
29
-
30
-
31
-
32
-
33
-
34
-
35
-
36
-
37
-
38
-
39
-
40
-
41
-
42
-
43
-
44
-
45
-
46
-
47
-
48
-
49
-
50
-
51
-
52
-
53
-
54
-
55
-
56
-
57
-
58
-
59
-
60
-
61
-
62
-
63
-
64
-
65
-
66
-
67
-
68
-
69
-
70
-
71
-
72
-
73
-
74
-
75
-
76
-
77
-
78
-
79
-
80
-
81
-
82
-
83
-
84
-
85
-
86
-
87
-
88
-
89
-
90
-
91
-
92
-
93
-
94
-
95
-
96
-
97
-
98
-
99
-
100
-
101
-
102
-
103
-
104
-
105
-
106
-
107
-
108
-
109
-
110
-
111
-
112
-
113
-
114
-
115
-
116
-
117
-
118
-
119
-
120
-
121
-
122
-
123
-
124
-
125
-
126
-
127
-
128
-
129
-
130
-
131
-
132
-
133
-
134
-
135
-
136
-
137
-
138
-
139
-
140
-
141
-
142
-
143
-
144
-
145
-
146
-
147
-
 148
148 -
 149
149 -
 150
150 -
 151
151 -
 152
152 -
 153
153 -
 154
154 -
 155
155 -
 156
156 -
 157
157 -
 158
158 -
159
-
160
-
161
-
162
-
163
-
164
-
165
-
166
-
167
-
168
-
169
-
170
-
171
-
172
-
173
-
174
-
175
-
176
-
177
 |
 |
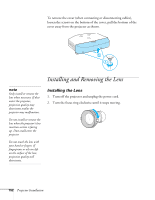
Projector Installation
153
3.
Make sure the white dot on the lens is facing up. Insert the lens
straight into the projector, then turn clockwise until you hear it
click into place.
4.
If necessary, attach the lens theft deterrent screw (see page 151).
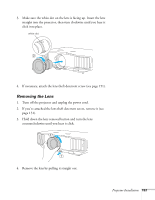
Removing the Lens
1.
Turn off the projector and unplug the power cord.
2.
If you’ve attached the lens theft deterrent screw, remove it (see
page 151).
3.
Hold down the lens removal button and turn the lens
counterclockwise until you hear it click.
4.
Remove the lens by pulling it straight out.
white dot