Epson PowerLite Pro Z8255NL User Manual - Page 143
Projecting with \, programs - Accessories - Connect to a Network
 |
View all Epson PowerLite Pro Z8255NL manuals
Add to My Manuals
Save this manual to your list of manuals |
Page 143 highlights
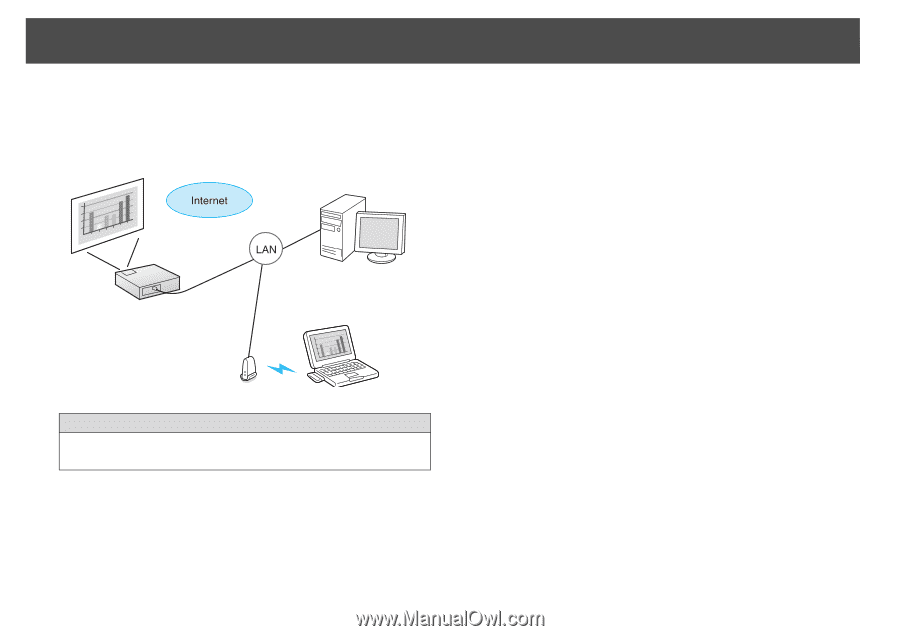
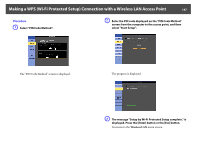
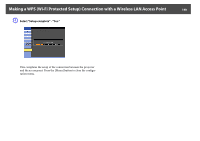
Projecting with "Connect to a Network Projector" 143 Projecting with "Connect to a Network Projector" "Connect to a Network Projector" is a standard function in Windows Vista and Windows 7. You can project images from the computer by detecting the projector on the network using a function of the OS without having to install any special software. Compatible OS Windows Vista: Home Premium/Business/Enterprise/Ultimate Windows 7: Professional/Ultimate This section provides an easy explanation of "Connect to a Network Projector". Check that the projector and computer are connected to the network, and carry out the following operations. Procedure A Turn the projector on and switch the input source to LAN. s "Changing the Projected Image" p.25 B On the computer, start Windows, and then click "Start" - "All programs" - "Accessories" - "Connect to a Network Projector". The connection setting screen is displayed. The projector is identified by inputting its IP address, or by allowing the OS to automatically identify all of the connected projectors. C Once the OS has identified all of the connected projectors, select the one that you want to use and click "Connect". When the projector password screen is displayed, enter the keyword shown at the bottom of the LAN standby screen. q • You can connect only one projector to a computer. • When using Network Projector from Options in Windows Meeting Space, set the colors for the computer screen you are using to the highest level (32bit). If it is not capable of a 32bit display, a message is displayed and you cannot connect.
-
 1
1 -
2
-
3
-
4
-
5
-
6
-
7
-
8
-
9
-
10
-
11
-
12
-
13
-
14
-
15
-
16
-
17
-
18
-
19
-
20
-
21
-
22
-
23
-
24
-
25
-
26
-
27
-
28
-
29
-
30
-
31
-
32
-
33
-
34
-
35
-
36
-
37
-
38
-
39
-
40
-
41
-
42
-
43
-
44
-
45
-
46
-
47
-
48
-
49
-
50
-
51
-
52
-
53
-
54
-
55
-
56
-
57
-
58
-
59
-
60
-
61
-
62
-
63
-
64
-
65
-
66
-
67
-
68
-
69
-
70
-
71
-
72
-
73
-
74
-
75
-
76
-
77
-
78
-
79
-
80
-
81
-
82
-
83
-
84
-
85
-
86
-
87
-
88
-
89
-
90
-
91
-
92
-
93
-
94
-
95
-
96
-
97
-
98
-
99
-
100
-
101
-
102
-
103
-
104
-
105
-
106
-
107
-
108
-
109
-
110
-
111
-
112
-
113
-
114
-
115
-
116
-
117
-
118
-
119
-
120
-
121
-
122
-
123
-
124
-
125
-
126
-
127
-
128
-
129
-
130
-
131
-
132
-
133
-
134
-
135
-
136
-
137
-
 138
138 -
 139
139 -
 140
140 -
 141
141 -
 142
142 -
 143
143 -
 144
144 -
 145
145 -
 146
146 -
 147
147 -
 148
148 -
149
-
150
-
151
-
152
-
153
-
154
-
155
-
156
-
157
-
158
-
159
-
160
-
161
-
162
-
163
-
164
-
165
-
166
-
167
-
168
-
169
-
170
-
171
-
172
-
173
-
174
-
175
-
176
-
177
-
178
-
179
-
180
-
181
-
182
-
183
-
184
-
185
-
186
-
187
-
188
-
189
-
190
-
191
-
192
-
193
-
194
-
195
-
196
-
197
-
198
-
199
-
200
-
201
-
202
-
203
-
204
-
205
-
206
-
207
-
208
-
209
-
210
-
211
-
212
-
213
-
214
-
215
-
216
-
217
-
218
-
219
-
220
-
221
-
222
-
223
-
224
-
225
-
226
-
227
-
228
-
229
-
230
-
231
-
232
-
233
-
234
-
235
-
236
-
237
-
238
-
239
-
240
-
241
-
242
-
243
-
244
-
245
-
246
-
247
-
248
-
249
-
250
-
251
-
252
-
253
-
254
 |
 |