Epson PowerLite Pro Z8255NL User Manual - Page 6

Installation and Connections, Making a WPS Wi-Fi Protected Setup Connection with a Wireless

Page 6 highlights

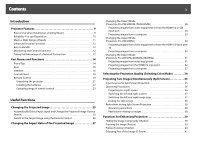
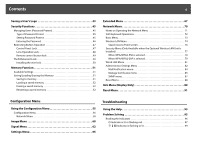
Contents 6 Making a WPS (Wi-Fi Protected Setup) Connection with a Wireless LAN Access Point 144 Connection Setup Method 144 Making a connection using the push button method 145 Making a connection using the PIN Code Method 146 Installation and Connections Installation Methods 150 Connecting to Equipment 152 Connecting to a Computer 152 Changing the video output from a laptop computer 153 Connecting to Video Equipment 154 Adjusting the Projected Image 157 Displaying a Test Pattern 157 Adjusting the Position of the Projected Image (Lens Shift 159 Focusing the Image 160 Zooming the Image 160 Adjusting the Tilt of the Projected Image 161 Correcting Distortion in the Projected Image 161 Quick Corner 162 H/V-Keystone 164 Arc Correction 166 Adjusting the Image Quality 169 Hue, Saturation, and Brightness Adjustment 169 Gamma Adjustment 169 Select and adjust the correction value 169 Adjust while viewing the image 170 Adjust using the gamma adjustment graph 170 Frame Interpolation (PowerLite Pro Z8450WUNL/Z8455WUNL only 171 Super-resolution 171 Noise Reduction 171 Noise Reduction 171 Mosquito NR 172 Settings for Multiple Projectors 173 Preparation Flow 173 Requirements 173 Projector ID/Remote Control ID 173 Setting the projector ID 174 Checking the Projector ID 174 Setting the remote control ID 175 Adjusting the Position of the Projected Image 176 Point Correction 176 Checking the Color Mode 178 Using the Edge Blending Function 178 Adjusting to Match Colors on Multi-Projection 180 Displays the Image Partly Enlarged (Scale 181 Setting Schedule 183 Setting Methods 183 Clock 184 Daylight Saving Time screen 184 Schedule 184 Clock / Schedule Setting screen 184 Connecting to External Equipment 185 Connecting a LAN Cable 185 Connecting to an External Monitor 185 Installing Optional and Supplied Accessories 186

  • 1
  • 2
  • 3
  • 4
  • 5
  • 6
  • 7
  • 8
  • 9
  • 10
  • 11
  • 12
  • 13
  • 14
  • 15
  • 16
  • 17
  • 18
  • 19
  • 20
  • 21
  • 22
  • 23
  • 24
  • 25
  • 26
  • 27
  • 28
  • 29
  • 30
  • 31
  • 32
  • 33
  • 34
  • 35
  • 36
  • 37
  • 38
  • 39
  • 40
  • 41
  • 42
  • 43
  • 44
  • 45
  • 46
  • 47
  • 48
  • 49
  • 50
  • 51
  • 52
  • 53
  • 54
  • 55
  • 56
  • 57
  • 58
  • 59
  • 60
  • 61
  • 62
  • 63
  • 64
  • 65
  • 66
  • 67
  • 68
  • 69
  • 70
  • 71
  • 72
  • 73
  • 74
  • 75
  • 76
  • 77
  • 78
  • 79
  • 80
  • 81
  • 82
  • 83
  • 84
  • 85
  • 86
  • 87
  • 88
  • 89
  • 90
  • 91
  • 92
  • 93
  • 94
  • 95
  • 96
  • 97
  • 98
  • 99
  • 100
  • 101
  • 102
  • 103
  • 104
  • 105
  • 106
  • 107
  • 108
  • 109
  • 110
  • 111
  • 112
  • 113
  • 114
  • 115
  • 116
  • 117
  • 118
  • 119
  • 120
  • 121
  • 122
  • 123
  • 124
  • 125
  • 126
  • 127
  • 128
  • 129
  • 130
  • 131
  • 132
  • 133
  • 134
  • 135
  • 136
  • 137
  • 138
  • 139
  • 140
  • 141
  • 142
  • 143
  • 144
  • 145
  • 146
  • 147
  • 148
  • 149
  • 150
  • 151
  • 152
  • 153
  • 154
  • 155
  • 156
  • 157
  • 158
  • 159
  • 160
  • 161
  • 162
  • 163
  • 164
  • 165
  • 166
  • 167
  • 168
  • 169
  • 170
  • 171
  • 172
  • 173
  • 174
  • 175
  • 176
  • 177
  • 178
  • 179
  • 180
  • 181
  • 182
  • 183
  • 184
  • 185
  • 186
  • 187
  • 188
  • 189
  • 190
  • 191
  • 192
  • 193
  • 194
  • 195
  • 196
  • 197
  • 198
  • 199
  • 200
  • 201
  • 202
  • 203
  • 204
  • 205
  • 206
  • 207
  • 208
  • 209
  • 210
  • 211
  • 212
  • 213
  • 214
  • 215
  • 216
  • 217
  • 218
  • 219
  • 220
  • 221
  • 222
  • 223
  • 224
  • 225
  • 226
  • 227
  • 228
  • 229
  • 230
  • 231
  • 232
  • 233
  • 234
  • 235
  • 236
  • 237
  • 238
  • 239
  • 240
  • 241
  • 242
  • 243
  • 244
  • 245
  • 246
  • 247
  • 248
  • 249
  • 250
  • 251
  • 252
  • 253
  • 254

Contents
6
Making a WPS (Wi-Fi Protected Setup) Connection with a Wireless
LAN Access Point. . . . . . . . . . . . . . . . . . . . . . . . . . . . . . . . . . . . . . . . . . . . 144
Connection Setup Method. . . . . . . . . . . . . . . . . . . . . . . . . . . . . . . . . . . . . . . . . . . . . 144
Making a connection using the push button method . . . . . . . . . . . . . . . .145
Making a connection using the PIN Code Method. . . . . . . . . . . . . . . . . . . . 146
Installation and Connections
Installation Methods . . . . . . . . . . . . . . . . . . . . . . . . . . . . . . . . . . . . . . . . 150
Connecting to Equipment . . . . . . . . . . . . . . . . . . . . . . . . . . . . . . . . . . . 152
Connecting to a Computer . . . . . . . . . . . . . . . . . . . . . . . . . . . . . . . . . . . . . . . . . . . .152
Changing the video output from a laptop computer.. . . . . . . . . . . . . . . . . 153
Connecting to Video Equipment . . . . . . . . . . . . . . . . . . . . . . . . . . . . . . . . . . . . . . . 154
Adjusting the Projected Image . . . . . . . . . . . . . . . . . . . . . . . . . . . . . . . 157
Displaying a Test Pattern . . . . . . . . . . . . . . . . . . . . . . . . . . . . . . . . . . . . . . . . . . . . . .157
Adjusting the Position of the Projected Image (Lens Shift) . . . . . . . . . . . . . . 159
Focusing the Image . . . . . . . . . . . . . . . . . . . . . . . . . . . . . . . . . . . . . . . . . . . . . . . . . . .160
Zooming the Image . . . . . . . . . . . . . . . . . . . . . . . . . . . . . . . . . . . . . . . . . . . . . . . . . . . 160
Adjusting the Tilt of the Projected Image. . . . . . . . . . . . . . . . . . . . . . . . . . . . . . . 161
Correcting Distortion in the Projected Image . . . . . . . . . . . . . . . . . . . . . . . . . . . 161
Quick Corner . . . . . . . . . . . . . . . . . . . . . . . . . . . . . . . . . . . . . . . . . . . . . . . . . . . . . . .162
H/V-Keystone . . . . . . . . . . . . . . . . . . . . . . . . . . . . . . . . . . . . . . . . . . . . . . . . . . . . . . . 164
Arc Correction . . . . . . . . . . . . . . . . . . . . . . . . . . . . . . . . . . . . . . . . . . . . . . . . . . . . . . 166
Adjusting the Image Quality . . . . . . . . . . . . . . . . . . . . . . . . . . . . . . . . . 169
Hue, Saturation, and Brightness Adjustment . . . . . . . . . . . . . . . . . . . . . . . . . . .169
Gamma Adjustment . . . . . . . . . . . . . . . . . . . . . . . . . . . . . . . . . . . . . . . . . . . . . . . . . . . 169
Select and adjust the correction value . . . . . . . . . . . . . . . . . . . . . . . . . . . . . . . 169
Adjust while viewing the image . . . . . . . . . . . . . . . . . . . . . . . . . . . . . . . . . . . . . 170
Adjust using the gamma adjustment graph. . . . . . . . . . . . . . . . . . . . . . . . . . 170
Frame Interpolation
(PowerLite Pro Z8450WUNL/Z8455WUNL only). . . . . . . . . . . . . . . . . . . . . . . . . 171
Super-resolution . . . . . . . . . . . . . . . . . . . . . . . . . . . . . . . . . . . . . . . . . . . . . . . . . . . . . . 171
Noise Reduction. . . . . . . . . . . . . . . . . . . . . . . . . . . . . . . . . . . . . . . . . . . . . . . . . . . . . . . 171
Noise Reduction . . . . . . . . . . . . . . . . . . . . . . . . . . . . . . . . . . . . . . . . . . . . . . . . . . . . 171
Mosquito NR. . . . . . . . . . . . . . . . . . . . . . . . . . . . . . . . . . . . . . . . . . . . . . . . . . . . . . . . 172
Settings for Multiple Projectors . . . . . . . . . . . . . . . . . . . . . . . . . . . . . .173
Preparation Flow . . . . . . . . . . . . . . . . . . . . . . . . . . . . . . . . . . . . . . . . . . . . . . . . . . . . . . 173
Requirements . . . . . . . . . . . . . . . . . . . . . . . . . . . . . . . . . . . . . . . . . . . . . . . . . . . . . . . . . 173
Projector ID/Remote Control ID . . . . . . . . . . . . . . . . . . . . . . . . . . . . . . . . . . . . . . . . 173
Setting the projector ID . . . . . . . . . . . . . . . . . . . . . . . . . . . . . . . . . . . . . . . . . . . . . 174
Checking the Projector ID . . . . . . . . . . . . . . . . . . . . . . . . . . . . . . . . . . . . . . . . . . . 174
Setting the remote control ID . . . . . . . . . . . . . . . . . . . . . . . . . . . . . . . . . . . . . . .175
Adjusting the Position of the Projected Image. . . . . . . . . . . . . . . . . . . . . . . . . . 176
Point Correction . . . . . . . . . . . . . . . . . . . . . . . . . . . . . . . . . . . . . . . . . . . . . . . . . . . . 176
Checking the Color Mode. . . . . . . . . . . . . . . . . . . . . . . . . . . . . . . . . . . . . . . . . . . . . . 178
Using the Edge Blending Function . . . . . . . . . . . . . . . . . . . . . . . . . . . . . . . . . . . . . 178
Adjusting to Match Colors on Multi-Projection . . . . . . . . . . . . . . . . . . . . . . . . . 180
Displays the Image Partly Enlarged (Scale) . . . . . . . . . . . . . . . . . . . . . . . . . . . . .181
Setting Schedule . . . . . . . . . . . . . . . . . . . . . . . . . . . . . . . . . . . . . . . . . . . . 183
Setting Methods . . . . . . . . . . . . . . . . . . . . . . . . . . . . . . . . . . . . . . . . . . . . . . . . . . . . . .183
Clock . . . . . . . . . . . . . . . . . . . . . . . . . . . . . . . . . . . . . . . . . . . . . . . . . . . . . . . . . . . . . . . . .184
Daylight Saving Time screen . . . . . . . . . . . . . . . . . . . . . . . . . . . . . . . . . . . . . . . . 184
Schedule. . . . . . . . . . . . . . . . . . . . . . . . . . . . . . . . . . . . . . . . . . . . . . . . . . . . . . . . . . . . . . 184
Clock / Schedule Setting screen . . . . . . . . . . . . . . . . . . . . . . . . . . . . . . . . . . . . . 184
Connecting to External Equipment . . . . . . . . . . . . . . . . . . . . . . . . . . . 185
Connecting a LAN Cable . . . . . . . . . . . . . . . . . . . . . . . . . . . . . . . . . . . . . . . . . . . . . . . 185
Connecting to an External Monitor. . . . . . . . . . . . . . . . . . . . . . . . . . . . . . . . . . . . . 185
Installing Optional and Supplied Accessories . . . . . . . . . . . . . . . . .186