HP 170X HP Jetdirect Print Server 170X Installation and Configuration - Page 22
Microsoft Windows Systems, Install - jetdirect cd
 |
UPC - 882780300699
View all HP 170X manuals
Add to My Manuals
Save this manual to your list of manuals |
Page 22 highlights
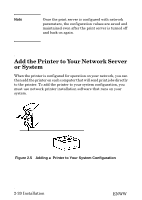
Microsoft Windows Systems To install the printer on a supported Windows system using the HP Jetdirect CD-ROM utility: 1. Insert the HP Jetdirect CD-ROM into your CD-ROM drive. 2. Wait for the installation utility to start automatically. If necessary, run SETUP.EXE from the root directory of the CD-ROM. 3. When the CD-ROM utility runs, select Install. This runs an installation wizard. 4. Follow the instructions on the screens. Note The printer installation wizard runs from the CD-ROM. It copies files to a temporary directory on your system, and deletes them when it terminates. For the latest version of the wizard that can be installed and run from your system disk, visit HP online support at: http://www.hp.com/go/inpw_sw 5. When prompted, print a test page to verify printer setup. Q If the test page successfully prints, then you have completed printer setup on this computer system. If this system was a server, see Client-Server Network Printing below. Q If the test page fails to print, perform the troubleshooting tasks displayed by the wizard. For additional troubleshooting information, see Chapter 5. 2-22 Installation ENWW
-
 1
1 -
2
-
3
-
4
-
5
-
6
-
7
-
8
-
9
-
10
-
11
-
12
-
13
-
14
-
15
-
16
-
 17
17 -
 18
18 -
 19
19 -
 20
20 -
 21
21 -
 22
22 -
 23
23 -
 24
24 -
 25
25 -
 26
26 -
 27
27 -
28
-
29
-
30
-
31
-
32
-
33
-
34
-
35
-
36
-
37
-
38
-
39
-
40
-
41
-
42
-
43
-
44
-
45
-
46
-
47
-
48
-
49
-
50
-
51
-
52
-
53
-
54
-
55
-
56
-
57
-
58
-
59
-
60
-
61
-
62
-
63
-
64
-
65
-
66
-
67
-
68
-
69
-
70
-
71
-
72
-
73
-
74
-
75
-
76
-
77
-
78
-
79
-
80
-
81
-
82
-
83
-
84
-
85
-
86
-
87
-
88
-
89
-
90
-
91
-
92
-
93
-
94
-
95
-
96
-
97
-
98
-
99
-
100
-
101
-
102
-
103
-
104
-
105
-
106
-
107
-
108
-
109
-
110
-
111
-
112
-
113
-
114
 |
 |
