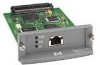
HP 635n HP Jetdirect Print Server Administrator's Guide (Firmware V.36) - Page 24
Mac OS Network Installation, Software Tools, Using Bonjour Mac OS X v10.4 - jetdirect configuration
 |
UPC - 882780301016
View all HP 635n manuals
Add to My Manuals
Save this manual to your list of manuals |
Page 24 highlights
Mac OS Network Installation Software Tools NOTE: For more information on Mac OS solutions, visit: http://www.hp.com/go/mac ● For Mac OS Classic systems, the HP LaserJet Utility provides configuration and management of your HP Jetdirect-connected printers/MFPs on AppleTalk (EtherTalk) networks. ● For printer/MFP configuration and management from Mac OS X v10.2 and later, use one of the following: ● The HP Printer Utility (for supported printers only) may be used on TCP/IP and AppleTalk (EtherTalk) networks. ● The embedded Web server on the printer/MFP device may be accessed from your browser (such as Safari) by entering the IP address or host name of the device as the URL address. ● On Mac OS X v10.2 and later, use your system utilities, such as Apple's Print Center or Bonjour applications for TCP/IP Printing. See the next section for an example of using Bonjour (formerly known as Rendezvous). Using Bonjour (Mac OS X v10.4) HP Jetdirect print servers support Bonjour (formerly known as Rendezvous) technology for printer discovery and installation over a TCP/IP network. NOTE: For a Mac OS X v10.4 system, the printer must be on the same network segment, that is, not across a router. In addition, the Network Port Configurations setting must have the appropriate network port enabled (for example, Built-in Ethernet is active) and is listed at the top of the ports list. To uniquely identify a printer on a network that contains many printers, print a Jetdirect Configuration page from the printer control panel. That page will contain unique identification information for the printer. To use Bonjour for printer discovery and network configuration through the embedded Web server directly: 1. Open Safari and click the bookmark icon. 2. In the bookmark list, select Bonjour. A list of discovered printers is displayed. 3. Identify and select your printer. A string of hexadecimal digits will be listed with the printer. These digits should match the LAN hardware address (or the last 6 digits of the address) on the Jetdirect configuration page for the printer. 4. Double-click the printer to access the embedded Web server on the printer. Configure your desired network settings using the Networking tab. To add the printer to your system for printing: 1. Open System Preferences, and then open Print & Fax. 2. Click + to add a printer. 14 Chapter 2 HP Software Solutions Summary ENWW
-
 1
1 -
2
-
3
-
4
-
5
-
6
-
7
-
8
-
9
-
10
-
11
-
12
-
13
-
14
-
15
-
16
-
17
-
18
-
 19
19 -
 20
20 -
 21
21 -
 22
22 -
 23
23 -
 24
24 -
 25
25 -
 26
26 -
 27
27 -
 28
28 -
 29
29 -
30
-
31
-
32
-
33
-
34
-
35
-
36
-
37
-
38
-
39
-
40
-
41
-
42
-
43
-
44
-
45
-
46
-
47
-
48
-
49
-
50
-
51
-
52
-
53
-
54
-
55
-
56
-
57
-
58
-
59
-
60
-
61
-
62
-
63
-
64
-
65
-
66
-
67
-
68
-
69
-
70
-
71
-
72
-
73
-
74
-
75
-
76
-
77
-
78
-
79
-
80
-
81
-
82
-
83
-
84
-
85
-
86
-
87
-
88
-
89
-
90
-
91
-
92
-
93
-
94
-
95
-
96
-
97
-
98
-
99
-
100
-
101
-
102
-
103
-
104
-
105
-
106
-
107
-
108
-
109
-
110
-
111
-
112
-
113
-
114
-
115
-
116
-
117
-
118
-
119
-
120
-
121
-
122
-
123
-
124
-
125
-
126
-
127
-
128
-
129
-
130
-
131
-
132
-
133
-
134
-
135
-
136
-
137
-
138
-
139
-
140
-
141
-
142
-
143
-
144
-
145
-
146
-
147
-
148
-
149
-
150
-
151
-
152
-
153
-
154
-
155
-
156
-
157
-
158
-
159
-
160
-
161
-
162
-
163
-
164
-
165
-
166
-
167
-
168
-
169
-
170
-
171
-
172
-
173
-
174
-
175
-
176
-
177
-
178
-
179
-
180
-
181
-
182
-
183
-
184
-
185
-
186
-
187
-
188
-
189
-
190
-
191
-
192
-
193
-
194
-
195
-
196
-
197
-
198
-
199
-
200
-
201
-
202
 |
 |