HP LaserJet 4v/mv Service Manual - Page 162
Possible Cause, Recommended Action, Table 7-11, Table 7-12
 |
View all HP LaserJet 4v/mv manuals
Add to My Manuals
Save this manual to your list of manuals |
Page 162 highlights
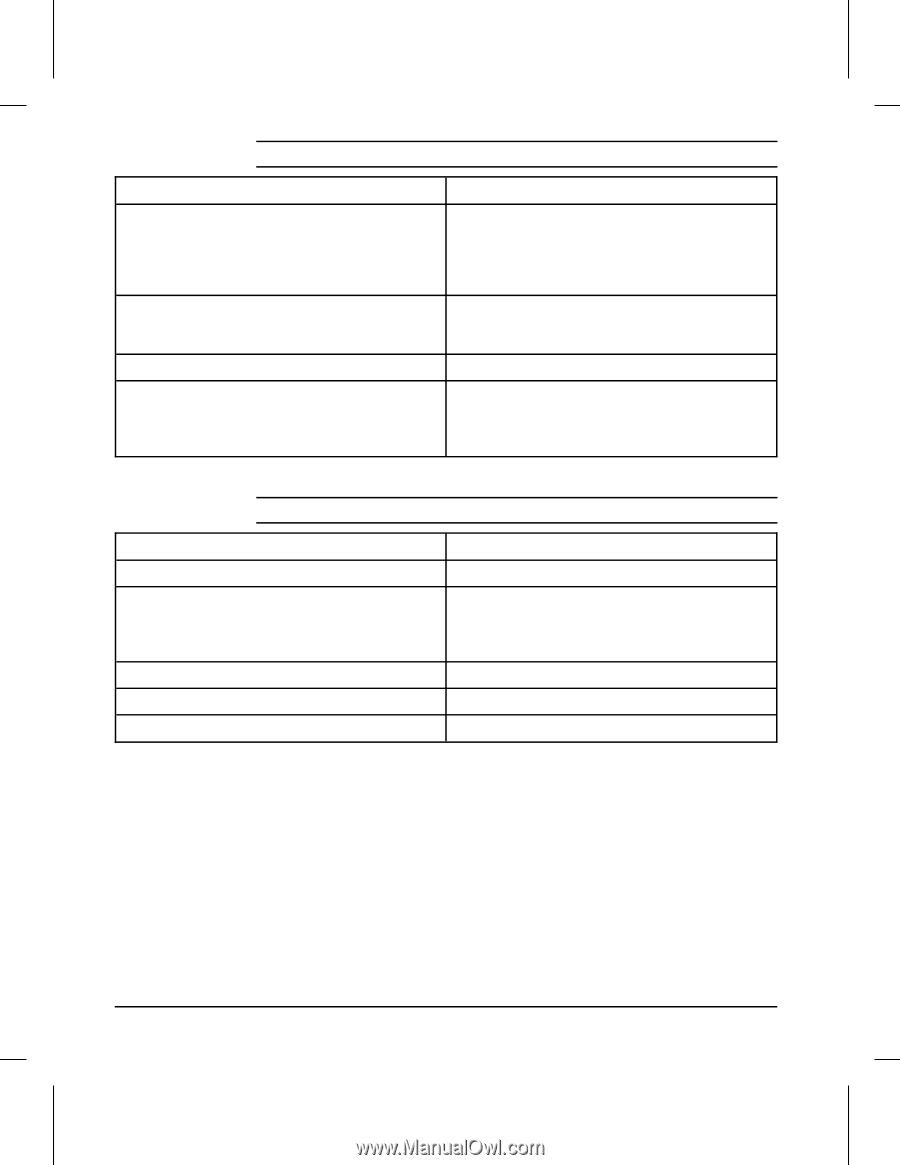
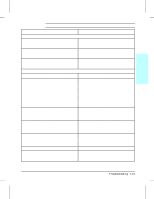
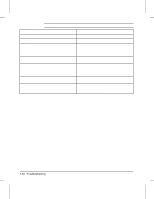
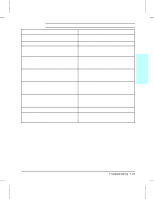
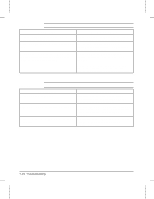
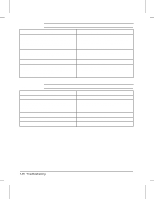
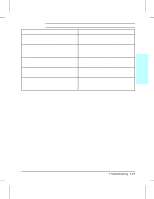
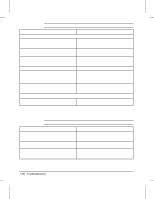
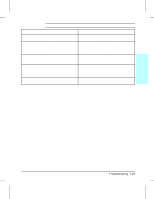
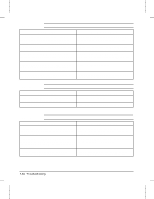
Table 7-11 Bubble Print Possible Cause 1. The density adjustment slider switch on the High Voltage Power Supply PCA slider switch is not aligned properly with the Print Density Dial. This causes the drum surface potential to be out of range. 2. Toner build-up in the Fusing Assembly. Toner build-up can physically damage the Fusing Assembly. 3. Leaking toner cartridge. 4. Paper does not meet specs. The paper moisture content, conductivity, or surface finish may not work correctly with the electrophotographic process. Recommended Action 1. Check the position of the Print Density Dial in the slider switch. If out of position, remove and reseat the High Voltage Power Supply PCA. 2. Replace the High Voltage Power Supply PCA. Remove and clean the Fusing Assembly (see Chapter 6). Replace the toner cartridge. Try a different paper lot (see HP LaserJet Printer Family Paper Specifications Guide). Table 7-12 Dropout Possible Cause 1. Single sheet of paper defective. 2. Paper does not meet specs. The paper moisture content, conductivity, or surface finish may not work correctly with the electrophotographic process. 3. DC Controller defective (low primary voltage). 4. High Voltage Power Supply PCA defective 5. Transfer Roller defective. Recommended Action Try reprinting the job. Try a different paper lot (see HP LaserJet Printer Family Paper Specifications Guide). Replace the DC Controller. Replace the High Voltage Power Supply PCA. Replace the Transfer Roller. 7-26 Troubleshooting
-
 1
1 -
2
-
3
-
4
-
5
-
6
-
7
-
8
-
9
-
10
-
11
-
12
-
13
-
14
-
15
-
16
-
17
-
18
-
19
-
20
-
21
-
22
-
23
-
24
-
25
-
26
-
27
-
28
-
29
-
30
-
31
-
32
-
33
-
34
-
35
-
36
-
37
-
38
-
39
-
40
-
41
-
42
-
43
-
44
-
45
-
46
-
47
-
48
-
49
-
50
-
51
-
52
-
53
-
54
-
55
-
56
-
57
-
58
-
59
-
60
-
61
-
62
-
63
-
64
-
65
-
66
-
67
-
68
-
69
-
70
-
71
-
72
-
73
-
74
-
75
-
76
-
77
-
78
-
79
-
80
-
81
-
82
-
83
-
84
-
85
-
86
-
87
-
88
-
89
-
90
-
91
-
92
-
93
-
94
-
95
-
96
-
97
-
98
-
99
-
100
-
101
-
102
-
103
-
104
-
105
-
106
-
107
-
108
-
109
-
110
-
111
-
112
-
113
-
114
-
115
-
116
-
117
-
118
-
119
-
120
-
121
-
122
-
123
-
124
-
125
-
126
-
127
-
128
-
129
-
130
-
131
-
132
-
133
-
134
-
135
-
136
-
137
-
138
-
139
-
140
-
141
-
142
-
143
-
144
-
145
-
146
-
147
-
148
-
149
-
150
-
151
-
152
-
153
-
154
-
155
-
156
-
 157
157 -
 158
158 -
 159
159 -
 160
160 -
 161
161 -
 162
162 -
 163
163 -
 164
164 -
 165
165 -
 166
166 -
 167
167 -
168
-
169
-
170
-
171
-
172
-
173
-
174
-
175
-
176
-
177
-
178
-
179
-
180
-
181
-
182
-
183
-
184
-
185
-
186
-
187
-
188
-
189
-
190
-
191
-
192
-
193
-
194
-
195
-
196
-
197
-
198
-
199
-
200
-
201
-
202
-
203
-
204
-
205
-
206
-
207
-
208
-
209
-
210
-
211
-
212
-
213
-
214
-
215
-
216
-
217
-
218
-
219
-
220
-
221
-
222
-
223
-
224
-
225
-
226
-
227
-
228
-
229
-
230
-
231
-
232
-
233
-
234
-
235
-
236
-
237
-
238
-
239
-
240
-
241
-
242
-
243
-
244
-
245
-
246
-
247
-
248
 |
 |