HP PSC 2500 HP PSC 2500 series All-in-One - (English) Reference Guide - Page 163
The EWS Home appears., Communication mode: Ad Hoc
 |
View all HP PSC 2500 manuals
Add to My Manuals
Save this manual to your list of manuals |
Page 163 highlights
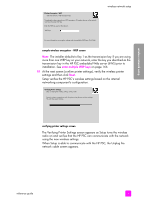
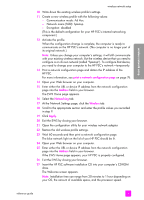
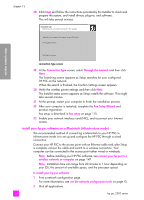
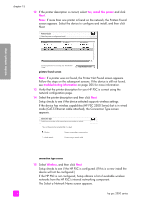
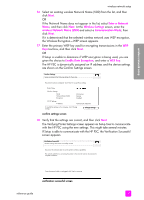
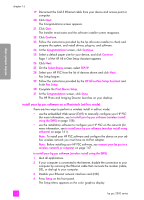
wireless network setup wireless network setup 10 Write down the existing wireless profile's settings. 11 Create a new wireless profile with the following values: - Communication mode: Ad Hoc - Network name (SSID): hpsetup - Encryption: disabled (This is the default configuration for your HP PSC's internal networking component.) 12 Activate the profile. When the configuration change is complete, the computer is ready to communicate on the HP PSC's network. (The computer is no longer part of its original network.) Note: Unless you change your computer's settings, it will still communicate with your existing wireless network. But the wireless device that you need to configure is on its own network (called "hpsetup"). To configure that device, you need to change your computer to the HP PSC's network-temporarily. 13 Print a network configuration page and obtain the IP address of the HP PSC. For more information, see print a network configuration page on page 76. 14 Open your Web browser on your computer. 15 Enter either the URL or device IP address from the network configuration page into the Address field in your browser. The EWS Home page appears. 16 Select the Networking tab. 17 At the Network Settings page, click the Wireless tab. 18 Scroll to the appropriate section and enter the profile values you recorded in step 9. 19 Click Apply. 20 Exit the EWS by closing your browser. 21 Open the configuration utility for your wireless network adapter. 22 Restore the old wireless profile settings. 23 Wait 60 seconds and then print a network configuration page. The blue network light on the lid of your HP PSC should be lit. 24 Open your Web browser on your computer. 25 Enter either the URL or device IP address from the network configuration page into the Address field in your browser. If the EWS Home page appears, your HP PSC is properly configured. 26 Exit the EWS by closing your browser. 27 Insert the HP PSC software installation CD into your computer's CD-ROM drive. The Welcome screen appears. Note: Installation time can range from 20 minutes to 1 hour depending on your OS, the amount of available space, and the processor speed. reference guide 153
-
 1
1 -
2
-
3
-
4
-
5
-
6
-
7
-
8
-
9
-
10
-
11
-
12
-
13
-
14
-
15
-
16
-
17
-
18
-
19
-
20
-
21
-
22
-
23
-
24
-
25
-
26
-
27
-
28
-
29
-
30
-
31
-
32
-
33
-
34
-
35
-
36
-
37
-
38
-
39
-
40
-
41
-
42
-
43
-
44
-
45
-
46
-
47
-
48
-
49
-
50
-
51
-
52
-
53
-
54
-
55
-
56
-
57
-
58
-
59
-
60
-
61
-
62
-
63
-
64
-
65
-
66
-
67
-
68
-
69
-
70
-
71
-
72
-
73
-
74
-
75
-
76
-
77
-
78
-
79
-
80
-
81
-
82
-
83
-
84
-
85
-
86
-
87
-
88
-
89
-
90
-
91
-
92
-
93
-
94
-
95
-
96
-
97
-
98
-
99
-
100
-
101
-
102
-
103
-
104
-
105
-
106
-
107
-
108
-
109
-
110
-
111
-
112
-
113
-
114
-
115
-
116
-
117
-
118
-
119
-
120
-
121
-
122
-
123
-
124
-
125
-
126
-
127
-
128
-
129
-
130
-
131
-
132
-
133
-
134
-
135
-
136
-
137
-
138
-
139
-
140
-
141
-
142
-
143
-
144
-
145
-
146
-
147
-
148
-
149
-
150
-
151
-
152
-
153
-
154
-
155
-
156
-
157
-
 158
158 -
 159
159 -
 160
160 -
 161
161 -
 162
162 -
 163
163 -
 164
164 -
 165
165 -
 166
166 -
 167
167 -
 168
168 -
169
-
170
-
171
-
172
-
173
-
174
-
175
-
176
-
177
-
178
-
179
-
180
-
181
-
182
-
183
-
184
-
185
-
186
-
187
-
188
-
189
-
190
-
191
-
192
-
193
-
194
-
195
-
196
-
197
-
198
-
199
-
200
-
201
-
202
-
203
-
204
-
205
-
206
-
207
-
208
-
209
-
210
-
211
-
212
-
213
-
214
-
215
-
216
-
217
-
218
-
219
-
220
-
221
-
222
-
223
-
224
-
225
-
226
-
227
-
228
-
229
-
230
-
231
-
232
-
233
-
234
-
235
-
236
-
237
-
238
-
239
-
240
-
241
-
242
-
243
-
244
-
245
-
246
 |
 |
