HP PSC 2500 HP PSC 2500 series All-in-One - (English) Reference Guide - Page 64
send the scan to a destination con d through hp instant share, Start Color - manual
 |
View all HP PSC 2500 manuals
Add to My Manuals
Save this manual to your list of manuals |
Page 64 highlights
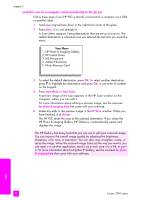
chapter 5 6 Press Start Black or Start Color. If you chose the HP Gallery, a preview image of the scan appears in the HP Scan window on the computer, where you can edit it. For more information about editing a preview image, see the onscreen hp photo & imaging help that came with your software. 7 Make any edits to the preview image in the HP Scan window. When you finish, click Accept. The HP PSC sends the scan to the selected destination. If you chose the HP Gallery, it automatically opens and displays the image. The HP Gallery has many tools that you can use to edit your scanned image. You can improve the overall image quality by adjusting the brightness, sharpness, color tone, or saturation. You can also crop, straighten, rotate, or resize the image. When the scanned image looks just the way you want it, you can open it in another application, send it via e-mail, save it to a file, or print it. For more information about using the HP Gallery, see the onscreen hp photo & imaging help that came with your software. send the scan to a destination configured through hp instant share HP Instant Share lets you share your photos with family and friends through e-mail messages and online photo albums, and order high-quality prints online. In order to take full advantage of the HP Instant Share features available from the front panel of your HP PSC, you must have your HP PSC set up on a network, and you must complete a simple online registration process. For information on setting up HP Instant Share, see hp instant share network setup and use on page 197. Note: If you do not have your HP PSC set up on a network, you can still use HP Instant Share to share photos. However, the procedure varies slightly from the one described here. The share destinations you set up will not be available from a menu in the color graphics display; instead you will have to access HP Instant Share manually, through the HP Gallery. After you have registered with HP Instant Share, you can begin customizing your account, including setting up an e-mail address book and setting up share destinations for your networked HP PSC. You can configure a share destination to send a photo you scan to a single e-mail recipient, a group of e-mail recipients, or an online shared photo album. You can also send the scanned photo to the HP Photo Processing Center, where you or your family and friends can order high-quality prints of any size. For more information on setting up share destinations, see register with hp instant share (Windows) on page 198. scan 54 hp psc 2500 series
-
 1
1 -
2
-
3
-
4
-
5
-
6
-
7
-
8
-
9
-
10
-
11
-
12
-
13
-
14
-
15
-
16
-
17
-
18
-
19
-
20
-
21
-
22
-
23
-
24
-
25
-
26
-
27
-
28
-
29
-
30
-
31
-
32
-
33
-
34
-
35
-
36
-
37
-
38
-
39
-
40
-
41
-
42
-
43
-
44
-
45
-
46
-
47
-
48
-
49
-
50
-
51
-
52
-
53
-
54
-
55
-
56
-
57
-
58
-
 59
59 -
 60
60 -
 61
61 -
 62
62 -
 63
63 -
 64
64 -
 65
65 -
 66
66 -
 67
67 -
 68
68 -
 69
69 -
70
-
71
-
72
-
73
-
74
-
75
-
76
-
77
-
78
-
79
-
80
-
81
-
82
-
83
-
84
-
85
-
86
-
87
-
88
-
89
-
90
-
91
-
92
-
93
-
94
-
95
-
96
-
97
-
98
-
99
-
100
-
101
-
102
-
103
-
104
-
105
-
106
-
107
-
108
-
109
-
110
-
111
-
112
-
113
-
114
-
115
-
116
-
117
-
118
-
119
-
120
-
121
-
122
-
123
-
124
-
125
-
126
-
127
-
128
-
129
-
130
-
131
-
132
-
133
-
134
-
135
-
136
-
137
-
138
-
139
-
140
-
141
-
142
-
143
-
144
-
145
-
146
-
147
-
148
-
149
-
150
-
151
-
152
-
153
-
154
-
155
-
156
-
157
-
158
-
159
-
160
-
161
-
162
-
163
-
164
-
165
-
166
-
167
-
168
-
169
-
170
-
171
-
172
-
173
-
174
-
175
-
176
-
177
-
178
-
179
-
180
-
181
-
182
-
183
-
184
-
185
-
186
-
187
-
188
-
189
-
190
-
191
-
192
-
193
-
194
-
195
-
196
-
197
-
198
-
199
-
200
-
201
-
202
-
203
-
204
-
205
-
206
-
207
-
208
-
209
-
210
-
211
-
212
-
213
-
214
-
215
-
216
-
217
-
218
-
219
-
220
-
221
-
222
-
223
-
224
-
225
-
226
-
227
-
228
-
229
-
230
-
231
-
232
-
233
-
234
-
235
-
236
-
237
-
238
-
239
-
240
-
241
-
242
-
243
-
244
-
245
-
246
 |
 |
