HP PSC 2500 HP PSC 2500 series All-in-One - (English) Reference Guide - Page 168
install your hp psc software on a Macintosh (ad-hoc mode
 |
View all HP PSC 2500 manuals
Add to My Manuals
Save this manual to your list of manuals |
Page 168 highlights
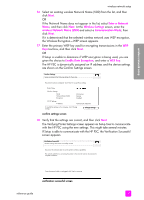
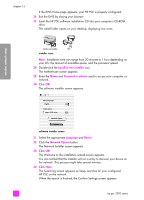
wireless network setup chapter 15 19 Disconnect the CAT-5 Ethernet cable from your device and access point or computer. 20 Click Next. The Congratulations screen appears. 21 Click Quit. The Installer re-activates and the software installer screen reappears. 22 Click Continue. 23 Follow the instructions provided by the hp all-in-one installer to check and prepare the system, and install drivers, plug-ins, and software. 24 At the Congratulations! screen, click Continue. 25 Select a default paper size for your device, and click Continue. Page 1 of the HP All-in-One Setup Assistant appears. 26 Click Next. 27 On the Select Device screen, select TCP/IP. 28 Select your HP PSC from the list of devices shown and click Next. Fax Setup begins. 29 Follow the instructions provided by the HP All-in-One Setup Assistant and finish Fax Setup. 30 Complete the Print Queue Setup. 31 At the Congratulations screen, click Done. The HP Photo and Imaging Director launches on your desktop. install your hp psc software on a Macintosh (ad-hoc mode) There are two ways to perform a wireless install in ad-hoc mode: • use the embedded Web server (EWS) to manually configure your HP PSC (for more information, see to install your hp psc software (wireless install using the EWS) on page 158). • use the installation software to configure your HP PSC on the network (for more information, see to install your hp psc software (wireless install using software) on page 161). Note: To install your HP PSC software and configure the device on your adhoc wireless network you must have an AirPort adapter. Note: Before installing your HP PSC software, see connect your hp psc to a wireless network or computer on page 147. to install your hp psc software (wireless install using the EWS) 1 Quit all applications. 2 If your computer is connected to the Internet, disable the connection to your computer by removing the Ethernet cable that connects the modem (cable, DSL, or dial-up) to your computer. 3 Disable your Ethernet network interface card (NIC). 4 Press Setup on the front panel. The Setup Menu appears on the color graphics display. 158 hp psc 2500 series
-
 1
1 -
2
-
3
-
4
-
5
-
6
-
7
-
8
-
9
-
10
-
11
-
12
-
13
-
14
-
15
-
16
-
17
-
18
-
19
-
20
-
21
-
22
-
23
-
24
-
25
-
26
-
27
-
28
-
29
-
30
-
31
-
32
-
33
-
34
-
35
-
36
-
37
-
38
-
39
-
40
-
41
-
42
-
43
-
44
-
45
-
46
-
47
-
48
-
49
-
50
-
51
-
52
-
53
-
54
-
55
-
56
-
57
-
58
-
59
-
60
-
61
-
62
-
63
-
64
-
65
-
66
-
67
-
68
-
69
-
70
-
71
-
72
-
73
-
74
-
75
-
76
-
77
-
78
-
79
-
80
-
81
-
82
-
83
-
84
-
85
-
86
-
87
-
88
-
89
-
90
-
91
-
92
-
93
-
94
-
95
-
96
-
97
-
98
-
99
-
100
-
101
-
102
-
103
-
104
-
105
-
106
-
107
-
108
-
109
-
110
-
111
-
112
-
113
-
114
-
115
-
116
-
117
-
118
-
119
-
120
-
121
-
122
-
123
-
124
-
125
-
126
-
127
-
128
-
129
-
130
-
131
-
132
-
133
-
134
-
135
-
136
-
137
-
138
-
139
-
140
-
141
-
142
-
143
-
144
-
145
-
146
-
147
-
148
-
149
-
150
-
151
-
152
-
153
-
154
-
155
-
156
-
157
-
158
-
159
-
160
-
161
-
162
-
 163
163 -
 164
164 -
 165
165 -
 166
166 -
 167
167 -
 168
168 -
 169
169 -
 170
170 -
 171
171 -
 172
172 -
 173
173 -
174
-
175
-
176
-
177
-
178
-
179
-
180
-
181
-
182
-
183
-
184
-
185
-
186
-
187
-
188
-
189
-
190
-
191
-
192
-
193
-
194
-
195
-
196
-
197
-
198
-
199
-
200
-
201
-
202
-
203
-
204
-
205
-
206
-
207
-
208
-
209
-
210
-
211
-
212
-
213
-
214
-
215
-
216
-
217
-
218
-
219
-
220
-
221
-
222
-
223
-
224
-
225
-
226
-
227
-
228
-
229
-
230
-
231
-
232
-
233
-
234
-
235
-
236
-
237
-
238
-
239
-
240
-
241
-
242
-
243
-
244
-
245
-
246
 |
 |
