HP Photosmart C4500 User Guide - Page 166
Solution 7: Contact HP support for service
 |
View all HP Photosmart C4500 manuals
Add to My Manuals
Save this manual to your list of manuals |
Page 166 highlights
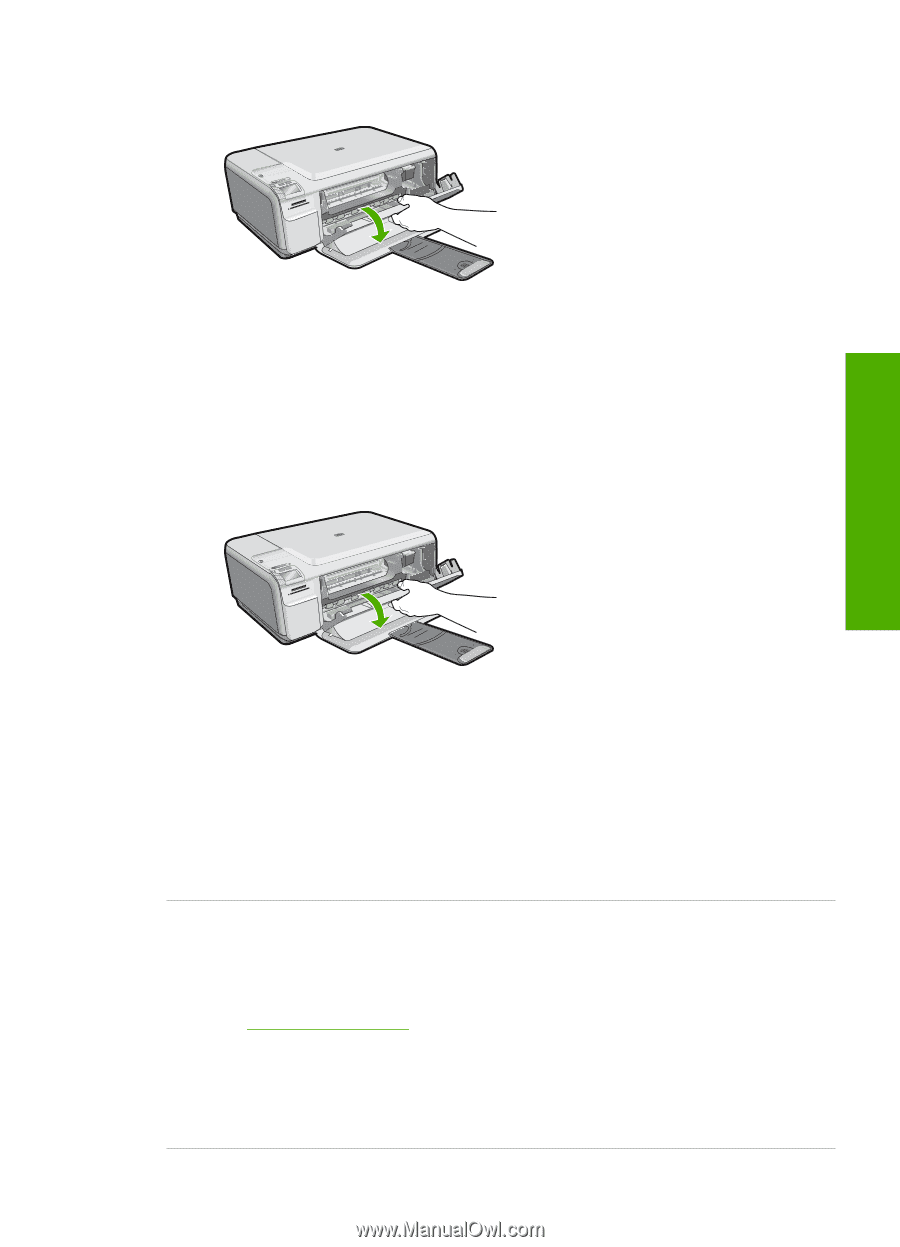
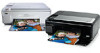
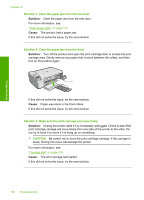
Troubleshooting 3. Open the print cartridge door. The print carriage should move to the far right side of the product. 4. Remove the print cartridges and keep them aside carefully. 5. Close the print cartridge door. 6. Disconnect the power cord from the product and wait for 60 seconds. 7. Reconnect the power cord to the product. 8. Turn on the product by pressing the On button. 9. Open the print cartridge door. The print carriage should move to the far right side of the product. 10. Reinsert the print cartridges in the appropriate slots. 11. Close the print cartridge door. 12. Load paper in the input tray. 13. If prompted, print a cartridge calibration page, and then scan it. Cause: The product experienced an error and had to be reset. If this did not solve the issue, try the next solution. Solution 7: Contact HP support for service Solution: If you have completed all of the steps provided in the previous solutions and are still having a problem, contact HP support for service. Go to: www.hp.com/support. If prompted, choose your country/region, and then click Contact HP for technical support. Cause: You might need assistance to enable the product or software to function properly. Errors 163
-
 1
1 -
2
-
3
-
4
-
5
-
6
-
7
-
8
-
9
-
10
-
11
-
12
-
13
-
14
-
15
-
16
-
17
-
18
-
19
-
20
-
21
-
22
-
23
-
24
-
25
-
26
-
27
-
28
-
29
-
30
-
31
-
32
-
33
-
34
-
35
-
36
-
37
-
38
-
39
-
40
-
41
-
42
-
43
-
44
-
45
-
46
-
47
-
48
-
49
-
50
-
51
-
52
-
53
-
54
-
55
-
56
-
57
-
58
-
59
-
60
-
61
-
62
-
63
-
64
-
65
-
66
-
67
-
68
-
69
-
70
-
71
-
72
-
73
-
74
-
75
-
76
-
77
-
78
-
79
-
80
-
81
-
82
-
83
-
84
-
85
-
86
-
87
-
88
-
89
-
90
-
91
-
92
-
93
-
94
-
95
-
96
-
97
-
98
-
99
-
100
-
101
-
102
-
103
-
104
-
105
-
106
-
107
-
108
-
109
-
110
-
111
-
112
-
113
-
114
-
115
-
116
-
117
-
118
-
119
-
120
-
121
-
122
-
123
-
124
-
125
-
126
-
127
-
128
-
129
-
130
-
131
-
132
-
133
-
134
-
135
-
136
-
137
-
138
-
139
-
140
-
141
-
142
-
143
-
144
-
145
-
146
-
147
-
148
-
149
-
150
-
151
-
152
-
153
-
154
-
155
-
156
-
157
-
158
-
159
-
160
-
 161
161 -
 162
162 -
 163
163 -
 164
164 -
 165
165 -
 166
166 -
 167
167 -
 168
168 -
 169
169 -
 170
170 -
 171
171 -
172
-
173
-
174
-
175
-
176
-
177
-
178
-
179
-
180
-
181
-
182
-
183
-
184
-
185
-
186
-
187
-
188
-
189
-
190
-
191
-
192
-
193
-
194
-
195
-
196
-
197
-
198
-
199
-
200
-
201
-
202
-
203
-
204
-
205
-
206
-
207
-
208
-
209
-
210
-
211
-
212
-
213
-
214
-
215
-
216
-
217
-
218
-
219
-
220
-
221
-
222
-
223
-
224
-
225
-
226
-
227
-
228
-
229
-
230
-
231
-
232
-
233
-
234
-
235
-
236
-
237
-
238
-
239
-
240
-
241
-
242
-
243
-
244
-
245
-
246
-
247
-
248
-
249
-
250
-
251
-
252
-
253
-
254
-
255
-
256
-
257
-
258
-
259
-
260
-
261
 |
 |