HP Photosmart C4500 User Guide - Page 72
Edit a scanned image, Edit a scanned document, Scan/Reprint, Scan to PC, Related topics
 |
View all HP Photosmart C4500 manuals
Add to My Manuals
Save this manual to your list of manuals |
Page 72 highlights
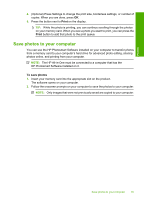
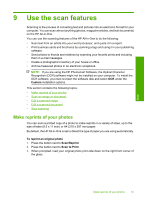
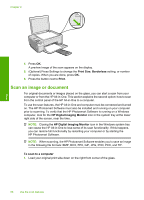
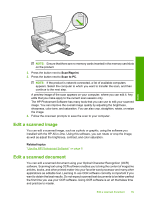
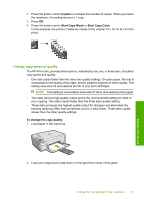
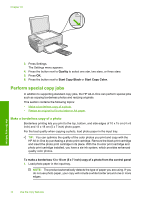
Scan NOTE: Ensure that there are no memory cards inserted in the memory card slots on the product. 2. Press the button next to Scan/Reprint. 3. Press the button next to Scan to PC. NOTE: If the product is network-connected, a list of available computers appears. Select the computer to which you want to transfer the scan, and then continue to the next step. A preview image of the scan appears on your computer, where you can edit it. Any edits that you make apply to the current scan session only. The HP Photosmart Software has many tools that you can use to edit your scanned image. You can improve the overall image quality by adjusting the brightness, sharpness, color tone, and saturation. You can also crop, straighten, rotate, or resize the image. 4. Follow the onscreen prompts to save the scan to your computer. Edit a scanned image You can edit a scanned image, such as a photo or graphic, using the software you installed with the HP All-in-One. Using this software, you can rotate or crop the image, as well as adjust the brightness, contrast, and color saturation. Related topics "Use the HP Photosmart Software" on page 8 Edit a scanned document You can edit a scanned document using your Optical Character Recognition (OCR) software. Scanning text using OCR software enables you to bring the content of magazine articles, books, and other printed matter into your favorite word processor and many other applications as editable text. Learning to use OCR software correctly is important if you want to obtain the best results. Do not expect scanned text documents to be letter-perfect the first time you use your OCR software. Using OCR software is an art that takes time and practice to master. Edit a scanned document 69
-
 1
1 -
2
-
3
-
4
-
5
-
6
-
7
-
8
-
9
-
10
-
11
-
12
-
13
-
14
-
15
-
16
-
17
-
18
-
19
-
20
-
21
-
22
-
23
-
24
-
25
-
26
-
27
-
28
-
29
-
30
-
31
-
32
-
33
-
34
-
35
-
36
-
37
-
38
-
39
-
40
-
41
-
42
-
43
-
44
-
45
-
46
-
47
-
48
-
49
-
50
-
51
-
52
-
53
-
54
-
55
-
56
-
57
-
58
-
59
-
60
-
61
-
62
-
63
-
64
-
65
-
66
-
 67
67 -
 68
68 -
 69
69 -
 70
70 -
 71
71 -
 72
72 -
 73
73 -
 74
74 -
 75
75 -
 76
76 -
 77
77 -
78
-
79
-
80
-
81
-
82
-
83
-
84
-
85
-
86
-
87
-
88
-
89
-
90
-
91
-
92
-
93
-
94
-
95
-
96
-
97
-
98
-
99
-
100
-
101
-
102
-
103
-
104
-
105
-
106
-
107
-
108
-
109
-
110
-
111
-
112
-
113
-
114
-
115
-
116
-
117
-
118
-
119
-
120
-
121
-
122
-
123
-
124
-
125
-
126
-
127
-
128
-
129
-
130
-
131
-
132
-
133
-
134
-
135
-
136
-
137
-
138
-
139
-
140
-
141
-
142
-
143
-
144
-
145
-
146
-
147
-
148
-
149
-
150
-
151
-
152
-
153
-
154
-
155
-
156
-
157
-
158
-
159
-
160
-
161
-
162
-
163
-
164
-
165
-
166
-
167
-
168
-
169
-
170
-
171
-
172
-
173
-
174
-
175
-
176
-
177
-
178
-
179
-
180
-
181
-
182
-
183
-
184
-
185
-
186
-
187
-
188
-
189
-
190
-
191
-
192
-
193
-
194
-
195
-
196
-
197
-
198
-
199
-
200
-
201
-
202
-
203
-
204
-
205
-
206
-
207
-
208
-
209
-
210
-
211
-
212
-
213
-
214
-
215
-
216
-
217
-
218
-
219
-
220
-
221
-
222
-
223
-
224
-
225
-
226
-
227
-
228
-
229
-
230
-
231
-
232
-
233
-
234
-
235
-
236
-
237
-
238
-
239
-
240
-
241
-
242
-
243
-
244
-
245
-
246
-
247
-
248
-
249
-
250
-
251
-
252
-
253
-
254
-
255
-
256
-
257
-
258
-
259
-
260
-
261
 |
 |