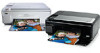
HP Photosmart C4500 User Guide - Page 20
Connect to a wireless ad hoc network, Connect to additional computers on a network - troubleshooting
 |
View all HP Photosmart C4500 manuals
Add to My Manuals
Save this manual to your list of manuals |
Page 20 highlights
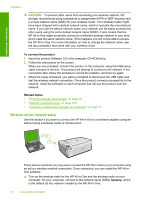
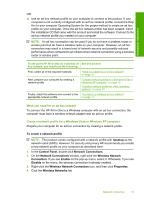
Connection information • Network name (SSID): Mynetwork (example only) NOTE: You should create a network name that is unique and easy for you to remember. Just remember that the network name is case-sensitive. Therefore, you must remember which letters are uppercase and lowercase. • Communication mode: Ad Hoc • Encryption: enabled Connect to a wireless ad hoc network The HP Photosmart Software CD and included USB setup cable provide an easy way to connect the HP All-in-One directly to your computer for an ad-hoc wireless network. To connect the product 1. Insert the product Software CD in the computer CD-ROM drive. 2. Follow the instructions on the screen. When you are prompted, connect the product to the computer using the USB setup cable included in the box. The product will attempt to connect to the network. If the connection fails, follow the prompts to correct the problem, and then try again. 3. When the setup is finished, you will be prompted to disconnect the USB cable and test the wireless network connection. Once the product connects successfully to the network, install the software on each computer that will use the product over the network. Related topics • "Print the wireless network test" on page 19 • "Network troubleshooting" on page 109 • "Connect to additional computers on a network" on page 17 Connect to additional computers on a network You can connect the HP All-in-One to more than one computer on a small network of computers. If the HP All-in-One is already connected to a computer on a network, for each additional computer you must install the HP All-in-One software. During installation of a wireless connection, the software will discover the SSID (network name) of the existing network. Once you have set up the HP All-in-One on the network you will not need to configure it again when you add additional computers. To install the Windows HP All-in-One software on additional networked computers 1. Quit all applications running on your computer, including any virus detection software. 2. Insert the Windows CD that came with the HP All-in-One into the CD-ROM drive on your computer and follow the onscreen instructions. 3. If a dialog box about firewalls appears, follow the instructions. If you see firewall pop- up messages, you must always accept or allow the pop-up messages. 4. On the Connection Type screen, select Through the network, and then click Next. The Searching screen appears as the Setup program searches for the HP All-in-One on the network. Network connection 17
-
 1
1 -
2
-
3
-
4
-
5
-
6
-
7
-
8
-
9
-
10
-
11
-
12
-
13
-
14
-
 15
15 -
 16
16 -
 17
17 -
 18
18 -
 19
19 -
 20
20 -
 21
21 -
 22
22 -
 23
23 -
 24
24 -
 25
25 -
26
-
27
-
28
-
29
-
30
-
31
-
32
-
33
-
34
-
35
-
36
-
37
-
38
-
39
-
40
-
41
-
42
-
43
-
44
-
45
-
46
-
47
-
48
-
49
-
50
-
51
-
52
-
53
-
54
-
55
-
56
-
57
-
58
-
59
-
60
-
61
-
62
-
63
-
64
-
65
-
66
-
67
-
68
-
69
-
70
-
71
-
72
-
73
-
74
-
75
-
76
-
77
-
78
-
79
-
80
-
81
-
82
-
83
-
84
-
85
-
86
-
87
-
88
-
89
-
90
-
91
-
92
-
93
-
94
-
95
-
96
-
97
-
98
-
99
-
100
-
101
-
102
-
103
-
104
-
105
-
106
-
107
-
108
-
109
-
110
-
111
-
112
-
113
-
114
-
115
-
116
-
117
-
118
-
119
-
120
-
121
-
122
-
123
-
124
-
125
-
126
-
127
-
128
-
129
-
130
-
131
-
132
-
133
-
134
-
135
-
136
-
137
-
138
-
139
-
140
-
141
-
142
-
143
-
144
-
145
-
146
-
147
-
148
-
149
-
150
-
151
-
152
-
153
-
154
-
155
-
156
-
157
-
158
-
159
-
160
-
161
-
162
-
163
-
164
-
165
-
166
-
167
-
168
-
169
-
170
-
171
-
172
-
173
-
174
-
175
-
176
-
177
-
178
-
179
-
180
-
181
-
182
-
183
-
184
-
185
-
186
-
187
-
188
-
189
-
190
-
191
-
192
-
193
-
194
-
195
-
196
-
197
-
198
-
199
-
200
-
201
-
202
-
203
-
204
-
205
-
206
-
207
-
208
-
209
-
210
-
211
-
212
-
213
-
214
-
215
-
216
-
217
-
218
-
219
-
220
-
221
-
222
-
223
-
224
-
225
-
226
-
227
-
228
-
229
-
230
-
231
-
232
-
233
-
234
-
235
-
236
-
237
-
238
-
239
-
240
-
241
-
242
-
243
-
244
-
245
-
246
-
247
-
248
-
249
-
250
-
251
-
252
-
253
-
254
-
255
-
256
-
257
-
258
-
259
-
260
-
261
 |
 |