HP Portable 386 Compaq Portable 386 Personal Computer Maintenance and Service - Page 138
Megabyte Fixed Disk Drive Expansion Unit, To replace the expansion unit
 |
View all HP Portable 386 manuals
Add to My Manuals
Save this manual to your list of manuals |
Page 138 highlights
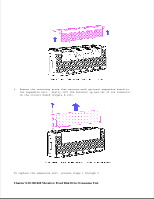
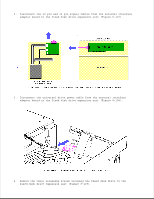
9. Remove the retaining screw that secures each optional expansion board to the expansion unit. Gently lift the board(s) up and out of its connector on the circuit board (Figure 8-105). To replace the expansion unit, reverse steps 1 through 9. Chapter 8.30 300/600 Megabyte Fixed Disk Drive Expansion Unit
-
 1
1 -
2
-
3
-
4
-
5
-
6
-
7
-
8
-
9
-
10
-
11
-
12
-
13
-
14
-
15
-
16
-
17
-
18
-
19
-
20
-
21
-
22
-
23
-
24
-
25
-
26
-
27
-
28
-
29
-
30
-
31
-
32
-
33
-
34
-
35
-
36
-
37
-
38
-
39
-
40
-
41
-
42
-
43
-
44
-
45
-
46
-
47
-
48
-
49
-
50
-
51
-
52
-
53
-
54
-
55
-
56
-
57
-
58
-
59
-
60
-
61
-
62
-
63
-
64
-
65
-
66
-
67
-
68
-
69
-
70
-
71
-
72
-
73
-
74
-
75
-
76
-
77
-
78
-
79
-
80
-
81
-
82
-
83
-
84
-
85
-
86
-
87
-
88
-
89
-
90
-
91
-
92
-
93
-
94
-
95
-
96
-
97
-
98
-
99
-
100
-
101
-
102
-
103
-
104
-
105
-
106
-
107
-
108
-
109
-
110
-
111
-
112
-
113
-
114
-
115
-
116
-
117
-
118
-
119
-
120
-
121
-
122
-
123
-
124
-
125
-
126
-
127
-
128
-
129
-
130
-
131
-
132
-
 133
133 -
 134
134 -
 135
135 -
 136
136 -
 137
137 -
 138
138 -
 139
139 -
 140
140 -
 141
141 -
 142
142 -
 143
143 -
144
-
145
-
146
-
147
-
148
-
149
-
150
-
151
-
152
-
153
-
154
-
155
-
156
-
157
-
158
-
159
-
160
-
161
-
162
-
163
-
164
-
165
-
166
 |
 |
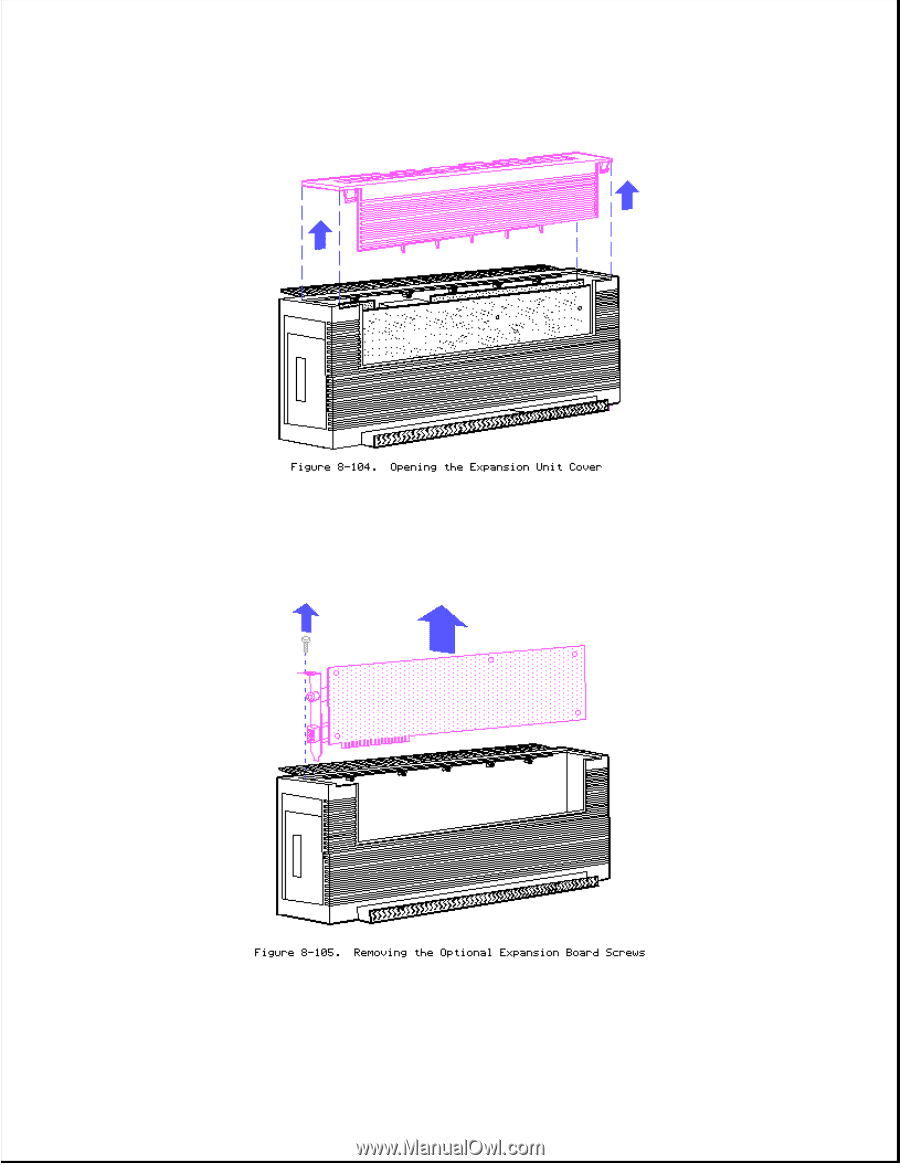
9. Remove the retaining screw that secures each optional expansion board to
the expansion unit. Gently lift the board(s) up and out of its connector
on the circuit board (Figure 8-105).
To replace the expansion unit, reverse steps 1 through 9.
Chapter 8.30 300/600 Megabyte Fixed Disk Drive Expansion Unit