HP Portable 386 Compaq Portable 386 Personal Computer Maintenance and Service - Page 16
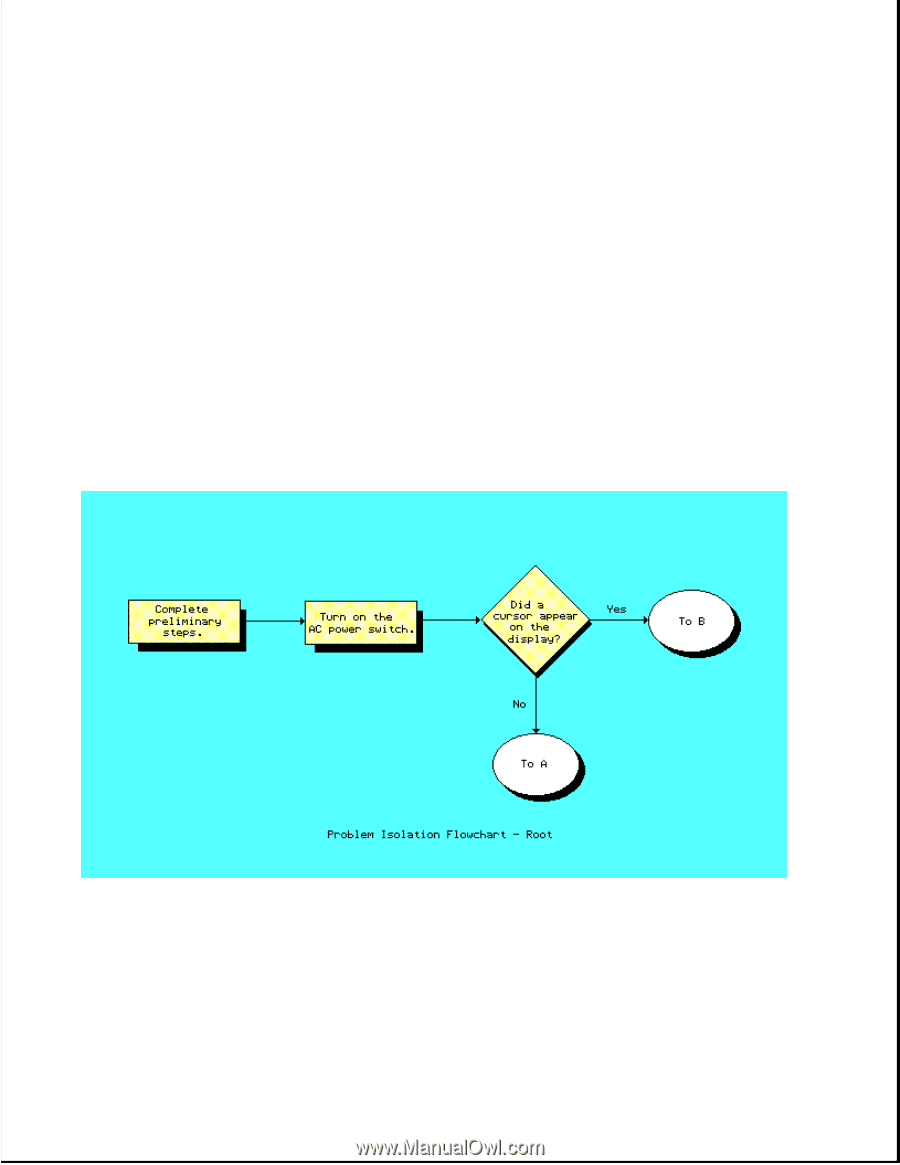
Problem Isolation Flowchart
 |
View all HP Portable 386 manuals
Add to My Manuals
Save this manual to your list of manuals |
Page 16 highlights
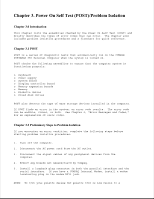
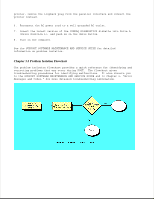
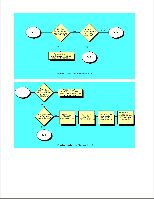
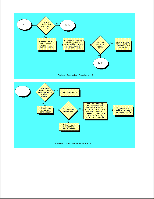
printer, remove the loopback plug from the parallel interface and connect the printer instead. 6. Reconnect the AC power cord to a well grounded AC outlet. 7. Insert the latest version of the COMPAQ DIAGNOSTICS diskette into Drive A (Drive Position 1), and push in on the drive button. 8. Turn on the computer. See the SUPPORT SOFTWARE MAINTENANCE AND SERVICE GUIDE for detailed information on problem isolation. Chapter 3.3 Problem Isolation Flowchart The problem isolation flowchart provides a quick reference for identifying and correcting problems that may occur during POST. The flowchart gives troubleshooting procedures for identifying malfunctions. It also directs you to the SUPPORT SOFTWARE MAINTENANCE AND SERVICE GUIDE and to Chapter 6, "Error Messages and Codes," for more detailed troubleshooting information.
-
 1
1 -
2
-
3
-
4
-
5
-
6
-
7
-
8
-
9
-
10
-
 11
11 -
 12
12 -
 13
13 -
 14
14 -
 15
15 -
 16
16 -
 17
17 -
 18
18 -
 19
19 -
 20
20 -
 21
21 -
22
-
23
-
24
-
25
-
26
-
27
-
28
-
29
-
30
-
31
-
32
-
33
-
34
-
35
-
36
-
37
-
38
-
39
-
40
-
41
-
42
-
43
-
44
-
45
-
46
-
47
-
48
-
49
-
50
-
51
-
52
-
53
-
54
-
55
-
56
-
57
-
58
-
59
-
60
-
61
-
62
-
63
-
64
-
65
-
66
-
67
-
68
-
69
-
70
-
71
-
72
-
73
-
74
-
75
-
76
-
77
-
78
-
79
-
80
-
81
-
82
-
83
-
84
-
85
-
86
-
87
-
88
-
89
-
90
-
91
-
92
-
93
-
94
-
95
-
96
-
97
-
98
-
99
-
100
-
101
-
102
-
103
-
104
-
105
-
106
-
107
-
108
-
109
-
110
-
111
-
112
-
113
-
114
-
115
-
116
-
117
-
118
-
119
-
120
-
121
-
122
-
123
-
124
-
125
-
126
-
127
-
128
-
129
-
130
-
131
-
132
-
133
-
134
-
135
-
136
-
137
-
138
-
139
-
140
-
141
-
142
-
143
-
144
-
145
-
146
-
147
-
148
-
149
-
150
-
151
-
152
-
153
-
154
-
155
-
156
-
157
-
158
-
159
-
160
-
161
-
162
-
163
-
164
-
165
-
166
 |
 |