HP Portable 386 Compaq Portable 386 Personal Computer Maintenance and Service - Page 143
access the connector on the board.
 |
View all HP Portable 386 manuals
Add to My Manuals
Save this manual to your list of manuals |
Page 143 highlights
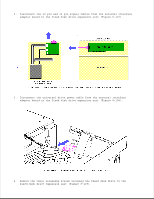
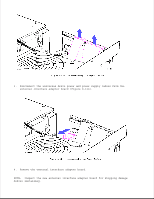
3. Slide the power supply assembly 1/2 inch to 1 inch (1.27 to 2.54 cm) toward the fixed disk drive housing (Figure 8-112). Be sure to clear the tabs on the bottom chassis. These tabs hold the power supply assembly in place. 4. Shift the power supply assembly away from the external adapter board to access the connector on the board. 5. Disconnect the power supply connector from the external interface adapter board and lift the power supply assembly out of the chassis.
-
 1
1 -
2
-
3
-
4
-
5
-
6
-
7
-
8
-
9
-
10
-
11
-
12
-
13
-
14
-
15
-
16
-
17
-
18
-
19
-
20
-
21
-
22
-
23
-
24
-
25
-
26
-
27
-
28
-
29
-
30
-
31
-
32
-
33
-
34
-
35
-
36
-
37
-
38
-
39
-
40
-
41
-
42
-
43
-
44
-
45
-
46
-
47
-
48
-
49
-
50
-
51
-
52
-
53
-
54
-
55
-
56
-
57
-
58
-
59
-
60
-
61
-
62
-
63
-
64
-
65
-
66
-
67
-
68
-
69
-
70
-
71
-
72
-
73
-
74
-
75
-
76
-
77
-
78
-
79
-
80
-
81
-
82
-
83
-
84
-
85
-
86
-
87
-
88
-
89
-
90
-
91
-
92
-
93
-
94
-
95
-
96
-
97
-
98
-
99
-
100
-
101
-
102
-
103
-
104
-
105
-
106
-
107
-
108
-
109
-
110
-
111
-
112
-
113
-
114
-
115
-
116
-
117
-
118
-
119
-
120
-
121
-
122
-
123
-
124
-
125
-
126
-
127
-
128
-
129
-
130
-
131
-
132
-
133
-
134
-
135
-
136
-
137
-
 138
138 -
 139
139 -
 140
140 -
 141
141 -
 142
142 -
 143
143 -
 144
144 -
 145
145 -
 146
146 -
 147
147 -
 148
148 -
149
-
150
-
151
-
152
-
153
-
154
-
155
-
156
-
157
-
158
-
159
-
160
-
161
-
162
-
163
-
164
-
165
-
166
 |
 |
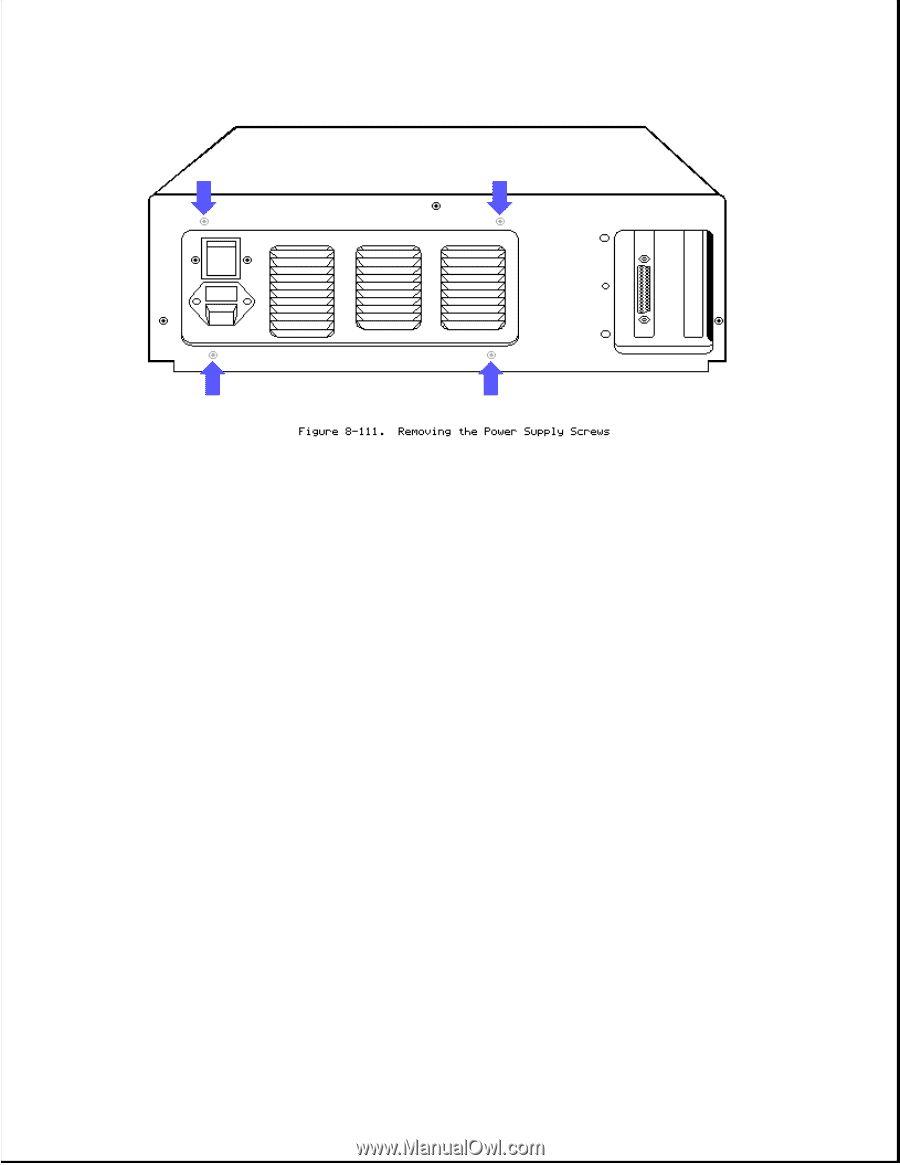
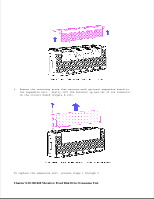
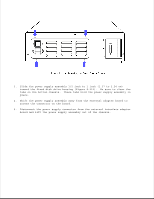
3. Slide the power supply assembly 1/2 inch to 1 inch (1.27 to 2.54 cm)
toward the fixed disk drive housing (Figure 8-112). Be sure to clear the
tabs on the bottom chassis. These tabs hold the power supply assembly in
place.
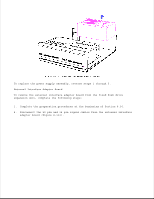
4. Shift the power supply assembly away from the external adapter board to
access the connector on the board.
5. Disconnect the power supply connector from the external interface adapter
board and lift the power supply assembly out of the chassis.