HP Vectra VE C/xxx 7 HP Vectra VE C/xxx Series 7 PC - Network Administration G - Page 49
NDIS 2.01 Driver for Windows for Workgroups 3.1, Installation Procedure
 |
View all HP Vectra VE C/xxx 7 manuals
Add to My Manuals
Save this manual to your list of manuals |
Page 49 highlights
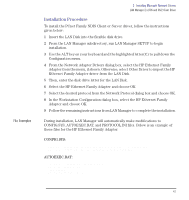
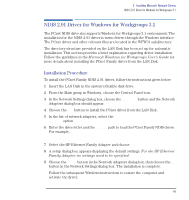
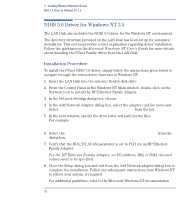
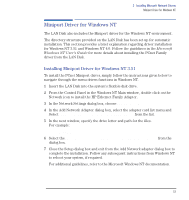
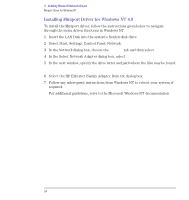
3 Installing Microsoft Network Drivers NDIS 2.01 Driver for Windows for Workgroups 3.1 NDIS 2.01 Driver for Windows for Workgroups 3.1 The PCnet NDIS drive also supports Windows for Workgroups 3.1 environment. The installation for the NDIS 2.01 driver is menu driven through the Windows interface. The PCnet driver and other relevant files are located in the WFW31 subdirectory. The directory structure provided on the LAN Disk has been set up for automatic installation. This section provides a brief explanation regarding driver installation. Follow the guidelines in the Microsoft Windows for Workgroups User's Guide for more details about installing the PCnet Family driver from the LAN Disk. Installation Procedure To install the PCnet Family NDIS 2.01 driver, follow the instructions given below: 1 Insert the LAN Disk in the system's flexible disk drive. 2 From the Main group in Windows, choose the Control Panel icon. 3 In the Network Settings dialog box, choose the Adapters button and the Network Adapters dialog box should appear. 4 Choose the Add button to install the PCnet driver from the LAN Disk. 5 In the list of network adapters, select the Unlisted or Updated Network Adapter option. 6 Enter the drive letter and the \WFW31 path to load the PCnet Family NDIS driver: For example, A:\WFW31\ 7 Select the HP Ethernet Family Adapter and choose OK. 8 A setup dialog box appears displaying the default settings. For the HP Ethernet Family Adapter, no settings need to be specified. 9 Choose the Close button in the Network Adapters dialog box, then choose the OK button in the Network Settings dialog box. The installation is complete. Follow the subsequent Windows instructions to restart the computer and activate the driver. English 49
-
 1
1 -
2
-
3
-
4
-
5
-
6
-
7
-
8
-
9
-
10
-
11
-
12
-
13
-
14
-
15
-
16
-
17
-
18
-
19
-
20
-
21
-
22
-
23
-
24
-
25
-
26
-
27
-
28
-
29
-
30
-
31
-
32
-
33
-
34
-
35
-
36
-
37
-
38
-
39
-
40
-
41
-
42
-
43
-
 44
44 -
 45
45 -
 46
46 -
 47
47 -
 48
48 -
 49
49 -
 50
50 -
 51
51 -
 52
52 -
 53
53 -
 54
54 -
55
-
56
-
57
-
58
-
59
-
60
-
61
-
62
-
63
-
64
-
65
-
66
-
67
-
68
-
69
-
70
-
71
-
72
-
73
-
74
-
75
-
76
-
77
-
78
-
79
-
80
-
81
-
82
-
83
-
84
-
85
-
86
-
87
-
88
-
89
-
90
-
91
-
92
-
93
-
94
-
95
-
96
-
97
-
98
-
99
-
100
-
101
-
102
-
103
-
104
-
105
-
106
-
107
-
108
-
109
-
110
-
111
-
112
 |
 |
