HP Vectra VE C/xxx 7 HP Vectra VE C/xxx Series 7 PC - Network Administration G - Page 72
NDIS 2.01 Driver for PC-NFS, Installation Procedure, Sun Microsystems PC-NFS Manuals
 |
View all HP Vectra VE C/xxx 7 manuals
Add to My Manuals
Save this manual to your list of manuals |
Page 72 highlights
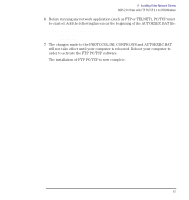
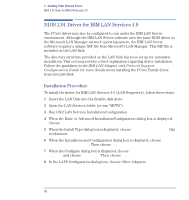
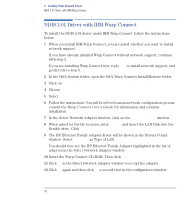
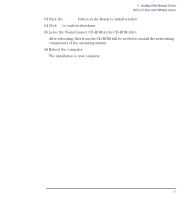
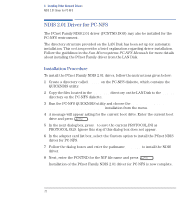
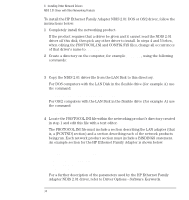
4 Installing Other Network Drivers NDIS 2.01 Driver for PC-NFS NDIS 2.01 Driver for PC-NFS The PCnet Family NDIS 2.01 driver (PCNTND.DOS) may also be installed for the PC-NFS environment. The directory structure provided on the LAN Disk has been set up for automatic installation. This section provides a brief explanation regarding driver installation. Follow the guidelines in the Sun Microsystems PC-NFS Manuals for more details about installing the PCnet Family driver from the LAN Disk. Installation Procedure To install the PCnet Family NDIS 2.01 driver, follow the instructions given below: 1 Create a directory called PCNTND on the PC-NFS diskette, which contains the QUICKNDIS utility. 2 Copy the files located in the \NDIS\DOS directory on the LAN Disk to the \PCNTND directory on the PC-NFS diskette. 3 Run the PC-NFS QUICKNDIS utility and choose the HP Ethernet Family Adapter with LAN Remote Power installation from the menu. 4 A message will appear asking for the current boot drive. Enter the current boot drive and press . 5 In the next dialog box, press Y to save the current PROTOCOL.INI as PROTOCOL.OLD. Ignore this step if this dialog box does not appear. 6 In the adapter card list box, select the Custom option to install the PCnet NDIS driver for PC-NFS. 7 Follow the dialog boxes and enter the pathname A:\PCNFS to install the NDIS driver. 8 Next, enter the PCNTND for the NIF file name and press . Installation of the PCnet Family NDIS 2.01 driver for PC-NFS is now complete. 72 English
-
 1
1 -
2
-
3
-
4
-
5
-
6
-
7
-
8
-
9
-
10
-
11
-
12
-
13
-
14
-
15
-
16
-
17
-
18
-
19
-
20
-
21
-
22
-
23
-
24
-
25
-
26
-
27
-
28
-
29
-
30
-
31
-
32
-
33
-
34
-
35
-
36
-
37
-
38
-
39
-
40
-
41
-
42
-
43
-
44
-
45
-
46
-
47
-
48
-
49
-
50
-
51
-
52
-
53
-
54
-
55
-
56
-
57
-
58
-
59
-
60
-
61
-
62
-
63
-
64
-
65
-
66
-
 67
67 -
 68
68 -
 69
69 -
 70
70 -
 71
71 -
 72
72 -
 73
73 -
 74
74 -
 75
75 -
 76
76 -
 77
77 -
78
-
79
-
80
-
81
-
82
-
83
-
84
-
85
-
86
-
87
-
88
-
89
-
90
-
91
-
92
-
93
-
94
-
95
-
96
-
97
-
98
-
99
-
100
-
101
-
102
-
103
-
104
-
105
-
106
-
107
-
108
-
109
-
110
-
111
-
112
 |
 |
