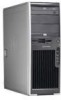
HP Xw4600 HP xw4600 Workstation - Service and Technical Reference Guide - Page 38
Computer Setup F10 Utility menu descriptions continued, System management - windows compatibility
 |
UPC - 883585516483
View all HP Xw4600 manuals
Add to My Manuals
Save this manual to your list of manuals |
Page 38 highlights
Table 4-1 Computer Setup (F10) Utility menu descriptions (continued) Heading Option Description Multisector Transfers options are 8, 16, and Disable (16 is the default). Transfer Mode specifies the active data transfer mode. Options (which are subject to device capabilities) are: Max UDMA, PIO 0, Max PIO, Enhanced DMA, and Ultra DMA0 (Max UDMA is the default). Translation Mode enables the BIOS to automatically determine the translation mode used to configure a previously formatted SATA or USB mass storage device. This prevents you from having to know how the mass storage device was previously formatted. Ordinarily, the translation mode selected automatically by the BIOS should not be changed. If the selected translation mode is not compatible with the translation mode that was active when the drive was partitioned and formatted, the data on the disk is inaccessible. Translation Mode Options are: Automatic, Bit Shift, LBA Assisted, Use (Cylinders, Heads, Sectors), and Off (Automatic is default). Storage Options Removable Media Boot-Enables and disables the ability to boot the system from removable media. Legacy Diskette Write-Enables and disables the ability to write data to removable media. SATA Emulation-Sets the SATA emulation mode with the following options: ● RAID-RAID OPROM executes. This emulation mode offers the best performance and most functionality. ● IDE-Offers standard SATA support (four ports only). ● AHCI-Offers full SATA and SATA-II functionality with no support for RAID. DPS Self-test Enables you to select a drive test for a SATA drive. It is not displayed by default and not available for RAID and AHCI configurations. Boot Order Enables you to configure the boot, diskette drive, and hard drive orders by physically reordering the menu entries. The default boot order presents the following selections: ● Optical Drive ● Diskette Drive ● USB Device ● Hard Drive ● Broadcom Ethernet controller Press Enter to drag a device to a preferred place. Press F5 to remove the device from consideration as a bootable device. NOTE: MS-DOS drive lettering assignments might not apply after an operating system other than MS-DOS has started. Boot devices can be disabled in the boot order process. These order changes are stored in the physical ROM when the F10 Setup changes are confirmed with File>Save Changes and Exit. You can temporarily override the boot order: To boot one time from a device other than the default device specified in Boot Order, restart the workstation and press F9 when the F9=Boot Menu message appears on the screen. After POST completes, a list of bootable devices is displayed. Use the arrow keys to select the preferred bootable device and press Enter. The workstation then boots from the selected nondefault device this time only. Security Setup Password Enables you to set and enable setup (administrator) password. NOTE: If the setup password is set, it is required to change computer setup options, flash the ROM, and make changes to certain Plug and Play settings under Windows. 28 Chapter 4 System management ENWW
-
 1
1 -
2
-
3
-
4
-
5
-
6
-
7
-
8
-
9
-
10
-
11
-
12
-
13
-
14
-
15
-
16
-
17
-
18
-
19
-
20
-
21
-
22
-
23
-
24
-
25
-
26
-
27
-
28
-
29
-
30
-
31
-
32
-
 33
33 -
 34
34 -
 35
35 -
 36
36 -
 37
37 -
 38
38 -
 39
39 -
 40
40 -
 41
41 -
 42
42 -
 43
43 -
44
-
45
-
46
-
47
-
48
-
49
-
50
-
51
-
52
-
53
-
54
-
55
-
56
-
57
-
58
-
59
-
60
-
61
-
62
-
63
-
64
-
65
-
66
-
67
-
68
-
69
-
70
-
71
-
72
-
73
-
74
-
75
-
76
-
77
-
78
-
79
-
80
-
81
-
82
-
83
-
84
-
85
-
86
-
87
-
88
-
89
-
90
-
91
-
92
-
93
-
94
-
95
-
96
-
97
-
98
-
99
-
100
-
101
-
102
-
103
-
104
-
105
-
106
-
107
-
108
-
109
-
110
-
111
-
112
-
113
-
114
-
115
-
116
-
117
-
118
-
119
-
120
-
121
-
122
-
123
-
124
-
125
-
126
-
127
-
128
-
129
-
130
-
131
-
132
-
133
-
134
-
135
-
136
-
137
-
138
-
139
-
140
-
141
-
142
-
143
-
144
-
145
-
146
-
147
-
148
-
149
-
150
-
151
-
152
-
153
-
154
-
155
-
156
-
157
-
158
-
159
-
160
-
161
-
162
-
163
-
164
-
165
-
166
-
167
-
168
-
169
-
170
-
171
-
172
-
173
-
174
-
175
-
176
-
177
-
178
-
179
-
180
-
181
 |
 |
