HP Z3100 HP Designjet Z3100 Photo Printer Series - Users Guide - Page 130
Prints do not fall nicely into the basket
 |
UPC - 882780677531
View all HP Z3100 manuals
Add to My Manuals
Save this manual to your list of manuals |
Page 130 highlights
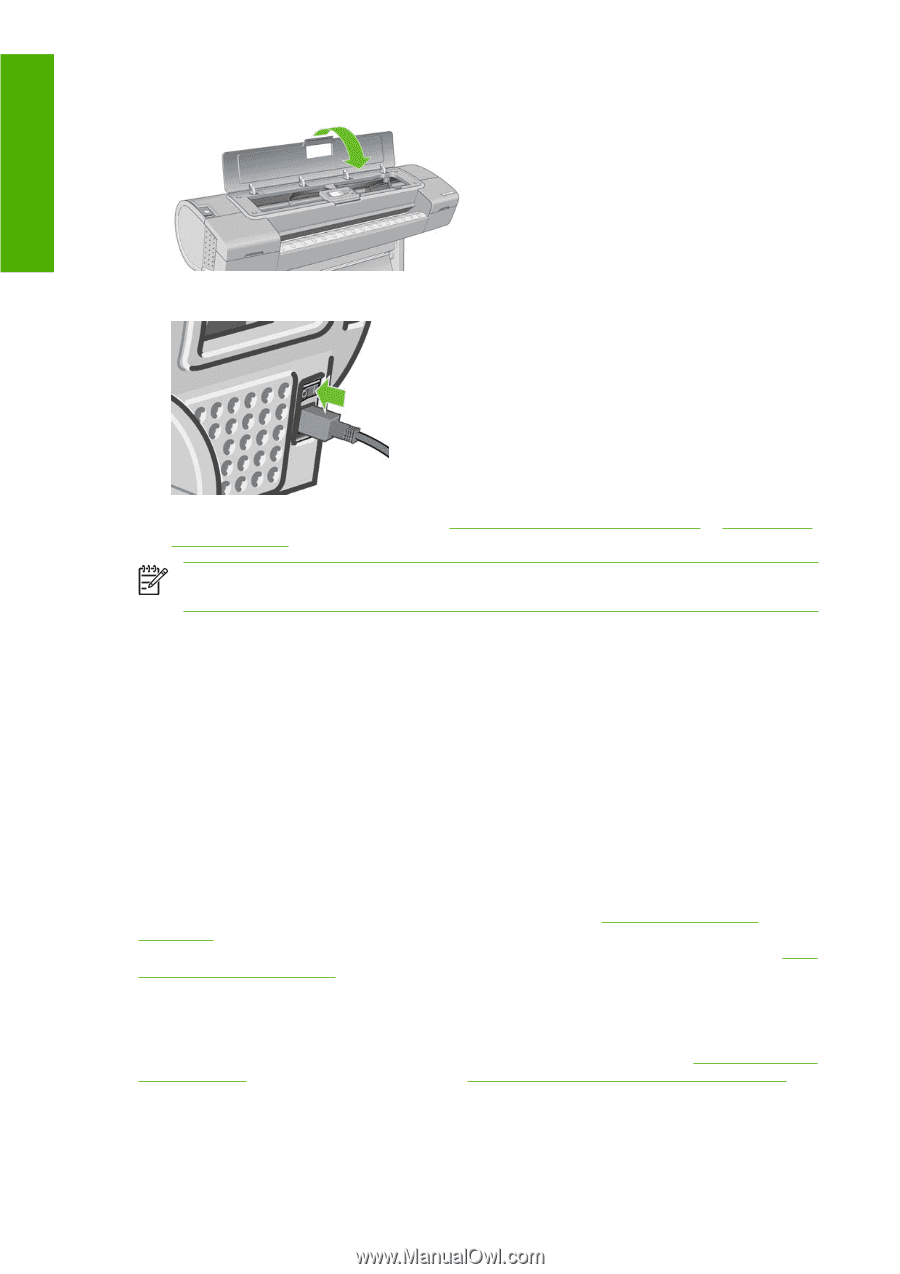
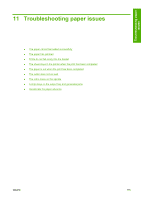
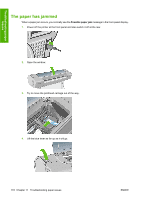
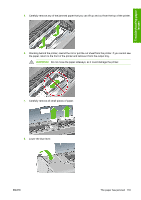
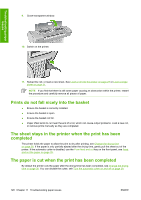
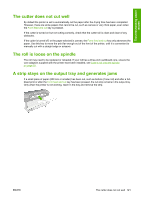
Troubleshooting paper issues 9. Close transparent window. 10. Switch on the printer. 11. Reload the roll, or load a new sheet. See Load a roll into the printer on page 27 or Load a single sheet on page 31. NOTE If you find that there is still some paper causing an obstruction within the printer, restart the procedure and carefully remove all pieces of paper. Prints do not fall nicely into the basket ● Ensure the basket is correctly installed. ● Ensure the basket is open. ● Ensure the basket not full. ● Paper often tends to curl near the end of a roll, which can cause output problems. Load a new roll, or remove prints manually as they are completed. The sheet stays in the printer when the print has been completed The printer holds the paper to allow the print to dry after printing, see Change the drying time on page 38. If the paper is only partially ejected after the drying time, gently pull the sheet out of the printer. If the automatic cutter is disabled, use the Form feed and cut key on the front panel, see Feed and cut the paper on page 39. The paper is cut when the print has been completed By default the printer cuts the paper after the drying time has been completed, see Change the drying time on page 38. You can disable the cutter, see Turn the automatic cutter on and off on page 38. 120 Chapter 11 Troubleshooting paper issues ENWW
-
 1
1 -
2
-
3
-
4
-
5
-
6
-
7
-
8
-
9
-
10
-
11
-
12
-
13
-
14
-
15
-
16
-
17
-
18
-
19
-
20
-
21
-
22
-
23
-
24
-
25
-
26
-
27
-
28
-
29
-
30
-
31
-
32
-
33
-
34
-
35
-
36
-
37
-
38
-
39
-
40
-
41
-
42
-
43
-
44
-
45
-
46
-
47
-
48
-
49
-
50
-
51
-
52
-
53
-
54
-
55
-
56
-
57
-
58
-
59
-
60
-
61
-
62
-
63
-
64
-
65
-
66
-
67
-
68
-
69
-
70
-
71
-
72
-
73
-
74
-
75
-
76
-
77
-
78
-
79
-
80
-
81
-
82
-
83
-
84
-
85
-
86
-
87
-
88
-
89
-
90
-
91
-
92
-
93
-
94
-
95
-
96
-
97
-
98
-
99
-
100
-
101
-
102
-
103
-
104
-
105
-
106
-
107
-
108
-
109
-
110
-
111
-
112
-
113
-
114
-
115
-
116
-
117
-
118
-
119
-
120
-
121
-
122
-
123
-
124
-
 125
125 -
 126
126 -
 127
127 -
 128
128 -
 129
129 -
 130
130 -
 131
131 -
 132
132 -
 133
133 -
 134
134 -
 135
135 -
136
-
137
-
138
-
139
-
140
-
141
-
142
-
143
-
144
-
145
-
146
-
147
-
148
-
149
-
150
-
151
-
152
-
153
-
154
-
155
-
156
-
157
-
158
-
159
-
160
-
161
-
162
-
163
-
164
-
165
-
166
-
167
-
168
-
169
-
170
-
171
-
172
-
173
-
174
-
175
-
176
-
177
-
178
-
179
-
180
-
181
-
182
-
183
-
184
-
185
 |
 |