HP Z3100 HP Designjet Z3100 Photo Printer Series - Users Guide - Page 39
Paper menu procedure, example
 |
UPC - 882780677531
View all HP Z3100 manuals
Add to My Manuals
Save this manual to your list of manuals |
Page 39 highlights
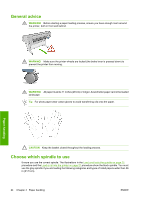
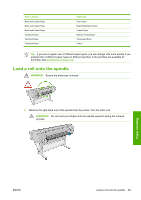
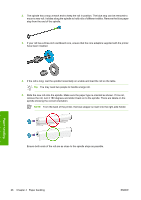
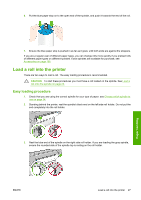
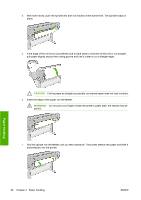
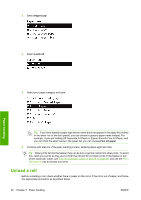
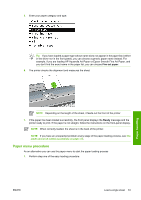
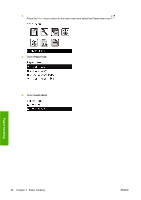
8. Once the paper is fed into the printer, the front-panel display asks if you are loading a roll or a sheet. Select Roll with the Up and Down keys and press OK. 9. Select your paper category and type. Paper handling Tip If you have loaded a paper type whose name does not appear in the paper list (neither in the driver nor in the front panel), you can choose a generic paper name instead. For example, if you are loading HP Aquarella Art Paper or Epson Smooth Fine Art Paper, and you don't find the exact name in the paper list, you can choose Fine art paper. 10. The printer checks the alignment and measures the width. 11. Look at the front panel; you may find some instructions there. 12. When the roll is aligned, the front panel displays the Ready message and the printer is ready to print. If the role is not aligned, follow the instructions on the front-panel display. 13. If the paper is loose on the roll, lightly rewind from the end of the spindle until tight. NOTE If you have an unexpected issue at any stage of the paper loading process, see The paper cannot be loaded successfully on page 116. Tip When prints fall into the basket, they can be torn or get ink marks from other prints. To avoid this, catch your prints as they are cut from the roll and do not stack prints in the basket or turn off the automatic cutter, see Turn the automatic cutter on and off on page 38, and use the Form feed and cut key to release your print. Paper menu procedure As an alternative you can use the paper menu to start the paper loading process. 1. Follow steps one through five of the Easy loading procedure on page 27. 2. Press the Menu key to return to the main menu, select the Paper menu icon . ENWW Load a roll into the printer 29
-
 1
1 -
2
-
3
-
4
-
5
-
6
-
7
-
8
-
9
-
10
-
11
-
12
-
13
-
14
-
15
-
16
-
17
-
18
-
19
-
20
-
21
-
22
-
23
-
24
-
25
-
26
-
27
-
28
-
29
-
30
-
31
-
32
-
33
-
 34
34 -
 35
35 -
 36
36 -
 37
37 -
 38
38 -
 39
39 -
 40
40 -
 41
41 -
 42
42 -
 43
43 -
 44
44 -
45
-
46
-
47
-
48
-
49
-
50
-
51
-
52
-
53
-
54
-
55
-
56
-
57
-
58
-
59
-
60
-
61
-
62
-
63
-
64
-
65
-
66
-
67
-
68
-
69
-
70
-
71
-
72
-
73
-
74
-
75
-
76
-
77
-
78
-
79
-
80
-
81
-
82
-
83
-
84
-
85
-
86
-
87
-
88
-
89
-
90
-
91
-
92
-
93
-
94
-
95
-
96
-
97
-
98
-
99
-
100
-
101
-
102
-
103
-
104
-
105
-
106
-
107
-
108
-
109
-
110
-
111
-
112
-
113
-
114
-
115
-
116
-
117
-
118
-
119
-
120
-
121
-
122
-
123
-
124
-
125
-
126
-
127
-
128
-
129
-
130
-
131
-
132
-
133
-
134
-
135
-
136
-
137
-
138
-
139
-
140
-
141
-
142
-
143
-
144
-
145
-
146
-
147
-
148
-
149
-
150
-
151
-
152
-
153
-
154
-
155
-
156
-
157
-
158
-
159
-
160
-
161
-
162
-
163
-
164
-
165
-
166
-
167
-
168
-
169
-
170
-
171
-
172
-
173
-
174
-
175
-
176
-
177
-
178
-
179
-
180
-
181
-
182
-
183
-
184
-
185
 |
 |
