JVC DVP9 Instruction Manual - Page 92
Updating [Device Manager] (Windows®), Installing [USB Mass Storage Class driver] Windows, 98SE only - gr driver
 |
UPC - 046838161100
View all JVC DVP9 manuals
Add to My Manuals
Save this manual to your list of manuals |
Page 92 highlights
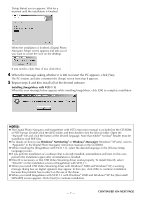
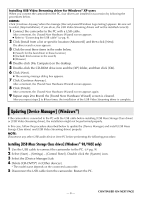
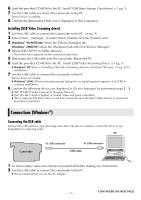
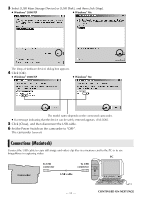
Installing USB Video Streaming driver for Windows® XP users When you connect the camcorder to the PC, four drivers are installed in succession by following the procedures below. NOTES: Click [Continue Anyway] when the message [Has not passed Windows Logo testing] appears. Be sure not to select [Stop Installation]. If you do so, the USB Video Streaming drivers will not be installed correctly. 1 Connect the camcorder to the PC with a USB cable. After a moment, the [Found New Hardware Wizard] screen appears. ● Refer to "Connecting the USB cable" (੬ pg. 9). 2 Click [Install from a list or specific location (Advanced)] and then click [Next]. The driver search screen appears. 3 Click the next three items in the order below. ● [Search for the best driver in these location] ● [Include this location in the search] ● [Browse] 4 Double-click [My Computer] on the desktop. 5 Double-click the CD-ROM drive icon and the [XP] folder, and then click [OK]. 6 Click [Next]. ● The warning message dialog box appears. 7 Click [Continue Anyway]. After a moment, the [Found New Hardware Wizard] screen appears. 8 Click [Finish]. After a moment, the [Found New Hardware Wizard] screen appears again. 9 Repeat steps 2 to 8 until the [Found New Hardware Wizard] screen is cleared. After you repeat steps 2 to 8 four times, the installation of the USB Video Streaming driver is complete. Updating [Device Manager] (Windows®) If the camcorder is connected to the PC with the USB cable before installing [USB Mass Storage Class driver] or [USB Video Streaming driver], the installation might not be performed properly. In this case, follow the procedure described below to update the [Device Manager] and install [USB Mass Storage Class driver] and [USB Video Streaming driver] properly. NOTE: Disconnect any other USB audio devices from PC before performing the following procedure. Installing [USB Mass Storage Class driver] (Windows® 98/98SE only) 1 Use the USB cable to connect the camcorder to the PC. (੬ pg. 9) 2 Select [Start] - [Settings] - [Control Panel]. Double click the [System] icon. 3 Select the [Device Manager] tab. 4 Delete [GR-DVP9*] in [Other devices]. * The model name depends on the connected camcorder. 5 Disconnect the USB cable from the camcorder. Restart the PC. -8- CONTINUED ON NEXT PAGE
-
 1
1 -
2
-
3
-
4
-
5
-
6
-
7
-
8
-
9
-
10
-
11
-
12
-
13
-
14
-
15
-
16
-
17
-
18
-
19
-
20
-
21
-
22
-
23
-
24
-
25
-
26
-
27
-
28
-
29
-
30
-
31
-
32
-
33
-
34
-
35
-
36
-
37
-
38
-
39
-
40
-
41
-
42
-
43
-
44
-
45
-
46
-
47
-
48
-
49
-
50
-
51
-
52
-
53
-
54
-
55
-
56
-
57
-
58
-
59
-
60
-
61
-
62
-
63
-
64
-
65
-
66
-
67
-
68
-
69
-
70
-
71
-
72
-
73
-
74
-
75
-
76
-
77
-
78
-
79
-
80
-
81
-
82
-
83
-
84
-
85
-
86
-
 87
87 -
 88
88 -
 89
89 -
 90
90 -
 91
91 -
 92
92 -
 93
93 -
 94
94 -
 95
95 -
 96
96 -
 97
97 -
98
-
99
-
100
-
101
-
102
-
103
-
104
-
105
-
106
-
107
-
108
-
109
-
110
-
111
-
112
-
113
-
114
-
115
-
116
-
117
-
118
-
119
-
120
-
121
-
122
-
123
-
124
-
125
-
126
-
127
-
128
-
129
-
130
-
131
-
132
-
133
-
134
-
135
-
136
-
137
-
138
-
139
-
140
-
141
-
142
-
143
-
144
-
145
-
146
-
147
-
148
-
149
-
150
 |
 |