JVC GY-HM200U Instruction Manual - Page 112
Int. Mic Wind Cut, Int. Mic Stereo Enhancer, Monitor, Alarm Level, Test Tone, Audio On FULL AUTO
 |
View all JVC GY-HM200U manuals
Add to My Manuals
Save this manual to your list of manuals |
Page 112 highlights
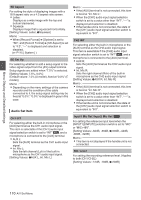
Menu Display and Detailed Settings Int. Mic Wind Cut For selecting whether to cut the low frequencies of the audio input signals (low-cut) from the built-in microphone. Set this item to "On" to reduce wind noise from the microphone. [Setting Values: On, ROff] Memo : 0 This item is enabled in the following cases. 0 When the [CH1] or [CH2] selection switch is set to "INT". O 0 [CH1 INT] is set to "Int. Mic L" or [CH2 INT] is set to "Int. Mic R". (A P110 [ CH1 INT ] ) (A P110 [ CH2 INT ] ) Int. Mic Stereo Enhancer For setting the enhancement level of the stereo effect of the built-in microphone. 0 On: Enhances the stereo effect. 0 Off: Does not enhance the stereo effect. [Setting Values: On, ROff] Memo : 0 This item is enabled in the following cases. 0 Both [CH1] and [CH2] selection switches are set to "INT". O 0 [CH1 INT] is set to "Int. Mic L" and [CH2 INT] is set to "Int. Mic R". (A P110 [ CH1 INT ] ) (A P110 [ CH2 INT ] ) Monitor For setting the audio output from the [x] jack or the speaker. 0 CH1: Outputs only the audio input from [CH1]. 0 CH2: Outputs only the audio input from [CH2]. 0 Mix: Generates a mixed audio output from [CH1] and [CH2]. 0 Stereo: Outputs audio from [CH1] to L and audio from [CH2] to R. [Setting Values: CH1, CH2, Mix, RStereo] Memo : 0 If both [CH1] and [CH2] are input signals of the built-in microphone, "Mix" cannot be selected for the output from the [x] jack. 0 "Stereo" cannot be selected for speaker output. Alarm Level For selecting whether to turn on the warning tone as well as setting the volume. The warning tone is output from the monitor speaker or [x] terminal. [Setting Values: High, Low, ROff] Test Tone For specifying whether to output the audio test signals (1 kHz) during color bar output. [Setting Values: On, ROff] Audio On FULL AUTO For setting whether to enable Auto for audio when Full Auto is enabled using the [FULL AUTO] button. 0 SW Set: The audio recording mode follows the settings below. 0 When the handle unit is connected: Follows the [CH1 AUTO/MANUAL]/[CH2 AUTO/ MANUAL] selection switch setting. 0 When the handle unit is not connected: Follows the MENU setting (AUTO/MANUAL in the audio level setting). 0 Auto: Sets audio recording mode to the forced auto mode. [Setting Values: SW Set, RAuto] 112 A/V Set Menu
-
 1
1 -
2
-
3
-
4
-
5
-
6
-
7
-
8
-
9
-
10
-
11
-
12
-
13
-
14
-
15
-
16
-
17
-
18
-
19
-
20
-
21
-
22
-
23
-
24
-
25
-
26
-
27
-
28
-
29
-
30
-
31
-
32
-
33
-
34
-
35
-
36
-
37
-
38
-
39
-
40
-
41
-
42
-
43
-
44
-
45
-
46
-
47
-
48
-
49
-
50
-
51
-
52
-
53
-
54
-
55
-
56
-
57
-
58
-
59
-
60
-
61
-
62
-
63
-
64
-
65
-
66
-
67
-
68
-
69
-
70
-
71
-
72
-
73
-
74
-
75
-
76
-
77
-
78
-
79
-
80
-
81
-
82
-
83
-
84
-
85
-
86
-
87
-
88
-
89
-
90
-
91
-
92
-
93
-
94
-
95
-
96
-
97
-
98
-
99
-
100
-
101
-
102
-
103
-
104
-
105
-
106
-
 107
107 -
 108
108 -
 109
109 -
 110
110 -
 111
111 -
 112
112 -
 113
113 -
 114
114 -
 115
115 -
 116
116 -
 117
117 -
118
-
119
-
120
-
121
-
122
-
123
-
124
-
125
-
126
-
127
-
128
-
129
-
130
-
131
-
132
-
133
-
134
-
135
-
136
-
137
-
138
-
139
-
140
-
141
-
142
-
143
-
144
-
145
-
146
-
147
-
148
-
149
-
150
-
151
-
152
-
153
-
154
-
155
-
156
-
157
-
158
-
159
-
160
-
161
-
162
-
163
-
164
-
165
-
166
-
167
-
168
-
169
-
170
-
171
-
172
-
173
-
174
-
175
-
176
-
177
-
178
-
179
-
180
-
181
-
182
-
183
-
184
 |
 |
