JVC GY-HM200U Instruction Manual - Page 135
Camera Features, Marker and Safety Zone Displays (Camera Mode Only), Color Bar Output
 |
View all JVC GY-HM200U manuals
Add to My Manuals
Save this manual to your list of manuals |
Page 135 highlights
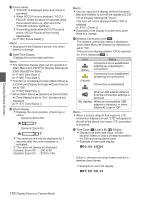
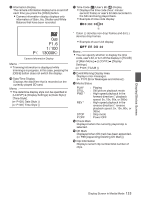
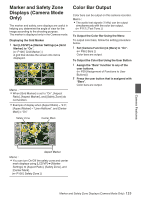
Marker and Safety Zone Displays (Camera Mode Only) The marker and safety zone displays are useful in helping you determine the angle of view for the image according to the shooting purpose. The marker is displayed only in the Camera mode. Displaying the Grid Marker 1 Set [LCD/VF] B [Marker Settings] B [Grid Marker] to "On". (A P106 [ Grid Marker ] ) A grid that divides the screen into 3x3 is displayed. . Memo : 0 When [Grid Marker] is set to "On", [Aspect Ratio], [Aspect Marker], and [Safety Zone] do not function. 0 Example of display when [Aspect Ratio] = "4:3", [Aspect Marker] = "Line+Halftone", and [Center Mark] = "On" Safety Zone Center Mark Color Bar Output Color bars can be output on this camera recorder. Memo : 0 The audio test signals (1 kHz) can be output simultaneously with the color bar output. (A P112 [ Test Tone ] ) To Output the Color Bar Using the Menu To output color bars, follow the setting procedure below. 1 Set [Camera Function] B [Bars] to "On". (A P96 [ Bars ] ) Color bars are output. To Output the Color Bar Using the User Button 1 Assign the "Bars" function to any of the user buttons. (A P39 [Assignment of Functions to User Buttons] ) 2 Press the user button that is assigned with "Bars". Color bars are output. Camera Features . Aspect Marker Memo : 0 You can turn On/Off the safety zone and center mark displays using [LCD/VF] B [Marker Settings] B [Aspect Ratio], [Safety Zone], and [Center Mark]. (A P106 [ Safety Zone ] ) Marker and Safety Zone Displays (Camera Mode Only) 135
-
 1
1 -
2
-
3
-
4
-
5
-
6
-
7
-
8
-
9
-
10
-
11
-
12
-
13
-
14
-
15
-
16
-
17
-
18
-
19
-
20
-
21
-
22
-
23
-
24
-
25
-
26
-
27
-
28
-
29
-
30
-
31
-
32
-
33
-
34
-
35
-
36
-
37
-
38
-
39
-
40
-
41
-
42
-
43
-
44
-
45
-
46
-
47
-
48
-
49
-
50
-
51
-
52
-
53
-
54
-
55
-
56
-
57
-
58
-
59
-
60
-
61
-
62
-
63
-
64
-
65
-
66
-
67
-
68
-
69
-
70
-
71
-
72
-
73
-
74
-
75
-
76
-
77
-
78
-
79
-
80
-
81
-
82
-
83
-
84
-
85
-
86
-
87
-
88
-
89
-
90
-
91
-
92
-
93
-
94
-
95
-
96
-
97
-
98
-
99
-
100
-
101
-
102
-
103
-
104
-
105
-
106
-
107
-
108
-
109
-
110
-
111
-
112
-
113
-
114
-
115
-
116
-
117
-
118
-
119
-
120
-
121
-
122
-
123
-
124
-
125
-
126
-
127
-
128
-
129
-
 130
130 -
 131
131 -
 132
132 -
 133
133 -
 134
134 -
 135
135 -
 136
136 -
 137
137 -
 138
138 -
 139
139 -
 140
140 -
141
-
142
-
143
-
144
-
145
-
146
-
147
-
148
-
149
-
150
-
151
-
152
-
153
-
154
-
155
-
156
-
157
-
158
-
159
-
160
-
161
-
162
-
163
-
164
-
165
-
166
-
167
-
168
-
169
-
170
-
171
-
172
-
173
-
174
-
175
-
176
-
177
-
178
-
179
-
180
-
181
-
182
-
183
-
184
 |
 |
