Lexmark X7550 User's Guide - Page 109
Canceling a scan job, Customizing scan settings using the computer - ocr download
 |
View all Lexmark X7550 manuals
Add to My Manuals
Save this manual to your list of manuals |
Page 109 highlights
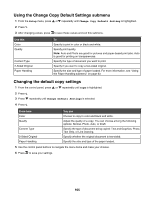
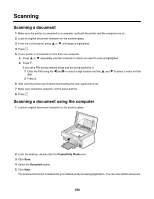
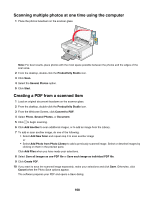
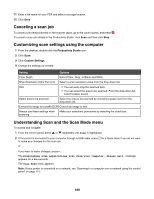
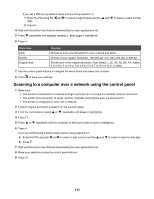
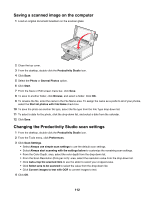
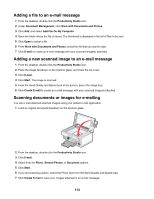
11 Enter a file name for your PDF and select a storage location. 12 Click Save. Canceling a scan job To cancel a job being scanned on the scanner glass, go to the control panel, and press . To cancel a scan job started in the Productivity Studio, click Scan and then click Stop. Customizing scan settings using the computer 1 From the desktop, double-click the Productivity Studio icon. 2 Click Scan. 3 Click Custom Settings. 4 Change the settings as needed. Setting Options Color Depth Select Color, Grey, or Black and White. Scan Resolution (Dots Per Inch) Select a scan resolution value from the drop-down list. Size • You can auto-crop the scanned item. • You can select the area to be scanned. From the drop-down list, select a paper source. Select area to be scanned Select the area to be scanned by choosing a paper size from the drop-down list. Convert the image to text with OCR Convert an image to text. Always use these settings when Make your selections permanent by selecting the check box. scanning Understanding Scan and the Scan Mode menu To access and navigate: 1 From the control panel, press or repeatedly until Scan is highlighted. 2 If the printer is connected to your computer through a USB cable, press to make any changes for this scan job. or for a Quick Scan if you do not want If you want to make changes, press . The Downloading scan applications list from your computer. Please wait. message appears for a few seconds. The Scan Mode menu appears. Note: If your printer is connected on a network, see "Scanning to a computer over a network using the control panel" on page 111. 109
-
 1
1 -
2
-
3
-
4
-
5
-
6
-
7
-
8
-
9
-
10
-
11
-
12
-
13
-
14
-
15
-
16
-
17
-
18
-
19
-
20
-
21
-
22
-
23
-
24
-
25
-
26
-
27
-
28
-
29
-
30
-
31
-
32
-
33
-
34
-
35
-
36
-
37
-
38
-
39
-
40
-
41
-
42
-
43
-
44
-
45
-
46
-
47
-
48
-
49
-
50
-
51
-
52
-
53
-
54
-
55
-
56
-
57
-
58
-
59
-
60
-
61
-
62
-
63
-
64
-
65
-
66
-
67
-
68
-
69
-
70
-
71
-
72
-
73
-
74
-
75
-
76
-
77
-
78
-
79
-
80
-
81
-
82
-
83
-
84
-
85
-
86
-
87
-
88
-
89
-
90
-
91
-
92
-
93
-
94
-
95
-
96
-
97
-
98
-
99
-
100
-
101
-
102
-
103
-
 104
104 -
 105
105 -
 106
106 -
 107
107 -
 108
108 -
 109
109 -
 110
110 -
 111
111 -
 112
112 -
 113
113 -
 114
114 -
115
-
116
-
117
-
118
-
119
-
120
-
121
-
122
-
123
-
124
-
125
-
126
-
127
-
128
-
129
-
130
-
131
-
132
-
133
-
134
-
135
-
136
-
137
-
138
-
139
-
140
-
141
-
142
-
143
-
144
-
145
-
146
-
147
-
148
-
149
-
150
-
151
-
152
-
153
-
154
-
155
-
156
-
157
-
158
-
159
-
160
-
161
-
162
-
163
-
164
-
165
-
166
-
167
-
168
-
169
-
170
-
171
-
172
-
173
-
174
-
175
-
176
-
177
-
178
-
179
-
180
-
181
-
182
-
183
-
184
-
185
-
186
-
187
-
188
-
189
-
190
-
191
-
192
-
193
-
194
-
195
-
196
-
197
-
198
-
199
-
200
-
201
-
202
-
203
-
204
-
205
-
206
-
207
-
208
-
209
-
210
-
211
-
212
-
213
-
214
-
215
-
216
-
217
-
218
-
219
-
220
-
221
-
222
-
223
-
224
-
225
-
226
-
227
-
228
-
229
 |
 |