Lexmark X7550 User's Guide - Page 189
Partial document or photo scans, Cannot scan to a computer over a network, Fax troubleshooting
 |
View all Lexmark X7550 manuals
Add to My Manuals
Save this manual to your list of manuals |
Page 189 highlights
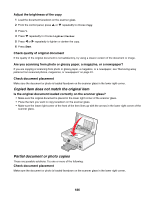
Check document placement Make sure the document or photo is loaded facedown on the scanner glass in the lower right corner. Partial document or photo scans These are possible solutions. Try one or more of the following: Check document placement Make sure the document or photo is loaded facedown on the scanner glass in the upper left corner. Check paper size Make sure the paper size being used matches the size you selected. Check Original Size setting Make sure the Original Size setting is Auto Detect or the size of the original document you are scanning. Cannot scan to a computer over a network See "Scanning to a computer over a network using the control panel" on page 111. Fax troubleshooting Cannot send or receive a fax These are possible solutions. Try one of the following: Check messages If an error message is displayed, follow the instructions on the error message dialog. Check power If the light is not on, see "Power button is not lit" on page 143. Check cable connections Make sure cable connections for the following hardware are secure, if applicable: • Power supply • Telephone • Handset • Answering machine Check the telephone wall jack 1 Plug a telephone into the wall jack. 2 Listen for a dial tone. 3 If you do not hear a dial tone, plug a different telephone into the wall jack. 4 If you still do not hear a dial tone, plug a telephone into a different wall jack. 5 If you hear a dial tone, connect the printer to that wall jack. 189
-
 1
1 -
2
-
3
-
4
-
5
-
6
-
7
-
8
-
9
-
10
-
11
-
12
-
13
-
14
-
15
-
16
-
17
-
18
-
19
-
20
-
21
-
22
-
23
-
24
-
25
-
26
-
27
-
28
-
29
-
30
-
31
-
32
-
33
-
34
-
35
-
36
-
37
-
38
-
39
-
40
-
41
-
42
-
43
-
44
-
45
-
46
-
47
-
48
-
49
-
50
-
51
-
52
-
53
-
54
-
55
-
56
-
57
-
58
-
59
-
60
-
61
-
62
-
63
-
64
-
65
-
66
-
67
-
68
-
69
-
70
-
71
-
72
-
73
-
74
-
75
-
76
-
77
-
78
-
79
-
80
-
81
-
82
-
83
-
84
-
85
-
86
-
87
-
88
-
89
-
90
-
91
-
92
-
93
-
94
-
95
-
96
-
97
-
98
-
99
-
100
-
101
-
102
-
103
-
104
-
105
-
106
-
107
-
108
-
109
-
110
-
111
-
112
-
113
-
114
-
115
-
116
-
117
-
118
-
119
-
120
-
121
-
122
-
123
-
124
-
125
-
126
-
127
-
128
-
129
-
130
-
131
-
132
-
133
-
134
-
135
-
136
-
137
-
138
-
139
-
140
-
141
-
142
-
143
-
144
-
145
-
146
-
147
-
148
-
149
-
150
-
151
-
152
-
153
-
154
-
155
-
156
-
157
-
158
-
159
-
160
-
161
-
162
-
163
-
164
-
165
-
166
-
167
-
168
-
169
-
170
-
171
-
172
-
173
-
174
-
175
-
176
-
177
-
178
-
179
-
180
-
181
-
182
-
183
-
 184
184 -
 185
185 -
 186
186 -
 187
187 -
 188
188 -
 189
189 -
 190
190 -
 191
191 -
 192
192 -
 193
193 -
 194
194 -
195
-
196
-
197
-
198
-
199
-
200
-
201
-
202
-
203
-
204
-
205
-
206
-
207
-
208
-
209
-
210
-
211
-
212
-
213
-
214
-
215
-
216
-
217
-
218
-
219
-
220
-
221
-
222
-
223
-
224
-
225
-
226
-
227
-
228
-
229
 |
 |