Lexmark X7550 User's Guide - Page 177
Cannot print from digital camera using PictBridge, Jams and misfeeds troubleshooting
 |
View all Lexmark X7550 manuals
Add to My Manuals
Save this manual to your list of manuals |
Page 177 highlights
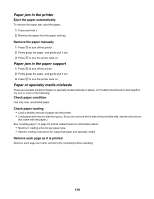
• Printouts have alternating bands of light and dark print • Page prints with different fonts • Printed characters are improperly formed or are not aligned correctly at the left margin • Transparencies or photos contain white lines • Glossy photo paper or transparencies stick together Cannot print from digital camera using PictBridge These are possible solutions. Try one or more of the following: Enable PictBridge printing from camera Enable PictBridge printing on the camera by selecting the correct USB mode. If the camera USB selection is incorrect, the camera will be detected as a USB storage device, or an error message will be displayed on the control panel of the printer. For more information, see the digital camera documentation. Make sure the camera is a PictBridge-enabled digital camera 1 Disconnect the camera. 2 Connect a PictBridge-enabled digital camera to the PictBridge port. See the digital camera documentation to determine whether it is PictBridge-enabled. Check USB cable Use only the USB cable that came with the camera. Remove memory cards Remove any memory cards from the printer. Check messages If an error message appears on the display, see "Error messages on the computer screen" on page 203. Jams and misfeeds troubleshooting How to clear and avoid paper jams To clear the paper path: 1 Pull firmly on the paper to remove it. If you cannot reach the paper because it is too far into the printer, lift the scanner unit to open the printer. 2 Pull the paper out. 3 Close the scanner unit. 4 Press . 5 Reprint any missing pages. To avoid paper jams, do not force paper into the printer. 177
-
 1
1 -
2
-
3
-
4
-
5
-
6
-
7
-
8
-
9
-
10
-
11
-
12
-
13
-
14
-
15
-
16
-
17
-
18
-
19
-
20
-
21
-
22
-
23
-
24
-
25
-
26
-
27
-
28
-
29
-
30
-
31
-
32
-
33
-
34
-
35
-
36
-
37
-
38
-
39
-
40
-
41
-
42
-
43
-
44
-
45
-
46
-
47
-
48
-
49
-
50
-
51
-
52
-
53
-
54
-
55
-
56
-
57
-
58
-
59
-
60
-
61
-
62
-
63
-
64
-
65
-
66
-
67
-
68
-
69
-
70
-
71
-
72
-
73
-
74
-
75
-
76
-
77
-
78
-
79
-
80
-
81
-
82
-
83
-
84
-
85
-
86
-
87
-
88
-
89
-
90
-
91
-
92
-
93
-
94
-
95
-
96
-
97
-
98
-
99
-
100
-
101
-
102
-
103
-
104
-
105
-
106
-
107
-
108
-
109
-
110
-
111
-
112
-
113
-
114
-
115
-
116
-
117
-
118
-
119
-
120
-
121
-
122
-
123
-
124
-
125
-
126
-
127
-
128
-
129
-
130
-
131
-
132
-
133
-
134
-
135
-
136
-
137
-
138
-
139
-
140
-
141
-
142
-
143
-
144
-
145
-
146
-
147
-
148
-
149
-
150
-
151
-
152
-
153
-
154
-
155
-
156
-
157
-
158
-
159
-
160
-
161
-
162
-
163
-
164
-
165
-
166
-
167
-
168
-
169
-
170
-
171
-
 172
172 -
 173
173 -
 174
174 -
 175
175 -
 176
176 -
 177
177 -
 178
178 -
 179
179 -
 180
180 -
 181
181 -
 182
182 -
183
-
184
-
185
-
186
-
187
-
188
-
189
-
190
-
191
-
192
-
193
-
194
-
195
-
196
-
197
-
198
-
199
-
200
-
201
-
202
-
203
-
204
-
205
-
206
-
207
-
208
-
209
-
210
-
211
-
212
-
213
-
214
-
215
-
216
-
217
-
218
-
219
-
220
-
221
-
222
-
223
-
224
-
225
-
226
-
227
-
228
-
229
 |
 |