Netgear FVS338 FVS338 Reference Manual - Page 97
Creating a VPN Tunnel Connection to a VPN Client, Remote LAN IP Address and Subnet Mask
 |
UPC - 606449037197
View all Netgear FVS338 manuals
Add to My Manuals
Save this manual to your list of manuals |
Page 97 highlights
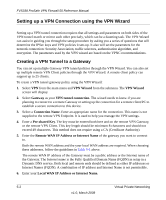
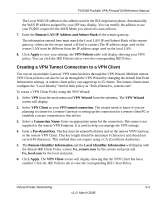
FVS338 ProSafe VPN Firewall 50 Reference Manual The Local WAN IP address is the address used in the IKE negotiation phase. Automatically, the WAN IP address assigned by your ISP may display. You can modify the address to use your FQDN; required if the WAN Mode you selected is auto-rollover. 7. Enter the Remote LAN IP Address and Subnet Mask of the remote gateway. The information entered here must match the Local LAN IP and Subnet Mask of the remote gateway; otherwise the secure tunnel will fail to connect.The IP address range used on the remote LAN must be different from the IP address range used on the local LAN. 8. Click Apply to save your settings. the VPN Policies table will display showing your VPN policy. You can click the IKE Policies tab to view the corresponding IKE Policy. Creating a VPN Tunnel Connection to a VPN Client You can set up multiple Gateway VPN tunnel policies through the VPN Wizard. Multiple remote VPN Client policies can also be set up through the VPN Wizard by changing the default End Point Information settings. A remote client policy can support up to 25 clients. The remote clients must configure the "Local Identity" field in their policy as "PolicyName.fvs_remote.com". To create a VPN Client Policy using the VPN Wizard: 1. Select VPN from the main menu and VPN Wizard from the submenu. The VPN Wizard screen will display. 2. Select VPN Client as your VPN tunnel connection. The wizard needs to know if you are planning to connect to a remote Gateway or setting up the connection for a remote client/PC to establish a secure connection to this device. 3. Select a Connection Name. Enter an appropriate name for the connection. This name is not supplied to the remote VPN Endpoint. It is used to help you manage the VPN settings. 4. Enter a Pre-shared Key. The key must be entered both here and on the remote VPN Gateway, or the remote VPN Client. This key length should be minimum 8 characters and should not exceed 49 characters. This method does not require using a CA (Certificate Authority). 5. The Remote Identifier Information and the Local Identifier Information will display with the default IKE Client Policy values: fvs_remote.com for the remote end point and fvs_local.com for the local end point. 6. Click Apply. The VPN Client screen will display showing that the VPN Client has been enabled. Click the IKE Policies tab to view the corresponding IKE Client Policy. Virtual Private Networking 5-3 v1.0, March 2008
-
 1
1 -
2
-
3
-
4
-
5
-
6
-
7
-
8
-
9
-
10
-
11
-
12
-
13
-
14
-
15
-
16
-
17
-
18
-
19
-
20
-
21
-
22
-
23
-
24
-
25
-
26
-
27
-
28
-
29
-
30
-
31
-
32
-
33
-
34
-
35
-
36
-
37
-
38
-
39
-
40
-
41
-
42
-
43
-
44
-
45
-
46
-
47
-
48
-
49
-
50
-
51
-
52
-
53
-
54
-
55
-
56
-
57
-
58
-
59
-
60
-
61
-
62
-
63
-
64
-
65
-
66
-
67
-
68
-
69
-
70
-
71
-
72
-
73
-
74
-
75
-
76
-
77
-
78
-
79
-
80
-
81
-
82
-
83
-
84
-
85
-
86
-
87
-
88
-
89
-
90
-
91
-
 92
92 -
 93
93 -
 94
94 -
 95
95 -
 96
96 -
 97
97 -
 98
98 -
 99
99 -
 100
100 -
 101
101 -
 102
102 -
103
-
104
-
105
-
106
-
107
-
108
-
109
-
110
-
111
-
112
-
113
-
114
-
115
-
116
-
117
-
118
-
119
-
120
-
121
-
122
-
123
-
124
-
125
-
126
-
127
-
128
-
129
-
130
-
131
-
132
-
133
-
134
-
135
-
136
-
137
-
138
-
139
-
140
-
141
-
142
-
143
-
144
-
145
-
146
-
147
-
148
-
149
-
150
-
151
-
152
-
153
-
154
-
155
-
156
-
157
-
158
-
159
-
160
-
161
-
162
-
163
-
164
-
165
-
166
-
167
-
168
-
169
-
170
-
171
-
172
-
173
-
174
-
175
-
176
-
177
-
178
-
179
-
180
-
181
-
182
-
183
-
184
-
185
-
186
-
187
-
188
-
189
-
190
-
191
-
192
-
193
-
194
-
195
-
196
-
197
-
198
 |
 |
