Netgear GS748TS GS7xxTS User Manual - Page 41
Clock Source, Time Zone Offset, Local, APPLY
 |
UPC - 606449049480
View all Netgear GS748TS manuals
Add to My Manuals
Save this manual to your list of manuals |
Page 41 highlights
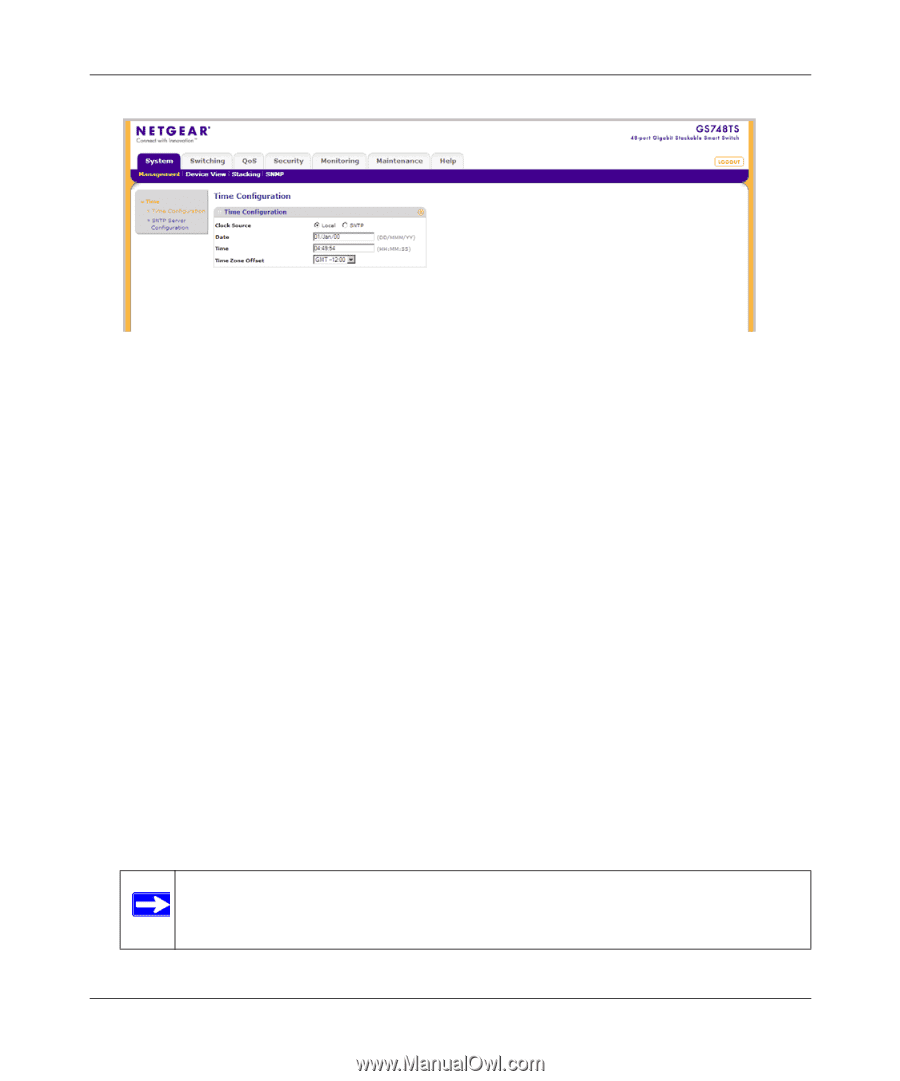
GS700TS Smart Switch Software Administration Manual Figure 3-3 The Time Configuration screen contains the following fields: • Clock Source - Select the source used to set the system clock. The possible field values are: - Local - Indicates system time is set locally. This is the default value. - SNTP - Indicates system time is set via an SNTP server. The Date and Time fields are disabled once you select the SNTP server. • Date - Enter the local system date. The field format is DD/MMM/YY (Day/Month/Year). For example: 04/May/50 (May 4, 2050). • Time - Enter the local system time. The field format is HH:MM:SS. For example: 21:15:03. • Time Zone Offset - Select the difference between Greenwich Mean Time (GMT) and local time. For example, the Time Zone Offset for Paris is GMT +1, while the Time Zone Offset for New York is GMT -5. 2. Select the Clock Source by selecting either Local or SNTP. 3. If you selected Local, then enter the local Date and Time in the provided fields. 4. Select the Time Zone Offset from the list. 5. Click APPLY to update the system settings. Note: If you selected SNTP, you must configure the SNTP servers. See "SNTP Server Configuration" for detailed instructions on configuring the SNTP servers. Managing System Settings 3-6 v1.0, June 2009
-
 1
1 -
2
-
3
-
4
-
5
-
6
-
7
-
8
-
9
-
10
-
11
-
12
-
13
-
14
-
15
-
16
-
17
-
18
-
19
-
20
-
21
-
22
-
23
-
24
-
25
-
26
-
27
-
28
-
29
-
30
-
31
-
32
-
33
-
34
-
35
-
 36
36 -
 37
37 -
 38
38 -
 39
39 -
 40
40 -
 41
41 -
 42
42 -
 43
43 -
 44
44 -
 45
45 -
 46
46 -
47
-
48
-
49
-
50
-
51
-
52
-
53
-
54
-
55
-
56
-
57
-
58
-
59
-
60
-
61
-
62
-
63
-
64
-
65
-
66
-
67
-
68
-
69
-
70
-
71
-
72
-
73
-
74
-
75
-
76
-
77
-
78
-
79
-
80
-
81
-
82
-
83
-
84
-
85
-
86
-
87
-
88
-
89
-
90
-
91
-
92
-
93
-
94
-
95
-
96
-
97
-
98
-
99
-
100
-
101
-
102
-
103
-
104
-
105
-
106
-
107
-
108
-
109
-
110
-
111
-
112
-
113
-
114
-
115
-
116
-
117
-
118
-
119
-
120
-
121
-
122
-
123
-
124
-
125
-
126
-
127
-
128
-
129
-
130
-
131
-
132
-
133
-
134
-
135
-
136
-
137
-
138
-
139
-
140
-
141
-
142
-
143
-
144
-
145
-
146
-
147
-
148
-
149
-
150
-
151
-
152
-
153
-
154
-
155
-
156
-
157
-
158
-
159
-
160
-
161
-
162
-
163
-
164
-
165
-
166
-
167
-
168
-
169
-
170
-
171
-
172
-
173
-
174
-
175
-
176
-
177
-
178
-
179
-
180
-
181
-
182
-
183
-
184
-
185
-
186
-
187
-
188
-
189
-
190
-
191
-
192
-
193
-
194
-
195
-
196
-
197
-
198
-
199
-
200
-
201
-
202
-
203
-
204
-
205
-
206
-
207
-
208
-
209
-
210
-
211
-
212
-
213
-
214
-
215
-
216
-
217
-
218
-
219
-
220
-
221
-
222
-
223
-
224
-
225
-
226
-
227
-
228
-
229
-
230
-
231
-
232
 |
 |