Oki MC770 MC770/780 User Guide - Advanced - Page 231
GENERAL, Changing the display language, Setting the reversed display, Adjusting the display setting
 |
View all Oki MC770 manuals
Add to My Manuals
Save this manual to your list of manuals |
Page 231 highlights
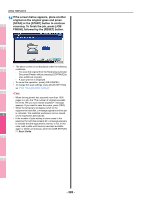
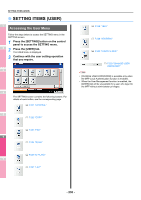
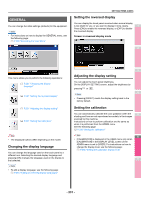
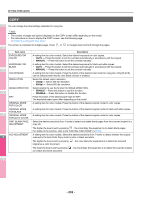
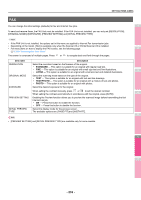
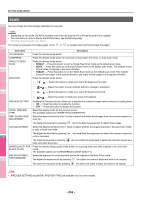
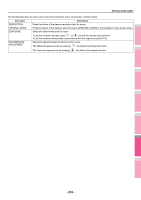
GENERAL You can change the initial settings (defaults) for the equipment. Memo • For instructions on how to display the GENERAL menu, see the following page: P.230 "Accessing the User Menu" SETTING ITEMS (USER) Setting the reversed display You can display the touch panel reversed when normal display is too bright for you, or you want to display it more clearly. 1 Press [ON] to enable the reversed display, or [OFF] to disable the reversed display. Screen in reversed display mode 2 This menu allows you to perform the following operations: P.231 "Changing the display language" P.231 "Setting the reversed display" P.231 "Adjusting the display setting" P.231 "Setting the calibration" Note • The displayed buttons differ depending on the model. Changing the display language You can change the language used on the touch panel to a different one. Selecting the desired display language and pressing [OK] changes the language used on the display to that selected. Memo • To add a display language, see the following page: P.260 "Adding or removing display languages" 3 Adjusting the display setting You can adjust the touch panel brightness. On the DISPLAY SETTING screen, adjust the brightness by pressing or . 4 Memo • Pressing [RESET] resets the display setting back to the factory default. Setting the calibration You can automatically calibrate the color gradation when the shading and hue are not reproduced accurately in the images 5 scanned by this machine. Instructions on how to perform calibration are the same as when it is performed from the ADMIN menu. See the following page: P.258 "Setting the calibration" Note 6 • [CALIBRATION] is displayed in the USER menu only when [CALIBRATION] in the DISPLAY LEVEL screen of the ADMIN menu is set to [USER]. For instructions on how to change the display level, see the following page: P.258 "Setting the calibration display level" 7 - 231 -
-
 1
1 -
2
-
3
-
4
-
5
-
6
-
7
-
8
-
9
-
10
-
11
-
12
-
13
-
14
-
15
-
16
-
17
-
18
-
19
-
20
-
21
-
22
-
23
-
24
-
25
-
26
-
27
-
28
-
29
-
30
-
31
-
32
-
33
-
34
-
35
-
36
-
37
-
38
-
39
-
40
-
41
-
42
-
43
-
44
-
45
-
46
-
47
-
48
-
49
-
50
-
51
-
52
-
53
-
54
-
55
-
56
-
57
-
58
-
59
-
60
-
61
-
62
-
63
-
64
-
65
-
66
-
67
-
68
-
69
-
70
-
71
-
72
-
73
-
74
-
75
-
76
-
77
-
78
-
79
-
80
-
81
-
82
-
83
-
84
-
85
-
86
-
87
-
88
-
89
-
90
-
91
-
92
-
93
-
94
-
95
-
96
-
97
-
98
-
99
-
100
-
101
-
102
-
103
-
104
-
105
-
106
-
107
-
108
-
109
-
110
-
111
-
112
-
113
-
114
-
115
-
116
-
117
-
118
-
119
-
120
-
121
-
122
-
123
-
124
-
125
-
126
-
127
-
128
-
129
-
130
-
131
-
132
-
133
-
134
-
135
-
136
-
137
-
138
-
139
-
140
-
141
-
142
-
143
-
144
-
145
-
146
-
147
-
148
-
149
-
150
-
151
-
152
-
153
-
154
-
155
-
156
-
157
-
158
-
159
-
160
-
161
-
162
-
163
-
164
-
165
-
166
-
167
-
168
-
169
-
170
-
171
-
172
-
173
-
174
-
175
-
176
-
177
-
178
-
179
-
180
-
181
-
182
-
183
-
184
-
185
-
186
-
187
-
188
-
189
-
190
-
191
-
192
-
193
-
194
-
195
-
196
-
197
-
198
-
199
-
200
-
201
-
202
-
203
-
204
-
205
-
206
-
207
-
208
-
209
-
210
-
211
-
212
-
213
-
214
-
215
-
216
-
217
-
218
-
219
-
220
-
221
-
222
-
223
-
224
-
225
-
 226
226 -
 227
227 -
 228
228 -
 229
229 -
 230
230 -
 231
231 -
 232
232 -
 233
233 -
 234
234 -
 235
235 -
 236
236 -
237
-
238
-
239
-
240
-
241
-
242
-
243
-
244
-
245
-
246
-
247
-
248
-
249
-
250
-
251
-
252
-
253
-
254
-
255
-
256
-
257
-
258
-
259
-
260
-
261
-
262
-
263
-
264
-
265
-
266
-
267
-
268
-
269
-
270
-
271
-
272
-
273
-
274
-
275
-
276
-
277
-
278
-
279
-
280
-
281
-
282
-
283
-
284
-
285
-
286
-
287
-
288
-
289
-
290
-
291
-
292
-
293
-
294
-
295
-
296
-
297
-
298
-
299
-
300
-
301
-
302
-
303
-
304
-
305
-
306
-
307
-
308
-
309
-
310
-
311
-
312
-
313
-
314
-
315
-
316
-
317
-
318
-
319
-
320
-
321
-
322
-
323
-
324
-
325
-
326
-
327
-
328
-
329
-
330
-
331
-
332
-
333
-
334
-
335
-
336
-
337
-
338
-
339
-
340
-
341
-
342
-
343
-
344
-
345
-
346
-
347
-
348
-
349
-
350
-
351
-
352
-
353
-
354
-
355
-
356
-
357
 |
 |
