Pioneer AVH-4100NEX Owner's Manual - Page 10
panel until it clicks into place. - memory full
 |
View all Pioneer AVH-4100NEX manuals
Add to My Manuals
Save this manual to your list of manuals |
Page 10 highlights
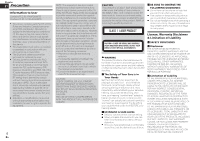
Chapter 02 Important Handle the front panel with care when removing or attaching it. Avoid subjecting the front panel to exces- sive shock. Keep the front panel out of direct sun- light and high temperatures. If removed, replace the front panel on the unit before starting up your vehicle. ■■Removing the front panel 1 Press the button. 2 Touch the following key. The front panel automatically slides toward you. 2 Push on the bottom of the front panel until it clicks into place. 3 Slide the dial at the bottom of the front panel to the right, and lift up the front panel while pushing down on the dial. 4 Put the front panel into the provided protective case for safe keeping. ■■Attaching the front panel 1 Slide the front panel into the top of the unit and push it into place. Slide the inserter on the front panel into the insertion slot on top of the unit and push it into place. Notes on using the LCD panel WARNING Keep hands and fingers clear of this product when opening, closing, or adjusting the LCD panel. Be especially cautious of children's hands and fingers. Do not use with the LCD panel left open. If the LCD panel is left open, it may result in injury in the event of an accident. CAUTION Do not open or close the LCD panel by force. This may cause a malfunction. Do not operate this product until the LCD panel has completely opened or closed. If this product is operated while the LCD panel is opening or closing, the LCD panel may stop at that angle for safety. Do not place a glass or can on the open LCD panel. Doing so may break this product. 10 En 2 Touch the following key. Adjusting the LCD panel angle 1 Press the button. 2 Touch the following keys to adjust the angle of the LCD panel. Laying the panel down. Opens the LCD panel. 3 Insert a disc into the disc-loading slot. The disc is loaded, and the LCD panel closes. Returning the panel to the upright position. 3 Touch the following key. Returns to the previous screen. Ejecting a disc 1 Press the button. 2 Touch the following key. The LCD panel opens, and the disc is ejected. p The adjusted angle of the LCD panel will be memorized and the LCD panel will automatically return to that angle the next time the LCD panel is opened or closed. Inserting/ejecting/connecting media CAUTION Do not insert anything other than a disc into the disc-loading slot. Do not insert anything other than SD memory cards into the SD card slot. Ejecting an SD memory card during data transfer can damage the SD memory card. Be sure to eject the SD memory card by the procedure described in this manual. Do not press the button when an SD memory card is not fully inserted. Doing so may damage the card. Do not press the button before an SD memory card has been completely removed. Doing so may damage the card. ■■Inserting and ejecting a disc Inserting a disc 3 Remove the disc, and press the button. The LCD panel closes. ■■Inserting and ejecting an SD memory card p This system is not compatible with the Multi Media Card (MMC). p Compatibility with all SD memory cards is not guaranteed. p This product may not achieve optimum performance with some SD memory cards. Inserting an SD memory card 1 Press the button. 2 Touch the following key. Opens the LCD panel. 3 Insert an SD memory card into the SD card slot. Insert it with the label surface face-up and press the card until it clicks and completely locks. 1 Press the button.
-
 1
1 -
2
-
3
-
4
-
 5
5 -
 6
6 -
 7
7 -
 8
8 -
 9
9 -
 10
10 -
 11
11 -
 12
12 -
 13
13 -
 14
14 -
 15
15 -
16
-
17
-
18
-
19
-
20
-
21
-
22
-
23
-
24
-
25
-
26
-
27
-
28
-
29
-
30
-
31
-
32
-
33
-
34
-
35
-
36
-
37
-
38
-
39
-
40
-
41
-
42
-
43
-
44
-
45
-
46
-
47
-
48
-
49
-
50
-
51
-
52
-
53
-
54
-
55
-
56
-
57
-
58
-
59
-
60
-
61
-
62
-
63
-
64
-
65
-
66
-
67
-
68
-
69
-
70
-
71
-
72
-
73
-
74
-
75
-
76
-
77
-
78
-
79
-
80
-
81
-
82
-
83
-
84
-
85
-
86
-
87
-
88
-
89
-
90
-
91
-
92
-
93
-
94
-
95
-
96
-
97
-
98
-
99
-
100
-
101
-
102
-
103
-
104
-
105
-
106
-
107
-
108
-
109
-
110
-
111
-
112
-
113
-
114
-
115
-
116
-
117
-
118
-
119
-
120
-
121
-
122
-
123
-
124
-
125
-
126
-
127
-
128
-
129
-
130
-
131
-
132
-
133
-
134
-
135
-
136
-
137
-
138
-
139
-
140
-
141
-
142
-
143
-
144
-
145
-
146
-
147
-
148
-
149
-
150
-
151
-
152
-
153
-
154
-
155
-
156
-
157
-
158
-
159
-
160
-
161
-
162
-
163
-
164
-
165
-
166
-
167
-
168
-
169
-
170
-
171
-
172
-
173
-
174
-
175
-
176
-
177
-
178
-
179
-
180
-
181
-
182
-
183
-
184
-
185
-
186
-
187
-
188
-
189
-
190
-
191
-
192
-
193
-
194
-
195
-
196
-
197
-
198
-
199
-
200
-
201
-
202
-
203
-
204
-
205
-
206
-
207
-
208
-
209
-
210
-
211
-
212
-
213
-
214
-
215
-
216
-
217
-
218
-
219
-
220
-
221
-
222
-
223
-
224
-
225
-
226
-
227
-
228
-
229
-
230
-
231
-
232
-
233
-
234
-
235
-
236
-
237
-
238
-
239
-
240
-
241
-
242
-
243
-
244
-
245
-
246
-
247
-
248
-
249
-
250
-
251
-
252
-
253
-
254
-
255
-
256
-
257
-
258
-
259
-
260
-
261
-
262
-
263
-
264
-
265
-
266
-
267
-
268
-
269
-
270
-
271
-
272
-
273
-
274
-
275
-
276
-
277
-
278
-
279
-
280
-
281
-
282
-
283
-
284
-
285
-
286
-
287
-
288
-
289
-
290
-
291
-
292
-
293
-
294
-
295
-
296
 |
 |
