Pioneer AVH-4100NEX Owner's Manual - Page 30
video files
 |
View all Pioneer AVH-4100NEX manuals
Add to My Manuals
Save this manual to your list of manuals |
Page 30 highlights
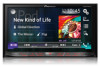
Chapter 09 : Repeats just the current folder. : Repeats just the current file. Music Browse mode (default): Repeats all files. : Repeats just the current file. Folder Browse mode (default): Repeats all files. : Repeats the current folder. : Repeats just the current file. Switching the media file type When playing a digital media containing a mixture of various media file types, you can switch between media file types to play. 1 Touch the following key. Displays the pop-up menu for selecting a media file type to play on the disc or in the external storage device (USB, SD). 2 Touch the item you want to set. Music: Switches the media file type to music (compressed audio). Video: Switches the media file type to video. CD-DA: Switches the media file type to CD (audio data (CD-DA)). Photo: Switches the media file type to still image (JPEG data). Operating with the hardware buttons Press the TRK button. You can skip files forward or backward. Press and hold the TRK button. You can perform fast reverse or fast forward. 30 En Playing compressed video files You can play compressed video files stored on a disc or in an external storage device (USB, SD) using the built-in drive of this product. This section describes how. For details, refer to Media compatibility chart on page 88. CAUTION For safety reasons, video images cannot be viewed while your vehicle is in motion. To view video images, you must stop in a safe place and apply the parking brake. Using the touch panel keys Example: Disc 1 23 4 5 6 h 7 g 8 f 9 e a d cb a 1 Displays the source list. For details, refer to Selecting a front source on the source list on page 13. 2 Displays the Time and date setting screen. For details, refer to Setting the time and date on page 70. 3 Displays the Setting menu screen. 4 Recalls equalizer curves. For details, refer to Using the equalizer on page 64. 5 Selects a file from the list. For details, refer to Selecting files from the file name list on page 31. 6 Hides the touch panel keys. Touching this area hides the touch panel keys. p Touch anywhere on the LCD screen to display the touch panel keys again. 7 Sets a repeat play range. For details, refer to Setting a repeat play range on page 31. 8 Switches the subtitle language. With DivX featuring multi-subtitle recordings, you can switch between subtitle languages during playback. 9 Displays the Phone menu screen. For details, refer to Displaying the phone menu on page 16. a Skips files forward or backward. b Switches the audio language. With DivX files that provide audio playback in different languages and different audio systems (Dolby Digital, DTS, etc.), you can switch between languages or audio systems during playback. c Changes the playback point by dragging the key. For details, refer to Operating the time bar on page 14. d Moves ahead one frame (frame-byframe playback) or slows down playback speed (slow-motion playback). For details, refer to Frame-by-frame playback on page 31. For details, refer to Slow motion playback on page 31. e Switches the media file type. For details, refer to Switching the media file type on page 31. f Switches between playback and pause. g Changes the wide screen mode. For details, refer to Changing the wide screen mode on page 71. h Stops playback. Reading the screen Example: Disc 1 3 2 Play time indicator Shows the elapsed playing time within the current file. 3 Current file information : File name Shows the name of the file currently playing. : Folder name Shows the name of the folder containing the file currently playing. Starting procedure (for Disc) 1 Display the AV source selection screen. For details of the operations, refer to Displaying the AV operation screen on page 12. 2 Insert the disc you want to play into the disc-loading slot. The source changes and then playback will start. For details, refer to Inserting and ejecting a disc on page 10. p If the disc is already set, touch [Disc] on the source list or on the AV source selection screen. For details, refer to Selecting a front source on the source list on page 13. For details, refer to Selecting a front source on the AV source selection screen on page 13. 3 Use the touch panel keys on the screen to control the disc. For details, refer to Using the touch panel keys on page 30. Starting procedure (for USB/ SD) 1 Display the AV source selection screen. For details of the operations, refer to Displaying the AV operation screen on page 12. 2 1 Current time and date
-
 1
1 -
2
-
3
-
4
-
5
-
6
-
7
-
8
-
9
-
10
-
11
-
12
-
13
-
14
-
15
-
16
-
17
-
18
-
19
-
20
-
21
-
22
-
23
-
24
-
 25
25 -
 26
26 -
 27
27 -
 28
28 -
 29
29 -
 30
30 -
 31
31 -
 32
32 -
 33
33 -
 34
34 -
 35
35 -
36
-
37
-
38
-
39
-
40
-
41
-
42
-
43
-
44
-
45
-
46
-
47
-
48
-
49
-
50
-
51
-
52
-
53
-
54
-
55
-
56
-
57
-
58
-
59
-
60
-
61
-
62
-
63
-
64
-
65
-
66
-
67
-
68
-
69
-
70
-
71
-
72
-
73
-
74
-
75
-
76
-
77
-
78
-
79
-
80
-
81
-
82
-
83
-
84
-
85
-
86
-
87
-
88
-
89
-
90
-
91
-
92
-
93
-
94
-
95
-
96
-
97
-
98
-
99
-
100
-
101
-
102
-
103
-
104
-
105
-
106
-
107
-
108
-
109
-
110
-
111
-
112
-
113
-
114
-
115
-
116
-
117
-
118
-
119
-
120
-
121
-
122
-
123
-
124
-
125
-
126
-
127
-
128
-
129
-
130
-
131
-
132
-
133
-
134
-
135
-
136
-
137
-
138
-
139
-
140
-
141
-
142
-
143
-
144
-
145
-
146
-
147
-
148
-
149
-
150
-
151
-
152
-
153
-
154
-
155
-
156
-
157
-
158
-
159
-
160
-
161
-
162
-
163
-
164
-
165
-
166
-
167
-
168
-
169
-
170
-
171
-
172
-
173
-
174
-
175
-
176
-
177
-
178
-
179
-
180
-
181
-
182
-
183
-
184
-
185
-
186
-
187
-
188
-
189
-
190
-
191
-
192
-
193
-
194
-
195
-
196
-
197
-
198
-
199
-
200
-
201
-
202
-
203
-
204
-
205
-
206
-
207
-
208
-
209
-
210
-
211
-
212
-
213
-
214
-
215
-
216
-
217
-
218
-
219
-
220
-
221
-
222
-
223
-
224
-
225
-
226
-
227
-
228
-
229
-
230
-
231
-
232
-
233
-
234
-
235
-
236
-
237
-
238
-
239
-
240
-
241
-
242
-
243
-
244
-
245
-
246
-
247
-
248
-
249
-
250
-
251
-
252
-
253
-
254
-
255
-
256
-
257
-
258
-
259
-
260
-
261
-
262
-
263
-
264
-
265
-
266
-
267
-
268
-
269
-
270
-
271
-
272
-
273
-
274
-
275
-
276
-
277
-
278
-
279
-
280
-
281
-
282
-
283
-
284
-
285
-
286
-
287
-
288
-
289
-
290
-
291
-
292
-
293
-
294
-
295
-
296
 |
 |
