Ricoh Aficio SP 5210SR Copy Reference - Page 171
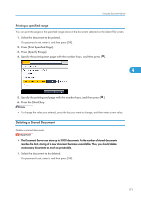
Sample print, Printing the first Select File screen.
 |
View all Ricoh Aficio SP 5210SR manuals
Add to My Manuals
Save this manual to your list of manuals |
Page 171 highlights
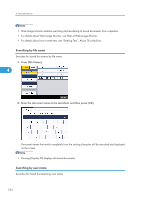
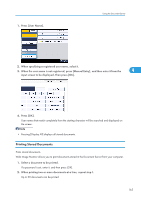
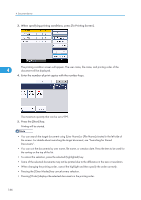
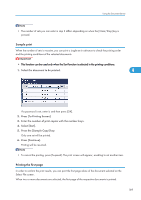
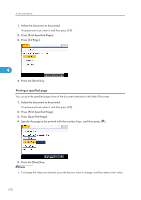
Using the Document Server • The number of sets you can enter in step 3 differs depending on when the [Clear/Stop] key is pressed. Sample print When the number of sets is massive, you can print a single set in advance to check the printing order and the printing conditions of the selected documents. • This function can be used only when the Sort function is selected in the printing conditions. 1. Select the document to be printed. 4 If a password is set, enter it, and then press [OK]. 2. Press [To Printing Screen]. 3. Enter the number of print copies with the number keys. 4. Select [Sort]. 5. Press the [Sample Copy] key. Only one set will be printed. 6. Press [Continue]. Printing will be resumed. • To cancel the printing, press [Suspend]. The print screen will appear, enabling to set another item. Printing the first page In order to confirm the print results, you can print the first page alone of the document selected on the Select File screen. When two or more documents are selected, the first page of the respective documents is printed. 169
-
 1
1 -
2
-
3
-
4
-
5
-
6
-
7
-
8
-
9
-
10
-
11
-
12
-
13
-
14
-
15
-
16
-
17
-
18
-
19
-
20
-
21
-
22
-
23
-
24
-
25
-
26
-
27
-
28
-
29
-
30
-
31
-
32
-
33
-
34
-
35
-
36
-
37
-
38
-
39
-
40
-
41
-
42
-
43
-
44
-
45
-
46
-
47
-
48
-
49
-
50
-
51
-
52
-
53
-
54
-
55
-
56
-
57
-
58
-
59
-
60
-
61
-
62
-
63
-
64
-
65
-
66
-
67
-
68
-
69
-
70
-
71
-
72
-
73
-
74
-
75
-
76
-
77
-
78
-
79
-
80
-
81
-
82
-
83
-
84
-
85
-
86
-
87
-
88
-
89
-
90
-
91
-
92
-
93
-
94
-
95
-
96
-
97
-
98
-
99
-
100
-
101
-
102
-
103
-
104
-
105
-
106
-
107
-
108
-
109
-
110
-
111
-
112
-
113
-
114
-
115
-
116
-
117
-
118
-
119
-
120
-
121
-
122
-
123
-
124
-
125
-
126
-
127
-
128
-
129
-
130
-
131
-
132
-
133
-
134
-
135
-
136
-
137
-
138
-
139
-
140
-
141
-
142
-
143
-
144
-
145
-
146
-
147
-
148
-
149
-
150
-
151
-
152
-
153
-
154
-
155
-
156
-
157
-
158
-
159
-
160
-
161
-
162
-
163
-
164
-
165
-
 166
166 -
 167
167 -
 168
168 -
 169
169 -
 170
170 -
 171
171 -
 172
172 -
 173
173 -
 174
174 -
 175
175 -
 176
176 -
177
-
178
-
179
-
180
-
181
-
182
-
183
-
184
-
185
-
186
-
187
-
188
-
189
-
190
-
191
-
192
-
193
-
194
-
195
-
196
-
197
-
198
-
199
-
200
-
201
-
202
-
203
-
204
-
205
-
206
-
207
-
208
 |
 |
