Ricoh Aficio SP 5210SR Copy Reference - Page 34
Original Settng, and then press [Auto Reduce / Enlarge]. For details, see Auto Reduce
 |
View all Ricoh Aficio SP 5210SR manuals
Add to My Manuals
Save this manual to your list of manuals |
Page 34 highlights
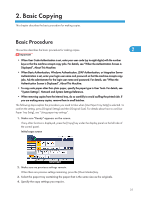
2. Basic Copying 5. Enter the number of copies with the number keys. The maximum copy quantity that can be set is 999. 6. Place the originals in the orientation displayed at Original Settng. 7. Press the [Start] key. The machine starts copying. 2 When placing originals on the exposure glass, press the [ ] key after all originals are scanned. 8. When the copy job is finished, press the [Clear Modes] key to clear the settings. • After logging in the machine, be sure to log out of it to prevent unauthorized usage. • To stop the machine during a multi-copy run, press the [Clear/Stop] key. • To cancel all copy functions and return the machine to the default condition, press the [Clear Modes] key. • To clear entered values, press the [Clear/Stop] key or [Cancel] on the screen. • To confirm settings, press [Check Modes]. • You can change the maximum copy quantity under Max. Copy Quantity in User Tools. For details about Max. Copy Quantity, see "General Features". • The machine cannot detect the size of the original automatically. Specify the original size. However, if [Use Paper Tray Settg] is specified in Original Settings, you do not have to specify the size of the original. For details about how to specify the original size, see "Specifying Original Sizes". For details about [Use Paper Tray Settg], see "Using paper tray settings". • You can specify a regular size or a custom size for the originals. For details about the regular sizes you can select, see "Regular sizes". For details about the custom sizes, see "Custom sizes". • To copy originals onto paper, or originals onto paper, specify the original size in "Original Settng", and then press [Auto Reduce / Enlarge]. For details, see "Auto Reduce / Enlarge". • Certain functions require you to specify the size of the originals. For details, see the procedures of the function that you want to use. • p.27 "Specifying Original Sizes" • p.28 "Using paper tray settings" • p.28 "Regular sizes" • p.29 "Custom sizes" • p.54 "Auto Reduce / Enlarge" • p.177 "General Features" 32
-
 1
1 -
2
-
3
-
4
-
5
-
6
-
7
-
8
-
9
-
10
-
11
-
12
-
13
-
14
-
15
-
16
-
17
-
18
-
19
-
20
-
21
-
22
-
23
-
24
-
25
-
26
-
27
-
28
-
 29
29 -
 30
30 -
 31
31 -
 32
32 -
 33
33 -
 34
34 -
 35
35 -
 36
36 -
 37
37 -
 38
38 -
 39
39 -
40
-
41
-
42
-
43
-
44
-
45
-
46
-
47
-
48
-
49
-
50
-
51
-
52
-
53
-
54
-
55
-
56
-
57
-
58
-
59
-
60
-
61
-
62
-
63
-
64
-
65
-
66
-
67
-
68
-
69
-
70
-
71
-
72
-
73
-
74
-
75
-
76
-
77
-
78
-
79
-
80
-
81
-
82
-
83
-
84
-
85
-
86
-
87
-
88
-
89
-
90
-
91
-
92
-
93
-
94
-
95
-
96
-
97
-
98
-
99
-
100
-
101
-
102
-
103
-
104
-
105
-
106
-
107
-
108
-
109
-
110
-
111
-
112
-
113
-
114
-
115
-
116
-
117
-
118
-
119
-
120
-
121
-
122
-
123
-
124
-
125
-
126
-
127
-
128
-
129
-
130
-
131
-
132
-
133
-
134
-
135
-
136
-
137
-
138
-
139
-
140
-
141
-
142
-
143
-
144
-
145
-
146
-
147
-
148
-
149
-
150
-
151
-
152
-
153
-
154
-
155
-
156
-
157
-
158
-
159
-
160
-
161
-
162
-
163
-
164
-
165
-
166
-
167
-
168
-
169
-
170
-
171
-
172
-
173
-
174
-
175
-
176
-
177
-
178
-
179
-
180
-
181
-
182
-
183
-
184
-
185
-
186
-
187
-
188
-
189
-
190
-
191
-
192
-
193
-
194
-
195
-
196
-
197
-
198
-
199
-
200
-
201
-
202
-
203
-
204
-
205
-
206
-
207
-
208
 |
 |