Ricoh SP C250DN Operating Instructions - Page 19
Getting Started, Guide to Components, Exterior: Front View - cartridges
 |
View all Ricoh SP C250DN manuals
Add to My Manuals
Save this manual to your list of manuals |
Page 19 highlights
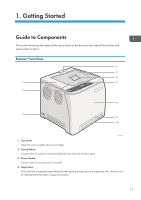
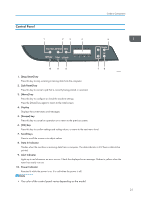
1. Getting Started Guide to Components This section introduces the names of the various parts on the front and rear side of the machine and outlines their functions. Exterior: Front View 4 5 6 1 7 2 8 3 9 10 DAC023 1. Top Cover Open this cover to replace the print cartridge. 2. Control Panel Contains keys for machine control and indicators that show the machine status. 3. Power Switch Use this switch to turn the power on and off. 4. Stop Fences Pull up this fence to prevent paper falling off when printing a large amount of paper at a time. The fence can be adjusted at the A4/Letter or Legal size position. 17
-
 1
1 -
2
-
3
-
4
-
5
-
6
-
7
-
8
-
9
-
10
-
11
-
12
-
13
-
 14
14 -
 15
15 -
 16
16 -
 17
17 -
 18
18 -
 19
19 -
 20
20 -
 21
21 -
 22
22 -
 23
23 -
 24
24 -
25
-
26
-
27
-
28
-
29
-
30
-
31
-
32
-
33
-
34
-
35
-
36
-
37
-
38
-
39
-
40
-
41
-
42
-
43
-
44
-
45
-
46
-
47
-
48
-
49
-
50
-
51
-
52
-
53
-
54
-
55
-
56
-
57
-
58
-
59
-
60
-
61
-
62
-
63
-
64
-
65
-
66
-
67
-
68
-
69
-
70
-
71
-
72
-
73
-
74
-
75
-
76
-
77
-
78
-
79
-
80
-
81
-
82
-
83
-
84
-
85
-
86
-
87
-
88
-
89
-
90
-
91
-
92
-
93
-
94
-
95
-
96
-
97
-
98
-
99
-
100
-
101
-
102
-
103
-
104
-
105
-
106
-
107
-
108
-
109
-
110
-
111
-
112
-
113
-
114
-
115
-
116
-
117
-
118
-
119
-
120
-
121
-
122
-
123
-
124
-
125
-
126
-
127
-
128
-
129
-
130
-
131
-
132
-
133
-
134
-
135
-
136
-
137
-
138
-
139
-
140
-
141
-
142
-
143
-
144
-
145
-
146
-
147
-
148
-
149
-
150
-
151
-
152
-
153
-
154
-
155
-
156
-
157
-
158
-
159
-
160
-
161
-
162
-
163
-
164
-
165
-
166
-
167
-
168
-
169
-
170
-
171
-
172
-
173
-
174
-
175
-
176
-
177
-
178
-
179
-
180
-
181
-
182
-
183
-
184
-
185
-
186
-
187
-
188
-
189
-
190
-
191
-
192
-
193
-
194
-
195
-
196
-
197
-
198
-
199
-
200
-
201
-
202
-
203
-
204
-
205
-
206
-
207
-
208
 |
 |
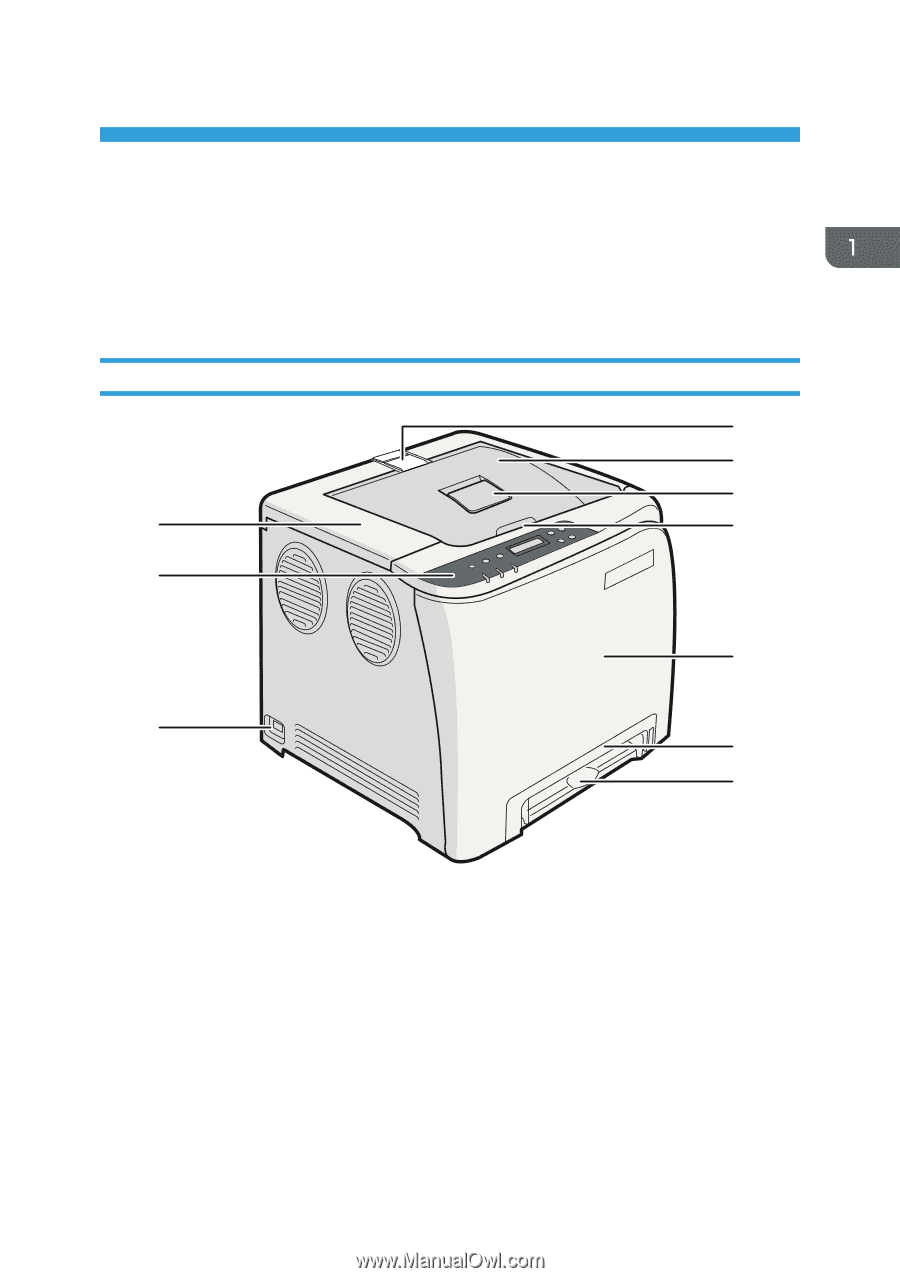
1. Getting Started
Guide to Components
This section introduces the names of the various parts on the front and rear side of the machine and
outlines their functions.
Exterior: Front View
1
2
3
4
5
6
7
8
9
10
DAC023
1.
Top Cover
Open this cover to replace the print cartridge.
2.
Control Panel
Contains keys for machine control and indicators that show the machine status.
3.
Power Switch
Use this switch to turn the power on and off.
4.
Stop Fences
Pull up this fence to prevent paper falling off when printing a large amount of paper at a time. The fence can
be adjusted at the A4/Letter or Legal size position.
17