Ricoh SP C250DN Operating Instructions - Page 76
What Can Be Done on this Machine, Exiting PictBridge
 |
View all Ricoh SP C250DN manuals
Add to My Manuals
Save this manual to your list of manuals |
Page 76 highlights
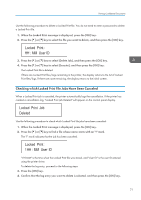
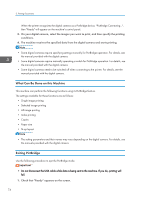
3. Printing Documents When the printer recognizes the digital camera as a PictBridge device, "PictBridge Connecting...", then "Ready" will appear on the machine's control panel. 3. On your digital camera, select the images you want to print, and then specify the printing conditions. 4. The machine receives the specified data from the digital camera and starts printing. • Some digital cameras require specifying settings manually for PictBridge operation. For details, see the manual provided with the digital camera. • Some digital cameras require manually operating a switch for PictBridge operation. For details, see the manual provided with the digital camera. • Some digital cameras need to be switched off when connecting to the printer. For details, see the manual provided with the digital camera. What Can Be Done on this Machine This machine can perform the following functions using its PictBridge feature. The settings available for these functions are as follows: • Single image printing • Selected image printing • All image printing • Index printing • Copies • Paper size • N-up layout • The setting parameters and their names may vary depending on the digital camera. For details, see the manuals provided with the digital camera. Exiting PictBridge Use the following procedure to quit the PictBridge mode. • Do not disconnect the USB cable while data is being sent to the machine. If you do, printing will fail. 1. Check that "Ready" appears on the screen. 74
-
 1
1 -
2
-
3
-
4
-
5
-
6
-
7
-
8
-
9
-
10
-
11
-
12
-
13
-
14
-
15
-
16
-
17
-
18
-
19
-
20
-
21
-
22
-
23
-
24
-
25
-
26
-
27
-
28
-
29
-
30
-
31
-
32
-
33
-
34
-
35
-
36
-
37
-
38
-
39
-
40
-
41
-
42
-
43
-
44
-
45
-
46
-
47
-
48
-
49
-
50
-
51
-
52
-
53
-
54
-
55
-
56
-
57
-
58
-
59
-
60
-
61
-
62
-
63
-
64
-
65
-
66
-
67
-
68
-
69
-
70
-
 71
71 -
 72
72 -
 73
73 -
 74
74 -
 75
75 -
 76
76 -
 77
77 -
 78
78 -
 79
79 -
 80
80 -
 81
81 -
82
-
83
-
84
-
85
-
86
-
87
-
88
-
89
-
90
-
91
-
92
-
93
-
94
-
95
-
96
-
97
-
98
-
99
-
100
-
101
-
102
-
103
-
104
-
105
-
106
-
107
-
108
-
109
-
110
-
111
-
112
-
113
-
114
-
115
-
116
-
117
-
118
-
119
-
120
-
121
-
122
-
123
-
124
-
125
-
126
-
127
-
128
-
129
-
130
-
131
-
132
-
133
-
134
-
135
-
136
-
137
-
138
-
139
-
140
-
141
-
142
-
143
-
144
-
145
-
146
-
147
-
148
-
149
-
150
-
151
-
152
-
153
-
154
-
155
-
156
-
157
-
158
-
159
-
160
-
161
-
162
-
163
-
164
-
165
-
166
-
167
-
168
-
169
-
170
-
171
-
172
-
173
-
174
-
175
-
176
-
177
-
178
-
179
-
180
-
181
-
182
-
183
-
184
-
185
-
186
-
187
-
188
-
189
-
190
-
191
-
192
-
193
-
194
-
195
-
196
-
197
-
198
-
199
-
200
-
201
-
202
-
203
-
204
-
205
-
206
-
207
-
208
 |
 |