Ricoh SP C250DN Operating Instructions - Page 36
Wireless LAN Setup, Infrastructure mode - wireless setup
 |
View all Ricoh SP C250DN manuals
Add to My Manuals
Save this manual to your list of manuals |
Page 36 highlights
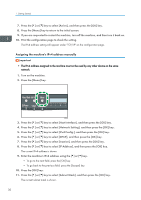
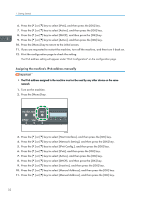
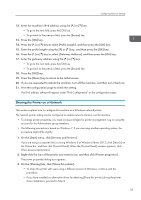
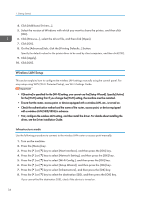
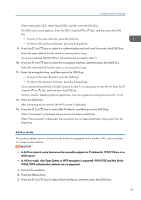
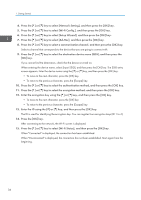
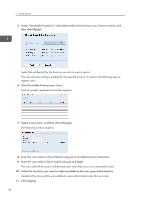
1. Getting Started 4. Click [Additional Drivers...]. 5. Select the version of Windows with which you want to share the printer, and then click [OK]. 6. Click [Browse...], select the driver file, and then click [Open]. 7. Click [OK]. 8. On the [Advanced] tab, click the [Printing Defaults...] button. Specify the default values for the printer driver to be used by client computers, and then click [OK]. 9. Click [Apply]. 10. Click [OK]. Wireless LAN Setup This section explains how to configure the wireless LAN settings manually using the control panel. For easy setup using WPS (Wi-Fi Protected Setup), see Wi-Fi Settings Guide. • If [Inactive] is specified for the [Wi-Fi] setting, you cannot use the [Setup Wizard]. Specify [Active] for the [Wi-Fi] setting first. If you change the [Wi-Fi] setting, the machine must be restarted. • Ensure that the router, access point, or device equipped with a wireless LAN, etc., is turned on. • Check the authentication method and the name of the router, access point, or device equipped with a wireless LAN (SSID/IBSS) in advance. • First, configure the wireless LAN setting, and then install the driver. For details about installing the driver, see the Driver Installation Guide. Infrastructure mode Use the following procedure to connect to the wireless LAN router or access point manually. 1. Turn on the machine. 2. Press the [Menu] key. 3. Press the [ ] or [ ] key to select [Host Interface], and then press the [OK] key. 4. Press the [ ] or [ ] key to select [Network Setting], and then press the [OK] key. 5. Press the [ ] or [ ] key to select [Wi-Fi Config.], and then press the [OK] key. 6. Press the [ ] or [ ] key to select [Setup Wizard], and then press the [OK] key. 7. Press the [ ] or [ ] key to select [Infrastructure], and then press the [OK] key. 8. Press the [ ] or [ ] key to select the destination SSID, and then press the [OK] key. If you cannot find the destination SSID, check if the device is turned on. 34
-
 1
1 -
2
-
3
-
4
-
5
-
6
-
7
-
8
-
9
-
10
-
11
-
12
-
13
-
14
-
15
-
16
-
17
-
18
-
19
-
20
-
21
-
22
-
23
-
24
-
25
-
26
-
27
-
28
-
29
-
30
-
 31
31 -
 32
32 -
 33
33 -
 34
34 -
 35
35 -
 36
36 -
 37
37 -
 38
38 -
 39
39 -
 40
40 -
 41
41 -
42
-
43
-
44
-
45
-
46
-
47
-
48
-
49
-
50
-
51
-
52
-
53
-
54
-
55
-
56
-
57
-
58
-
59
-
60
-
61
-
62
-
63
-
64
-
65
-
66
-
67
-
68
-
69
-
70
-
71
-
72
-
73
-
74
-
75
-
76
-
77
-
78
-
79
-
80
-
81
-
82
-
83
-
84
-
85
-
86
-
87
-
88
-
89
-
90
-
91
-
92
-
93
-
94
-
95
-
96
-
97
-
98
-
99
-
100
-
101
-
102
-
103
-
104
-
105
-
106
-
107
-
108
-
109
-
110
-
111
-
112
-
113
-
114
-
115
-
116
-
117
-
118
-
119
-
120
-
121
-
122
-
123
-
124
-
125
-
126
-
127
-
128
-
129
-
130
-
131
-
132
-
133
-
134
-
135
-
136
-
137
-
138
-
139
-
140
-
141
-
142
-
143
-
144
-
145
-
146
-
147
-
148
-
149
-
150
-
151
-
152
-
153
-
154
-
155
-
156
-
157
-
158
-
159
-
160
-
161
-
162
-
163
-
164
-
165
-
166
-
167
-
168
-
169
-
170
-
171
-
172
-
173
-
174
-
175
-
176
-
177
-
178
-
179
-
180
-
181
-
182
-
183
-
184
-
185
-
186
-
187
-
188
-
189
-
190
-
191
-
192
-
193
-
194
-
195
-
196
-
197
-
198
-
199
-
200
-
201
-
202
-
203
-
204
-
205
-
206
-
207
-
208
 |
 |