Samsung SCD6040 User Manual (user Manual) (English, French) - Page 105
Delayed Recording - Self Timer
 |
View all Samsung SCD6040 manuals
Add to My Manuals
Save this manual to your list of manuals |
Page 105 highlights
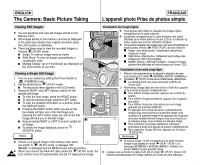
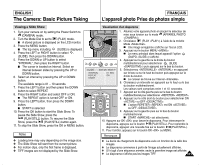
ENGLISH The Camera: Basic Picture Taking FRANÇAIS L'appareil photo Prise de photos simple Delayed Recording - Self Timer ✤ Using the remote control, delaying the shutter release (in order to take self-photography and various other camera uses) is available. 1. Turn your camera on by setting the Power Switch to (CAMERA) mode. 2. Turn the Mode Dial to set (PROGRAM), A, S, M, SCENE or (MOVIE) mode. 3. Press the MENU button. I The top menu including (SELF TIMER) is displayed. 4. Press the LEFT or RIGHT button to select (SELF TIMER), then press the DOWN button. I The available options of OFF, 2s SELF and 10s SELF are listed. 5. Select an option by pressing the DOWN or UP button, then press the OK or MENU button. I The selected option is applied and the corresponding indicator appears on the LCD monitor. I You can also set the SELF TIMER by pressing the SELF TIMER button on the Remote Control until the desired option is displayed on the LCD monitor. : Delays the shutter release by 2 seconds. : Delays the shutter release by 10 seconds. 6. Frame your subject. 7. Press the PHOTO button on the Remote Control or on the Camera to start the timer. For motion clips, press the START/STOP button on the Remote Control or on the Camera. I A beep sound will play and after the time indicated, recording starts. SELF TIMER OFF 2s SELF 10s SELF 2S Notes ✤ Do not obstruct the remote control sensor by putting obstacles between the remote control and camera. ✤ The remote control range is 4 ~ 5m (13 ~ 17 ft). ✤ The effective remote control angle is up to 30 degrees left / right from the center line. ✤ Using a tripod is recommended for delayed recording. Retardement de la prise de vue - retardateur automatique SET 2 2272 ✤ Au moyen de votre télécommande, vous pouvez retarder le déverrouillage de l'obturateur (afin de photographier automatiquement et d'utiliser diverses options supplémentaires de votre appareil). 1. Allumez votre appareil photo en plaçant le sélecteur de mise sous tension sur le mode (CAMERA ). 2. Choisissez le mode (PROGRAM ), A, S, M, SCENE ou (MOVIE ) à l'aide de Mode Dial . 3. Appuyez sur le bouton MENU. I Le menu principal dans lequel apparaît l'option (SELF TIMER) s'affiche. 4. Appuyez sur la gauche ou la droite du bouton multidirectionnel pour sélectionner (SELF TIMER ) puis appuyez sur le bas du bouton. I Les options disponibles OFF , 2s SELF et 10s SELF apparaissent sous forme de liste. 5. Sélectionnez une option à l'aide du bouton multidirectionnel puis appuyez sur le bouton OK ou MENU. I L'option sélectionnée s'applique et l'indicateur correspondant s'affiche sur l'écran LCD. I Vous pouvez aussi sélectionner SELF TIMER en appuyant sur le bouton SELF TIMER de la télécommande jusqu'à ce que l'option souhaitée apparaisse sur l'écran LCD. : Retarde le déverrouillage de l'obturateur de 2 secondes. : Retarde le déverrouillage de l'obturateur de 10 secondes. 6. Cadrez votre sujet. 7. Appuyez sur le bouton PHOTO de votre télécommande ou de votre appareil pour activer le retardateur. Pour les séquences animées, appuyez sur le bouton START/STOP de votre télécommande ou de votre appareil photo. I Un signal sonore retentit et une fois le temps indiqué écoulé, l'enregistrement démarre. Remarques ✤ Ne gênez pas le capteur de votre télécommande en mettant des obstacles entre la télécommande et l'appareil photo. ✤ La portée de la télécommande est de 4 ~ 5 m. ✤ L'angle de la télécommande est efficace jusqu'à 30 degrés à droite et à g auche à partir de la ligne médiane. 105 ✤ L'utilisation d'un trépied est recommandée pour les prises de vues retardées.
-
 1
1 -
2
-
3
-
4
-
5
-
6
-
7
-
8
-
9
-
10
-
11
-
12
-
13
-
14
-
15
-
16
-
17
-
18
-
19
-
20
-
21
-
22
-
23
-
24
-
25
-
26
-
27
-
28
-
29
-
30
-
31
-
32
-
33
-
34
-
35
-
36
-
37
-
38
-
39
-
40
-
41
-
42
-
43
-
44
-
45
-
46
-
47
-
48
-
49
-
50
-
51
-
52
-
53
-
54
-
55
-
56
-
57
-
58
-
59
-
60
-
61
-
62
-
63
-
64
-
65
-
66
-
67
-
68
-
69
-
70
-
71
-
72
-
73
-
74
-
75
-
76
-
77
-
78
-
79
-
80
-
81
-
82
-
83
-
84
-
85
-
86
-
87
-
88
-
89
-
90
-
91
-
92
-
93
-
94
-
95
-
96
-
97
-
98
-
99
-
 100
100 -
 101
101 -
 102
102 -
 103
103 -
 104
104 -
 105
105 -
 106
106 -
 107
107 -
 108
108 -
 109
109 -
 110
110 -
111
-
112
-
113
-
114
-
115
-
116
-
117
-
118
-
119
-
120
-
121
-
122
-
123
-
124
-
125
-
126
-
127
-
128
-
129
-
130
-
131
-
132
-
133
-
134
-
135
-
136
-
137
-
138
-
139
-
140
-
141
-
142
-
143
-
144
-
145
-
146
-
147
-
148
-
149
-
150
-
151
-
152
-
153
-
154
-
155
-
156
-
157
-
158
-
159
-
160
-
161
-
162
-
163
-
164
-
165
-
166
-
167
 |
 |
