Samsung SCH R500 User Manual (ENGLISH) - Page 65
Add a Number or E-mail Address to an Existing Entry, Edit an Existing E-mail Address
 |
View all Samsung SCH R500 manuals
Add to My Manuals
Save this manual to your list of manuals |
Page 65 highlights
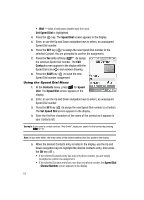
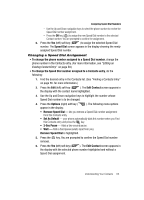
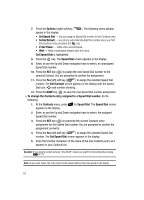
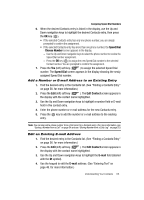
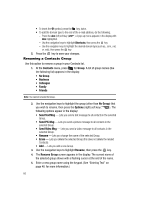
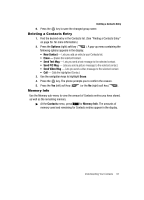
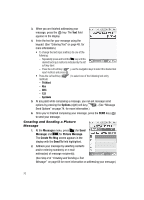
Assigning Speed Dial Numbers 6. When the desired Contacts entry is listed in the display, use the Up and Down navigation keys to highlight the desired Contacts entry, then press the OK key ( ). • If the selected Contacts entry has only one phone number, you are simply prompted to confirm the assignment. • If the selected Contacts entry has more than one phone number, the Speed Dial - Choose Number screen appears in the display. - Use the Up and Down navigation keys to select the phone number to receive the Speed Dial number assignment. - Press the OK key ( ) to assign the new Speed Dial number to the selected Contact number. You are prompted to confirm the assignment. 7. Press the Yes (left) soft key ( ) to assign the selected Speed Dial number. The Speed Dial screen appears in the display showing the newly assigned Speed Dial number. Add a Number or E-mail Address to an Existing Entry 1. Find the desired entry in the Contacts list. (See "Finding a Contacts Entry" on page 56. for more information.) 2. Press the Edit (left) soft key ( ). The Edit Contact screen appears in the display with the contact name highlighted. 3. Use the Up and Down navigation keys to highlight a number field or E-mail field in this contact entry. 4. Enter the phone number or e-mail address for the new Contacts entry. 5. Press the key to add the number or e-mail address to the existing entry. Note: You can also add a phone number from a Call record to a Contacts entry. (For more information, see "Saving a Number from a Call" on page 54 and see "Storing Number from a Calls Log" on page 55.) Edit an Existing E-mail Address 1. Find the desired entry in the Contacts list. (See "Finding a Contacts Entry" on page 56. for more information.) 2. Press the Edit (left) soft key ( ). The Edit Contact screen appears in the display with the contact name highlighted. 3. Use the Up and Down navigation keys to highlight the E-mail field (labeled with the @ symbol). 4. Use the keypad to edit the E-mail address. (See "Entering Text" on page 48. for more information.) Understanding Your Contacts 65
-
 1
1 -
2
-
3
-
4
-
5
-
6
-
7
-
8
-
9
-
10
-
11
-
12
-
13
-
14
-
15
-
16
-
17
-
18
-
19
-
20
-
21
-
22
-
23
-
24
-
25
-
26
-
27
-
28
-
29
-
30
-
31
-
32
-
33
-
34
-
35
-
36
-
37
-
38
-
39
-
40
-
41
-
42
-
43
-
44
-
45
-
46
-
47
-
48
-
49
-
50
-
51
-
52
-
53
-
54
-
55
-
56
-
57
-
58
-
59
-
 60
60 -
 61
61 -
 62
62 -
 63
63 -
 64
64 -
 65
65 -
 66
66 -
 67
67 -
 68
68 -
 69
69 -
 70
70 -
71
-
72
-
73
-
74
-
75
-
76
-
77
-
78
-
79
-
80
-
81
-
82
-
83
-
84
-
85
-
86
-
87
-
88
-
89
-
90
-
91
-
92
-
93
-
94
-
95
-
96
-
97
-
98
-
99
-
100
-
101
-
102
-
103
-
104
-
105
-
106
-
107
-
108
-
109
-
110
-
111
-
112
-
113
-
114
-
115
-
116
-
117
-
118
-
119
-
120
-
121
-
122
-
123
-
124
-
125
-
126
-
127
-
128
-
129
-
130
-
131
-
132
-
133
-
134
-
135
-
136
-
137
-
138
-
139
-
140
-
141
-
142
-
143
-
144
-
145
-
146
-
147
-
148
-
149
-
150
-
151
-
152
-
153
-
154
-
155
-
156
-
157
-
158
-
159
-
160
-
161
-
162
-
163
-
164
-
165
-
166
-
167
-
168
-
169
-
170
-
171
-
172
-
173
-
174
-
175
-
176
-
177
-
178
-
179
-
180
-
181
-
182
-
183
-
184
-
185
-
186
-
187
-
188
-
189
-
190
 |
 |