Sony SNCEP520 User Manual (SNC-ER/EP User Guide) - Page 29
Using the Trigger Button, Sending a monitor image via e-mail
 |
View all Sony SNCEP520 manuals
Add to My Manuals
Save this manual to your list of manuals |
Page 29 highlights
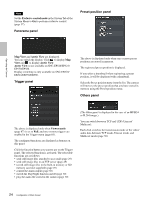
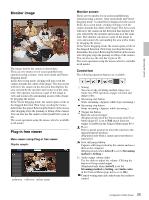
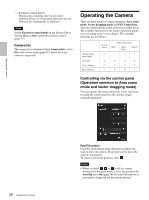
Operating the Camera Display switching is only available on SNC-ER520/ER521/ER550/ER580. (The Illustration above is a simulated screen image of the panorama image. The displays may be different from the ones that appear in actual use.) 2 Click the point you want to watch in the panorama window. The camera is moved to face toward the clicked point, and the present image at the point is displayed in the monitor window. To rotate the panorama image To rotate the panorama image in accordance with the camera's panning direction, set Panorama mode to Rotate in the System menu of the Administrator menu (page 38). (The mark on the panorama image indicates the panning home position.) Note The panorama image can be rotated only when a 360degree panorama image has been created using SNC toolbox. Using the Trigger Button You can execute various functions by clicking their respective buttons on the Trigger panel. Sending a monitor image via e-mail You can send a captured still image by attaching it to an e-mail. To use this function, you need to make e-Mail (SMTP) active and set the address in the Trigger menu of the Administrator menu properly (page 85). 1 Click e-Mail (SMTP) on the Trigger panel. The still image of the moment you click is captured, and your e-mail with the image file attached is sent to the specified mail address. Sending a monitor image to an FTP server You can send a captured still image to the FTP server. To use this function, you need to make FTP client active and set the address in the Trigger menu of the Administrator menu properly (page 86). 1 Click FTP client on the Trigger panel. The still image of the moment you click is captured, and the image file is sent to the FTP server. Recording a camera image as a still image You can record a captured still image in the built-in memory or SD memory card (not supplied). To use this function, you need to make Image memory active and set the details in the Trigger menu of the Administrator menu (page 86). 1 Click Image memory on the Trigger panel. The still image of the moment you click is captured, and the image file is recorded. 29 Using the Trigger Button
-
 1
1 -
2
-
3
-
4
-
5
-
6
-
7
-
8
-
9
-
10
-
11
-
12
-
13
-
14
-
15
-
16
-
17
-
18
-
19
-
20
-
21
-
22
-
23
-
 24
24 -
 25
25 -
 26
26 -
 27
27 -
 28
28 -
 29
29 -
 30
30 -
 31
31 -
 32
32 -
 33
33 -
 34
34 -
35
-
36
-
37
-
38
-
39
-
40
-
41
-
42
-
43
-
44
-
45
-
46
-
47
-
48
-
49
-
50
-
51
-
52
-
53
-
54
-
55
-
56
-
57
-
58
-
59
-
60
-
61
-
62
-
63
-
64
-
65
-
66
-
67
-
68
-
69
-
70
-
71
-
72
-
73
-
74
-
75
-
76
-
77
-
78
-
79
-
80
-
81
-
82
-
83
-
84
-
85
-
86
-
87
-
88
-
89
-
90
-
91
-
92
-
93
-
94
-
95
-
96
-
97
-
98
-
99
-
100
-
101
-
102
-
103
-
104
-
105
-
106
-
107
-
108
-
109
-
110
-
111
-
112
-
113
-
114
-
115
-
116
-
117
-
118
-
119
-
120
-
121
-
122
 |
 |
