Sony SNCEP520 User Manual (SNC-ER/EP User Guide) - Page 46
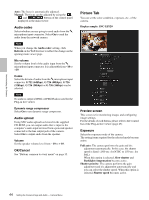
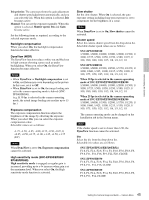
Privacy Masking tab, White balance, Brightness SNC-EP520/EP521/ER520, ER521, Saturation, Sharpness
 |
View all Sony SNCEP520 manuals
Add to My Manuals
Save this manual to your list of manuals |
Page 46 highlights
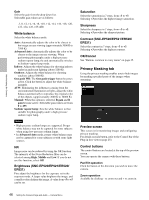
Administrating the Camera Gain Select the gain from the drop-down list. Selectable gain values are as follows: -3, 0, +2, +4, +6, +8, +10, +12, +14, +16, +18, +20, +22, +24, +26, +28 (dB) White balance Select the white balance mode. Auto: Automatically adjusts the color to be closest to the image you are viewing (approximately 3000 K to 7500 K). Advanced Auto: Automatically adjusts the color to be closest to the image you are viewing. When performing photography under a high-pressure sodium vapour lamp, the unit automatically switches to Sodium vapour lamp mode. Indoor: Adjusts the white balance for shooting indoors under incandescent lighting (about 3200 K). Outdoor: Adjusts the white balance for shooting outdoors (about 5800 K). One push WB: The One push trigger button becomes active. Click the button to adjust the white balance instantly. ATW: Eliminating the influences causing from the environmental illumination or lights, adjust the white balance automatically to reproduce the original color of the objects. (approximately 2000 K to 10000 K). Manual: When this option is selected, R gain and B gain become active. Selectable gain values are from 0 to 255. Sodium vapour lamp: Sets the white balance to that suitable for photography under a high-pressure sodium vapor lamp. Notes • High-pressure sodium lamps are supported. Proper white balance may not be captured for some subjects when using low-pressure sodium lamps. • In Advanced Auto mode, proper white balance may not be captured for some subjects or with some light sources. NR Image noise can be reduced by using the NR function. The intensity of the Noise Reduction filter can be selected among High, Middle and Low. If you do not use this function, select Off. Brightness (SNC-EP520/EP521/ER520/ ER521) Fine adjust the brightness for the exposure set in the exposure mode. A larger value brightens the image, and a smaller value darkens the image. A value from -5 to +5 can be set. Saturation Select the saturation in 7 steps, from -3 to +3. Selecting +3 provides the highest image saturation. Sharpness Select the sharpness in 7 steps, from -3 to +3. Selecting +3 provides the sharpest picture. Contrast (SNC-EP520/EP521/ER520/ ER521) Select the contrast in 7 steps, from -3 to +3. Selecting +3 provides the highest contrast. OK/Cancel See "Buttons common to every menu" on page 35. Privacy Masking tab Using the privacy masking enables you to hide images by masking specified parts of the images when streaming. Preview screen This screen is for monitoring images and configuring privacy masking. For details on each button, refer to the Control bar of the Plug-in free viewer (page 25). Control buttons The control buttons are located at the top of the preview screen. You can operate the camera with these buttons. Pan/Tilt operation Click the button of the direction you wish to move the camera. Zoom operation Available by clicking - to zoom out and + to zoom in. 46 Setting the Camera Image and Audio - Camera Menu
-
 1
1 -
2
-
3
-
4
-
5
-
6
-
7
-
8
-
9
-
10
-
11
-
12
-
13
-
14
-
15
-
16
-
17
-
18
-
19
-
20
-
21
-
22
-
23
-
24
-
25
-
26
-
27
-
28
-
29
-
30
-
31
-
32
-
33
-
34
-
35
-
36
-
37
-
38
-
39
-
40
-
 41
41 -
 42
42 -
 43
43 -
 44
44 -
 45
45 -
 46
46 -
 47
47 -
 48
48 -
 49
49 -
 50
50 -
 51
51 -
52
-
53
-
54
-
55
-
56
-
57
-
58
-
59
-
60
-
61
-
62
-
63
-
64
-
65
-
66
-
67
-
68
-
69
-
70
-
71
-
72
-
73
-
74
-
75
-
76
-
77
-
78
-
79
-
80
-
81
-
82
-
83
-
84
-
85
-
86
-
87
-
88
-
89
-
90
-
91
-
92
-
93
-
94
-
95
-
96
-
97
-
98
-
99
-
100
-
101
-
102
-
103
-
104
-
105
-
106
-
107
-
108
-
109
-
110
-
111
-
112
-
113
-
114
-
115
-
116
-
117
-
118
-
119
-
120
-
121
-
122
 |
 |
