Brother International MFC 8500 Service Manual - Page 24
Setting Id Codes To Facsimile Machines - illustration
 |
UPC - 012502603832
View all Brother International MFC 8500 manuals
Add to My Manuals
Save this manual to your list of manuals |
Page 24 highlights
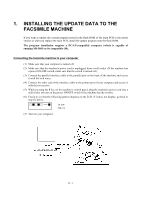
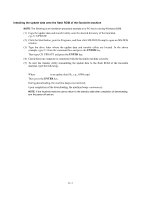
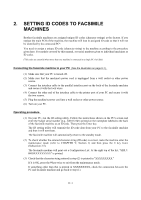
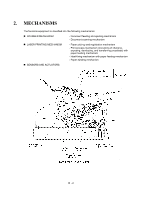
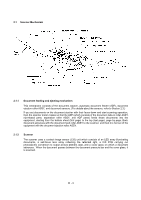
2. SETTING ID CODES TO FACSIMILE MACHINES Brother facsimile machines are assigned unique ID codes (character strings) at the factory. If you replace the main PCB of the machine, the machine will lose its assigned ID code so that it will not be identified by the connected PC*. You need to assign a unique ID code (character string) to the machine according to the procedure given here. For models covered by this manual, set serial numbers given to individual machines as ID codes. (*ID codes are essential when more than one machine is connected to a single PC via USB.) Connecting the facsimile machine to your PC (See the illustration on page II-1.) (1) Make sure that your PC is turned off. (2) Make sure that the machine's power cord is unplugged from a wall socket or other power source. (3) Connect the interface cable to the parallel interface port on the back of the facsimile machine and secure it with the lock wires. (4) Connect the other end of the interface cable to the printer port of your PC and secure it with the two screws. (5) Plug the machine's power cord into a wall socket or other power source. (6) Turn on your PC. Operating procedure (1) On your PC, run the ID setting utility. Follow the instructions shown on the PC's screen and enter the 9-digit serial number (e.g., G01012345) printed on the nameplate labeled to the back of the facsimile machine as an ID code. Then press the Enter key. The ID setting utility will transmit the ID code data from your PC to the facsimile machine and then it will terminate. The facsimile machine will automatically return to the standby mode. (2) To check whether the entered character string (ID code) is correct, make the machine enter the maintenance mode (refer to CHAPTER V, Section 1) and then press the 1 key twice (Subsection 3.5). The facsimile machine will print out a Configuration List. At the right top of the list, "SER.#: BROXXXXXXXXX" is printed. (3) Check that the character string entered in step (2) is printed in "XXXXXXXXX." If it is OK, press the 9 key twice to exit from the maintenance mode. If something other than that is printed in XXXXXXXXX, check the connection between the PC and facsimile machine and go back to step (1). II-3
-
 1
1 -
2
-
3
-
4
-
5
-
6
-
7
-
8
-
9
-
10
-
11
-
12
-
13
-
14
-
15
-
16
-
17
-
18
-
 19
19 -
 20
20 -
 21
21 -
 22
22 -
 23
23 -
 24
24 -
 25
25 -
 26
26 -
 27
27 -
 28
28 -
 29
29 -
30
-
31
-
32
-
33
-
34
-
35
-
36
-
37
-
38
-
39
-
40
-
41
-
42
-
43
-
44
-
45
-
46
-
47
-
48
-
49
-
50
-
51
-
52
-
53
-
54
-
55
-
56
-
57
-
58
-
59
-
60
-
61
-
62
-
63
-
64
-
65
-
66
-
67
-
68
-
69
-
70
-
71
-
72
-
73
-
74
-
75
-
76
-
77
-
78
-
79
-
80
-
81
-
82
-
83
-
84
-
85
-
86
-
87
-
88
-
89
-
90
-
91
-
92
-
93
-
94
-
95
-
96
-
97
-
98
-
99
-
100
-
101
-
102
-
103
-
104
-
105
-
106
-
107
-
108
-
109
-
110
-
111
-
112
-
113
-
114
-
115
-
116
-
117
-
118
-
119
-
120
-
121
-
122
-
123
-
124
-
125
-
126
-
127
-
128
-
129
-
130
-
131
-
132
-
133
-
134
-
135
-
136
-
137
-
138
-
139
-
140
-
141
-
142
-
143
-
144
-
145
-
146
-
147
-
148
-
149
-
150
-
151
-
152
-
153
-
154
-
155
-
156
-
157
-
158
-
159
-
160
-
161
-
162
-
163
-
164
-
165
-
166
-
167
-
168
-
169
-
170
-
171
-
172
-
173
-
174
-
175
-
176
-
177
-
178
-
179
-
180
-
181
-
182
-
183
-
184
-
185
-
186
-
187
-
188
-
189
-
190
-
191
-
192
-
193
-
194
-
195
-
196
-
197
-
198
-
199
-
200
-
201
-
202
-
203
-
204
-
205
-
206
-
207
-
208
-
209
-
210
-
211
-
212
-
213
-
214
-
215
-
216
-
217
-
218
-
219
-
220
-
221
-
222
-
223
-
224
-
225
-
226
-
227
-
228
-
229
-
230
-
231
-
232
-
233
-
234
-
235
-
236
-
237
-
238
-
239
 |
 |