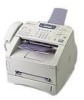
Brother International MFC 8500 Service Manual - Page 73
[Disassembling the heat-fixing unit]
 |
UPC - 012502603832
View all Brother International MFC 8500 manuals
Add to My Manuals
Save this manual to your list of manuals |
Page 73 highlights
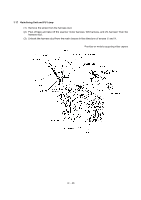
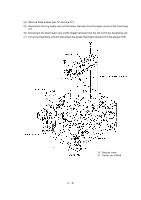
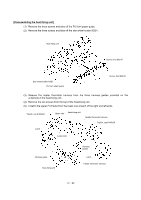
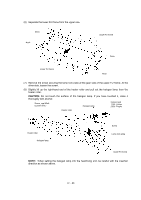
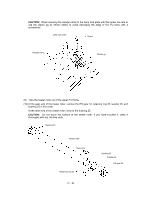
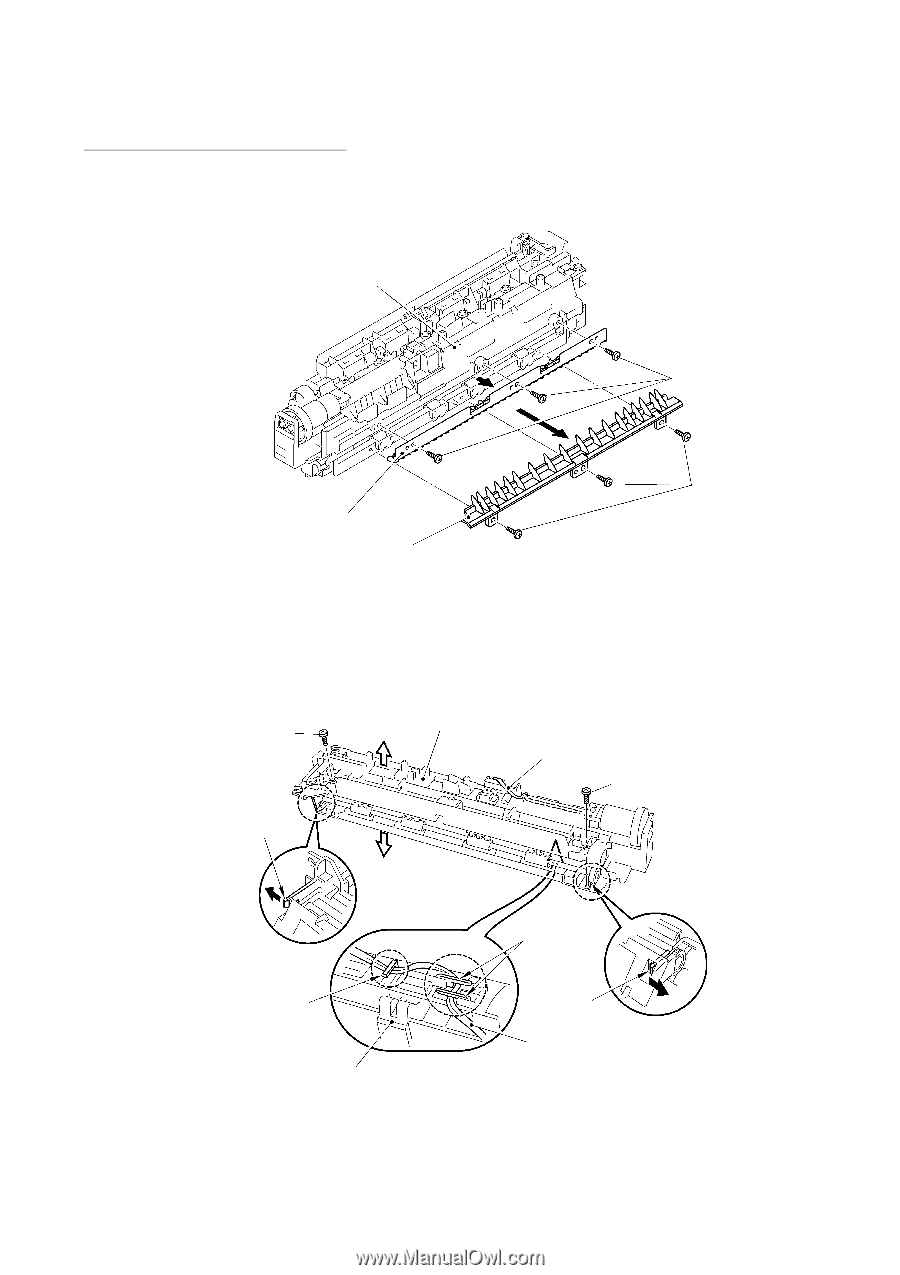
[Disassembling the heat-fixing unit] (1) Remove the three screws and take off the FU front paper guide. (2) Remove the three screws and take off the star wheel holder ASSY. Heat-fixing unit Screw, bind M3x10 Star wheel holder ASSY FU front paper guide Screw, bind M3x10 (3) Release the heater thermistor harness from the three harness guides provided on the underside of the heat-fixing unit. (4) Remove the two screws from the top of the heat-fixing unit. (5) Unlatch the upper FU frame from the lower one at each of the right and left ends. Taptite, cup B M3x20 Upper side Heat-fixing unit Heater thermistor harness Taptite, cup B M3x20 Latch Lower side Harness guide Heat-fixing unit Harness guides Latch Heater thermistor harness IV - 32
-
 1
1 -
2
-
3
-
4
-
5
-
6
-
7
-
8
-
9
-
10
-
11
-
12
-
13
-
14
-
15
-
16
-
17
-
18
-
19
-
20
-
21
-
22
-
23
-
24
-
25
-
26
-
27
-
28
-
29
-
30
-
31
-
32
-
33
-
34
-
35
-
36
-
37
-
38
-
39
-
40
-
41
-
42
-
43
-
44
-
45
-
46
-
47
-
48
-
49
-
50
-
51
-
52
-
53
-
54
-
55
-
56
-
57
-
58
-
59
-
60
-
61
-
62
-
63
-
64
-
65
-
66
-
67
-
 68
68 -
 69
69 -
 70
70 -
 71
71 -
 72
72 -
 73
73 -
 74
74 -
 75
75 -
 76
76 -
 77
77 -
 78
78 -
79
-
80
-
81
-
82
-
83
-
84
-
85
-
86
-
87
-
88
-
89
-
90
-
91
-
92
-
93
-
94
-
95
-
96
-
97
-
98
-
99
-
100
-
101
-
102
-
103
-
104
-
105
-
106
-
107
-
108
-
109
-
110
-
111
-
112
-
113
-
114
-
115
-
116
-
117
-
118
-
119
-
120
-
121
-
122
-
123
-
124
-
125
-
126
-
127
-
128
-
129
-
130
-
131
-
132
-
133
-
134
-
135
-
136
-
137
-
138
-
139
-
140
-
141
-
142
-
143
-
144
-
145
-
146
-
147
-
148
-
149
-
150
-
151
-
152
-
153
-
154
-
155
-
156
-
157
-
158
-
159
-
160
-
161
-
162
-
163
-
164
-
165
-
166
-
167
-
168
-
169
-
170
-
171
-
172
-
173
-
174
-
175
-
176
-
177
-
178
-
179
-
180
-
181
-
182
-
183
-
184
-
185
-
186
-
187
-
188
-
189
-
190
-
191
-
192
-
193
-
194
-
195
-
196
-
197
-
198
-
199
-
200
-
201
-
202
-
203
-
204
-
205
-
206
-
207
-
208
-
209
-
210
-
211
-
212
-
213
-
214
-
215
-
216
-
217
-
218
-
219
-
220
-
221
-
222
-
223
-
224
-
225
-
226
-
227
-
228
-
229
-
230
-
231
-
232
-
233
-
234
-
235
-
236
-
237
-
238
-
239
 |
 |
IV
- 32
[Disassembling the heat-fixing unit]
(1)
Remove the three screws and take off the FU front paper guide.
(2)
Remove the three screws and take off the star wheel holder ASSY.
(3)
Release the heater thermistor harness from the three harness guides provided on the
underside of the heat-fixing unit.
(4)
Remove the two screws from the top of the heat-fixing unit.
(5)
Unlatch the upper FU frame from the lower one at each of the right and left ends.
Heat-fixing unit
Screw, bind M3x10
FU front paper guide
Star wheel holder ASSY
Screw, bind M3x10
Taptite, cup B M3x20
Heater thermistor harness
Heat-fixing unit
Taptite, cup B M3x20
Latch
Upper side
Lower side
Harness
guides
Harness guide
Latch
Heat-fixing unit
Heater thermistor harness