Cisco 7921G Phone Guide - Page 78
Controlling Line Settings on the Web
 |
UPC - 882658123108
View all Cisco 7921G manuals
Add to My Manuals
Save this manual to your list of manuals |
Page 78 highlights
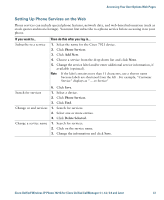
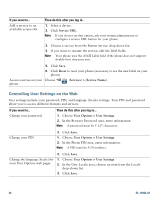
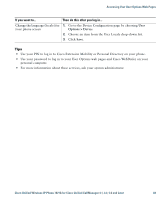
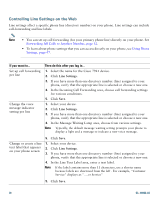
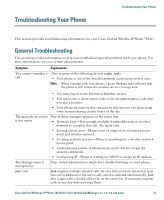
Controlling Line Settings on the Web Line settings affect a specific phone line (directory number) on your phone. Line settings can include call-forwarding and line labels. Note • You can set up call forwarding (for your primary phone line) directly on your phone. See Forwarding All Calls to Another Number, page 32. • To learn about phone settings that you can access directly on your phone, see Using Phone Settings, page 47. If you want to... Set up call forwarding per line Change the voice message indicator setting per line Then do this after you log in... 1. Select the name for the Cisco 7921 device. 2. Click Line Settings. 3. If you have more than one directory number (line) assigned to your phone, verify that the appropriate line is selected or choose a new one. 4. In the Incoming Call Forwarding area, choose call forwarding settings for various conditions. 5. Click Save. 1. Select your device. 2. Click Line Settings. 3. If you have more than one directory number (line) assigned to your phone, verify that the appropriate line is selected or choose a new one. 4. In the Message Waiting Lamp area, choose from various settings. Note Typically, the default message waiting setting prompts your phone to display a light and a message to indicate a new voice message. 5. Click Save. Change or create a line text label that appears on your phone screen 1. Select your device. 2. Click Line Settings. 3. If you have more than one directory number (line) assigned to your phone, verify that the appropriate line is selected or choose a new one. 4. In the Line Text Label area, enter a text label. Note If the label contains more than 11 characters, use a shorter name because labels are shortened from the left . For example, "Customer Service" displays as ".....er Service" 5. Click Save. 70 OL-10806-02
-
 1
1 -
2
-
3
-
4
-
5
-
6
-
7
-
8
-
9
-
10
-
11
-
12
-
13
-
14
-
15
-
16
-
17
-
18
-
19
-
20
-
21
-
22
-
23
-
24
-
25
-
26
-
27
-
28
-
29
-
30
-
31
-
32
-
33
-
34
-
35
-
36
-
37
-
38
-
39
-
40
-
41
-
42
-
43
-
44
-
45
-
46
-
47
-
48
-
49
-
50
-
51
-
52
-
53
-
54
-
55
-
56
-
57
-
58
-
59
-
60
-
61
-
62
-
63
-
64
-
65
-
66
-
67
-
68
-
69
-
70
-
71
-
72
-
 73
73 -
 74
74 -
 75
75 -
 76
76 -
 77
77 -
 78
78 -
 79
79 -
 80
80 -
 81
81 -
 82
82 -
 83
83 -
84
-
85
-
86
-
87
-
88
-
89
-
90
-
91
-
92
-
93
-
94
-
95
-
96
 |
 |
