Epson ActionLaser User Manual - Page 28
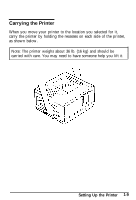
charger, aside for, Setting Up the Printer, fraction of an inch into the slot to reach
 |
View all Epson ActionLaser manuals
Add to My Manuals
Save this manual to your list of manuals |
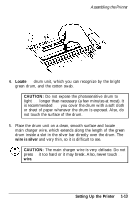
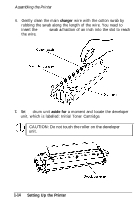
Page 28 highlights
Assembling the Printer 6. Gently clean the main charger wire with the cotton swab by rubbing the swab along the length of the wire. You need to insert the cotton swab a fraction of an inch into the slot to reach the wire. 7. Set the drum unit aside for a moment and locate the developer unit, which is labelled: Initial Toner Cartridge. CAUTION: Do not touch the roller on the developer unit. 1-14 Setting Up the Printer
-
 1
1 -
2
-
3
-
4
-
5
-
6
-
7
-
8
-
9
-
10
-
11
-
12
-
13
-
14
-
15
-
16
-
17
-
18
-
19
-
20
-
21
-
22
-
 23
23 -
 24
24 -
 25
25 -
 26
26 -
 27
27 -
 28
28 -
 29
29 -
 30
30 -
 31
31 -
 32
32 -
 33
33 -
34
-
35
-
36
-
37
-
38
-
39
-
40
-
41
-
42
-
43
-
44
-
45
-
46
-
47
-
48
-
49
-
50
-
51
-
52
-
53
-
54
-
55
-
56
-
57
-
58
-
59
-
60
-
61
-
62
-
63
-
64
-
65
-
66
-
67
-
68
-
69
-
70
-
71
-
72
-
73
-
74
-
75
-
76
-
77
-
78
-
79
-
80
-
81
-
82
-
83
-
84
-
85
-
86
-
87
-
88
-
89
-
90
-
91
-
92
-
93
-
94
-
95
-
96
-
97
-
98
-
99
-
100
-
101
-
102
-
103
-
104
-
105
-
106
-
107
-
108
-
109
-
110
-
111
-
112
-
113
-
114
-
115
-
116
-
117
-
118
-
119
-
120
-
121
-
122
-
123
-
124
-
125
-
126
-
127
-
128
-
129
-
130
-
131
-
132
-
133
-
134
-
135
-
136
-
137
-
138
-
139
-
140
-
141
-
142
-
143
-
144
-
145
-
146
-
147
-
148
-
149
-
150
-
151
-
152
-
153
-
154
-
155
-
156
-
157
-
158
-
159
-
160
-
161
-
162
-
163
-
164
-
165
-
166
-
167
-
168
-
169
-
170
-
171
-
172
-
173
-
174
-
175
-
176
-
177
-
178
-
179
-
180
-
181
-
182
-
183
-
184
-
185
-
186
-
187
-
188
-
189
-
190
-
191
-
192
-
193
-
194
-
195
-
196
-
197
-
198
-
199
-
200
-
201
-
202
-
203
-
204
-
205
-
206
-
207
-
208
-
209
-
210
-
211
-
212
-
213
-
214
-
215
-
216
-
217
-
218
-
219
 |
 |
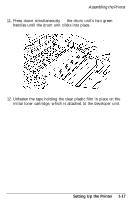
Assembling the Printer
6.
Gently clean the main
charger
wire with the cotton swab by
rubbing the swab along the length of the wire. You need to
insert the
cotton
swab
a
fraction of an inch into the slot to reach
the wire.
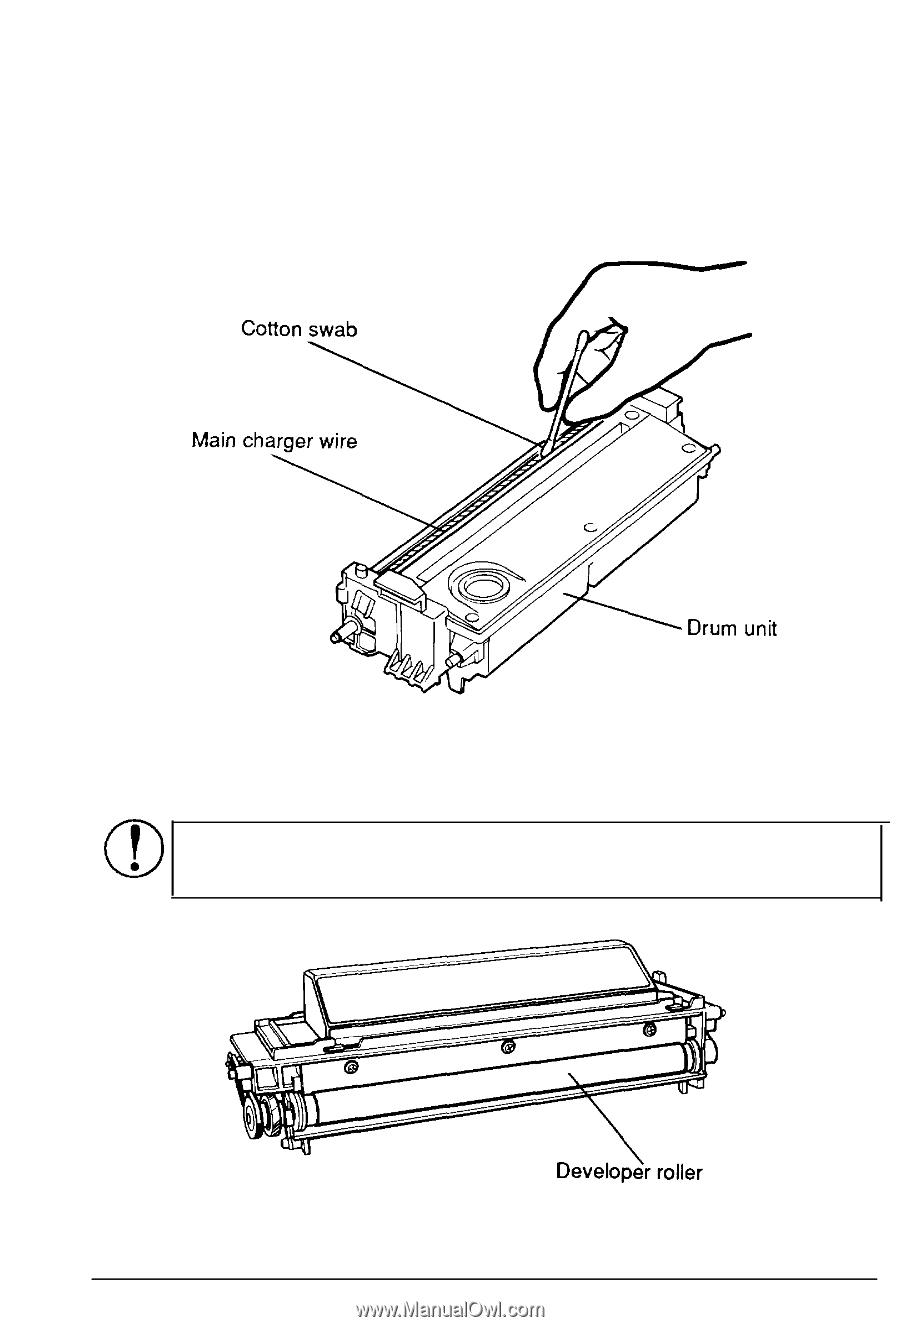
7.
Set
the
drum unit
aside for
a moment and locate the developer
unit, which is labelled: Initial Toner Cartridge.
CAUTION: Do not touch the roller on the developer
unit.
1-14
Setting Up the Printer