Epson ActionLaser User Manual - Page 44
Adjusting print density, Testing the Printer, at the same time.
 |
View all Epson ActionLaser manuals
Add to My Manuals
Save this manual to your list of manuals |
Page 44 highlights
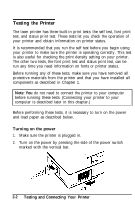
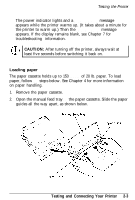
Testing the Printer 4. When you release the buttons, SELF TEST appears on the display and the printer prints a self test. Notes: l It is important to press the buttons at the same time. l For more information on using the control panel, see Chapter 3. Part of the character pattern is shown below. Look at your printout to determine whether the print is too light or too dark. If you need to change the print density, see the following section on adjusting print density. Adjusting print density If the self test you printed is too light or too dark, adjust the print density as follows: 1. Open the printer cover by lifting up on the latch. 2-6 Testing and Connecting Your Printer
-
 1
1 -
2
-
3
-
4
-
5
-
6
-
7
-
8
-
9
-
10
-
11
-
12
-
13
-
14
-
15
-
16
-
17
-
18
-
19
-
20
-
21
-
22
-
23
-
24
-
25
-
26
-
27
-
28
-
29
-
30
-
31
-
32
-
33
-
34
-
35
-
36
-
37
-
38
-
 39
39 -
 40
40 -
 41
41 -
 42
42 -
 43
43 -
 44
44 -
 45
45 -
 46
46 -
 47
47 -
 48
48 -
 49
49 -
50
-
51
-
52
-
53
-
54
-
55
-
56
-
57
-
58
-
59
-
60
-
61
-
62
-
63
-
64
-
65
-
66
-
67
-
68
-
69
-
70
-
71
-
72
-
73
-
74
-
75
-
76
-
77
-
78
-
79
-
80
-
81
-
82
-
83
-
84
-
85
-
86
-
87
-
88
-
89
-
90
-
91
-
92
-
93
-
94
-
95
-
96
-
97
-
98
-
99
-
100
-
101
-
102
-
103
-
104
-
105
-
106
-
107
-
108
-
109
-
110
-
111
-
112
-
113
-
114
-
115
-
116
-
117
-
118
-
119
-
120
-
121
-
122
-
123
-
124
-
125
-
126
-
127
-
128
-
129
-
130
-
131
-
132
-
133
-
134
-
135
-
136
-
137
-
138
-
139
-
140
-
141
-
142
-
143
-
144
-
145
-
146
-
147
-
148
-
149
-
150
-
151
-
152
-
153
-
154
-
155
-
156
-
157
-
158
-
159
-
160
-
161
-
162
-
163
-
164
-
165
-
166
-
167
-
168
-
169
-
170
-
171
-
172
-
173
-
174
-
175
-
176
-
177
-
178
-
179
-
180
-
181
-
182
-
183
-
184
-
185
-
186
-
187
-
188
-
189
-
190
-
191
-
192
-
193
-
194
-
195
-
196
-
197
-
198
-
199
-
200
-
201
-
202
-
203
-
204
-
205
-
206
-
207
-
208
-
209
-
210
-
211
-
212
-
213
-
214
-
215
-
216
-
217
-
218
-
219
 |
 |

Testing the Printer
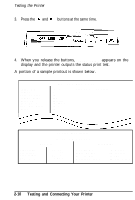
4.
When you release the buttons,
SELF TEST
appears on the
display and the printer prints a self test.
Notes:
l
It is important to press the buttons
at the same time.
l
For more information on using the control panel, see
Chapter 3.
Part of the character pattern is shown below. Look at your printout
to determine whether the print is too light or too dark. If you need
to change
the
print density, see the following section
on
adjusting
print density.
Adjusting print density
If the self test you printed is too light or too dark, adjust the print
density as follows:
1.
Open the printer cover by lifting up on the latch.
2-6
Testing and Connecting Your Printer