Epson ActionLaser User Manual - Page 48
appears on the, display and the printer outputs the status print test.
 |
View all Epson ActionLaser manuals
Add to My Manuals
Save this manual to your list of manuals |
Page 48 highlights
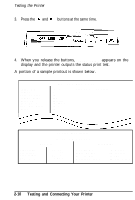
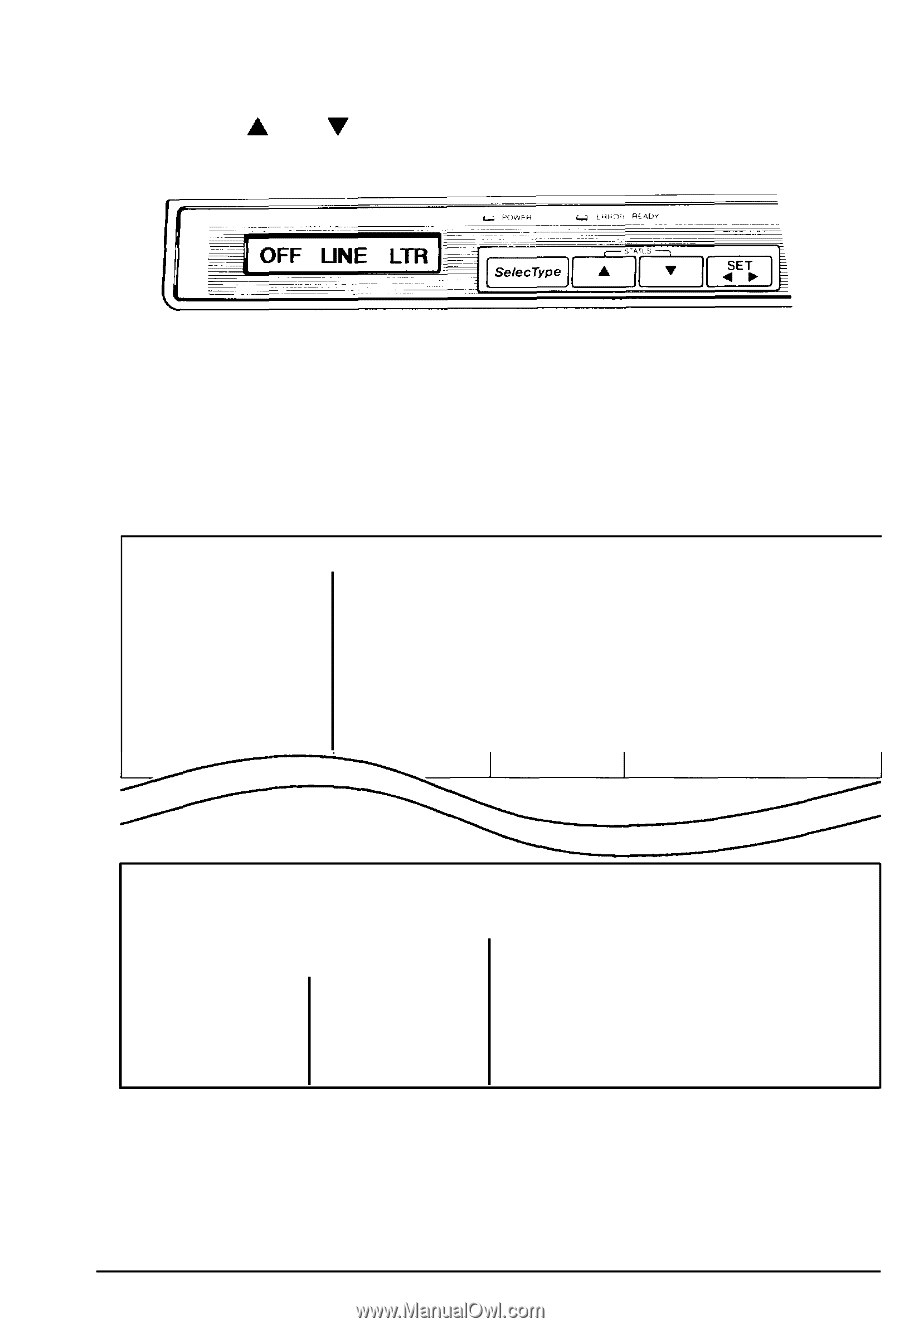
Testing the Printer 3. Press the and buttons at the same time. 4. When you release the buttons, STATUS PRINT appears on the display and the printer outputs the status print test. A portion of a sample printout is shown below. Paper Size Copies Auto Continue Status print Power-ON Data Buffer Over Run Buffer Buzzer Function & Menu Status Letter 1 ON OFF ON-LINE 2K Bytes 10 % ON Interface Parallel Current Page Format Letter 8.5 x 11 inch Vertical Horizontal Page Length Top Margin Text Length Current LPI 66 Lines 3 Lines 60 Lines 6 LPI Left Margin Right Margin Current CPI Printable Chara 0 Columns 80 Columns 10 CPI 80 Characters 2-10 Testing and Connecting Your Printer
-
 1
1 -
2
-
3
-
4
-
5
-
6
-
7
-
8
-
9
-
10
-
11
-
12
-
13
-
14
-
15
-
16
-
17
-
18
-
19
-
20
-
21
-
22
-
23
-
24
-
25
-
26
-
27
-
28
-
29
-
30
-
31
-
32
-
33
-
34
-
35
-
36
-
37
-
38
-
39
-
40
-
41
-
42
-
 43
43 -
 44
44 -
 45
45 -
 46
46 -
 47
47 -
 48
48 -
 49
49 -
 50
50 -
 51
51 -
 52
52 -
 53
53 -
54
-
55
-
56
-
57
-
58
-
59
-
60
-
61
-
62
-
63
-
64
-
65
-
66
-
67
-
68
-
69
-
70
-
71
-
72
-
73
-
74
-
75
-
76
-
77
-
78
-
79
-
80
-
81
-
82
-
83
-
84
-
85
-
86
-
87
-
88
-
89
-
90
-
91
-
92
-
93
-
94
-
95
-
96
-
97
-
98
-
99
-
100
-
101
-
102
-
103
-
104
-
105
-
106
-
107
-
108
-
109
-
110
-
111
-
112
-
113
-
114
-
115
-
116
-
117
-
118
-
119
-
120
-
121
-
122
-
123
-
124
-
125
-
126
-
127
-
128
-
129
-
130
-
131
-
132
-
133
-
134
-
135
-
136
-
137
-
138
-
139
-
140
-
141
-
142
-
143
-
144
-
145
-
146
-
147
-
148
-
149
-
150
-
151
-
152
-
153
-
154
-
155
-
156
-
157
-
158
-
159
-
160
-
161
-
162
-
163
-
164
-
165
-
166
-
167
-
168
-
169
-
170
-
171
-
172
-
173
-
174
-
175
-
176
-
177
-
178
-
179
-
180
-
181
-
182
-
183
-
184
-
185
-
186
-
187
-
188
-
189
-
190
-
191
-
192
-
193
-
194
-
195
-
196
-
197
-
198
-
199
-
200
-
201
-
202
-
203
-
204
-
205
-
206
-
207
-
208
-
209
-
210
-
211
-
212
-
213
-
214
-
215
-
216
-
217
-
218
-
219
 |
 |
Testing the Printer
3.
Press the
and
buttons at the same time.
4.
When you release the buttons,
STATUS PRINT
appears on the
display and the printer outputs the status print test.
A portion of a sample printout is shown below.
Function & Menu Status
Paper Size
Copies
Auto Continue
Status print
Power-ON
Data Buffer
Over Run Buffer
Buzzer
Letter
1
ON
OFF
ON-LINE
2K Bytes
10 %
ON
Interface
Parallel
Current Page Format
Letter
8.5 x 11 inch
Vertical
Horizontal
Page Length
66 Lines
Left Margin
0 Columns
Top Margin
3 Lines
Right Margin
80 Columns
Text Length
60 Lines
Current CPI
10 CPI
Current LPI
6 LPI
Printable Chara
80 Characters
2-10
Testing and Connecting Your Printer